Friday, February 3, 2012

One Of A Kind


Card Positioning Systems is celebrating their 5th Anniversary by releasing a sketch a day for 15 days.  I'm playing catch up but it has been great to get the coloured stamps out of plastic baggies and onto cards :o)

This card is my interpretation of the day three sketch.  
The adorable little pup is a Mo Manning digital stamp called Pug Love.  You'll see this pretty puppy appear in several cards, not just because it's so cute, but because I coloured four of them at the same time!  Once again this has been coloured with Prismacolor Pencils, I love, love, love working with them at the moment.  I used baby oil as the blending medium.

Also entering into the Simon Says Stamp Challenge this week, the theme of which is Animal Antics.

Thursday, February 2, 2012

Hang In There

Hang In There

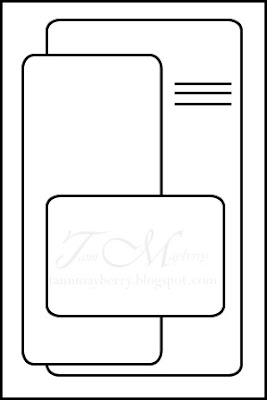
Card Positioning Systems is celebrating their 5th Anniversary by releasing a sketch a day for 15 days.  

This card is my interpretation of the day two sketch. 


The base is Kraft, it's my current favourite.  The designer paper is called Dragonflies from the Pink Paisley Butterfly Garden collection.  I've inked the edge of the doily with Antique Linen Distress Ink and finished with a natural raffia bow.

The stamp features Toby Tumble by Pachela Studios called "Just Saying Hi".  He's the cutest little bunny there ever was!  I've coloured him with Prismacolor pencils, and used a paper stump with baby oil as the medium for the blending.  The sentiment inside reads "Hang In There".

Also entering into the Simon Says Stamp Challenge this week, the theme of which is Animal Antics.

Love Defined

Love Defined


Card Positioning Systems is celebrating their 5th Anniversary by releasing a sketch a day for 15 days. I've got a list of cards I would like to have made and ready to post for when the occasion arises, such as a sympathy card, a get well card, a few generic greeting cards, as well as getting a head start on  some holiday cards, and this is just the motivation I need to get going.

This card is my interpretation of the day one sketch.  The card was challenging for me because I think it is the very first I have made without a coloured image on the front, so it felt a little naked and I wasn't really sure when to stop fiddling!


The designer papers are by Kaisercraft, one is called Script and the other is called Newsprint, both are from the Timeless collection.  I've used a Fiskars edge punch for the heart borders, Kraft card for the base and framing mats, and Frayed Burlap Distress Ink on all the edges.

The little postage stamp in the top corner says "Love has nothing to do with what you are expecting to get, it's what you are expected to give - which is everything".


Wednesday, February 1, 2012

Snowman Tin

Snowman Tin

Materials:
Warm Winter Wishes digi by Paper Pretties
paper doilies
ribbon
silver glitter
orange gel pen
Copic markers


Snowman Tin


It's time for the February challenge at Christmas Crafting, and this month the lovely Sara who has chosen a colour challenge: Blue, White and Silver.

The cute little digi can be found at Paper Pretties, if you haven't visited their store before they have some wonderful stamps to work with.


Snowman Tin


I enjoyed working with the image so much I made a second project, a Christmas card.  A white card base, with alternating layers of blue and white.  The central ornament cut with a Big Shot die, using plain card covered in silver foil.


Snowman Bauble Card

Tuesday, January 31, 2012

Pug Love Valentines Card


Materials:
Kraft card
dark brown Bazzil card
"You and Me" Sweet Nothings Collection by Kaisercraft
Pug Love digi by Mo Manning
Donna Salazar's Rose Creations die by Spellbinders
Prismacolor pencils
baby oil
paper stump
scissors, adhesives, etc

I just adore my dogs.  You've seen in movies the way that wealthy women pamper their poodles and pugs, well I'm not quite that bad, not quite.  Mostly I think because they are Mastiffs and at eight months old (giant puppies) they are 80lbs, so they are way too big to pick up and carry around with me, but I think if I could I probably would!

This cute little digi by Mo Manning called Pug Love is a pretty close representation of what my dogs looked like as wee little pups.  I've used Prismacolor pencils, but instead of using an odorless solvent to blend I experimented with baby oil to see which I prefer.  Still undecided on that.

This card is using the layout at Mojo Monday this week, a nice simple one but that suited me as this card is intended for a man for Valentines Day and you know what they think of all things frilly and frou frou.


I'm also entering into Mo's Challenge Blog as the theme this week is "My Favourite Things" and this card includes my favourite colours (creams and browns), my favourite animals (my puppies) and it's for my favourite man (my partner).

Thursday, January 26, 2012

Teddy Bo Milk Cartons

Teddy Bo & Bea Cartons

Materials:
Kraft card
Newsprint by Kaisercraft
Frayed Burlap Distress Ink
Teddybobea_Tabs_002 digi aka "Three Little Piggies"
Prismacolor pencils
novelty bulldog clips

I had been wanting to have a go at making these adorable little milk cartons for a while now, and receiving my Teddy Bo digi was the push I needed to get me started.  The digi comes with three panels, which are perfect for the side of the cartons.

Teddy Bo Carton

I've coloured the little bears with Prismacolors, I am finding them harder and harder to put down.  They seem much more forgiving than the Copics, although my thumb was complaining quite a lot after colouring these three.

Teddy Bea Carton

The cartons themselves are made from Kraft card, I used a template I found online as a guide and adjusted the measurements to suit myself.  Each panel of the carton is 2 3/4 inches wide by 4 1/2 inches high.

Teddy Bo & Teddy Bea Carton

The background paper is by Kaisercraft.  It is the reverse side of a paper called Newsprint, and it has cute dictionary sayings.  Everything has been inked with Frayed Burlap Distress Ink.


I originally planned to give these as Valentine's Day gifts, but I might end up filling them with Easter eggs instead.  These were so quick and fun to do!

Challenges:
Teddy Bo Challenge:  Anything Goes
Make It Monday:  Always Anything Goes #73
Simon Says Stamp:  Anything Goes

Thursday, January 19, 2012

A Very Special Gift

Last year when I hurt my thumb I went into a kind of hibernation.  My life was so drastically affected by such a small thing, I can't even begin to imagine how people who suffer major, life altering disabilities cope.  I was only out of action for 10 weeks, and I knew at the end I'd be back to normal, I am so grateful that it was a minor injury and not something permanently debilitating.

During that 10 weeks I missed 3 Christmas Crafting assignments, and a Christmas Card swap.  The ladies on the design team got together and swapped cards, but I wasn't able to participate.  That didn't stop them from including me and they arrived this week from the UK.

I love getting packages, and I opened this one eagerly.  I have never received a hand made card and I was excited to see the work from the talented gals on the design team.


Arline's Card

Arline, our incredible co-ordinator at Christmas Crafting!, made this beautiful white on white card featuring the Snowman by Raymond Briggs.  The sparkle on this card is just beautiful, both on the background and as an accent around the centrepiece and sentiment.  You can visit Arline's blog Arline's Allsorts to see more of her beautiful work.

Arline's Card (Senior)

Arline (Senior) created this wonderful and warm card.  The metallic accents sparkle and the digi of the two little bugs warming by the fire is adorable.  You can visit Arline's blog Arline's Arty Attic to see more of her cute creations.

Meg's Card

Meg made this stunning aqua and white card featuring James the Bear by Lilly Of The Valley.  Lots of layers and textures make this card a visual treat, and the detail is incredible.  You can visit her blog Bit's and Pieces to see more of her work.

Debbie's Card

Debbie created this beautiful card featuring a digi by Mo Manning.  I adore Mo's illustrations and Debbie has coloured this one to perfection, and the entire ensemble is stunning.  You can visit Debbie's blog Fairy Bluebell's Craft Adventure to see more of her work.

This was such a treat for me.  To hold the cards, to feel the weight and textures, to ooooooh and aahhhhhh as my fingertips traced over all the textures and details.  I feel in awe and so inspired by the fabulous cards sent to me, and so blessed to be a part of such a caring and creative team.

On top of all of that I got a fabulous package of crafting goodies from Arline that included a LoTV rubber stamp, a dozen or so charms and several yards of different ribbons.

Thank you ladies, for such a special gift.

Monday, January 9, 2012

Crochet Snowflake

Crochet Snowflake


I didn't put all of the decorations I made during the year on the tree, I was a little concerned at the 6 month old mastiff puppies finding them tasty treats.  I did add a few of my favourites, high up on the branches where I thought they would be safe.  The decorations that received the most comments were by far the crochet snowflakes.  They were beautiful, delicate and glittering as they wafted around gently in the air conditioned breeze.  This year I want to make a few dozen more, for both my tree and as gifts for my family, and by far my favourite site for fabulous patterns is Snowcatcher.

There are dozens of beautiful patterns to be found there, all of them free for personal use.  If you would specifically like the pattern I used for this snowflake you can find it here.

Finishing


Print the above image out onto ordinary paper. Tape the piece of paper to a sheet of styrofoam. Tape a piece of baking paper or wax paper over the top of that. This creates a non stick blocking template. The above grid allows you to easily line up your snowflake spokes so they are symmetrical.

Blocking Board


In a small bowl dilute a little white glue until it is the consistency of pouring cream. Saturate the snowflake and squeeze well to force out any excess. Make sure you are using rust free pins, and pin to your template. Give a sprinkle of glitter if you like, I like quite a bit as I use them on the tree and really makes them sparkle. Allow to dry for 24 hours and then remove the pins and peel away from the paper. You can re-use that printed template several times.

Thursday, January 5, 2012

Tilda Gift Basket

Tilda Gift Basket


Materials:
Kraft card
Cookie Dough by Kaisercraft
Spellbinders circles and scallop circle dies
Frayed Burlap Distress Ink
Magnolia Tilda with Spoon rubber stamp
Copic markers
border punch

This project felt really good to make, as it's my first attempt at colouring in months.  My thumb is still quite rigid so my technique is a little different, but I was still relatively pleased with the results I got.

I followed >this< tutorial for putting the basket together.  The measurements included in that tutorial are in centimetres, and my Scorpal is in inches, so I cut my 12" x 12" Kraft card down to 10.5" x 10.5" and scored it at 3.5" and 7" on each side.  Any measurement divisible by 3 would work, e.g. for a smaller basket cut a 6" square and score it at 2" and 4" on each side.

Tilda Gift Basket


Before assembling I used a heart shaped border punch by Fiskars on the uncut edges, and I used the same punch to create the handles.  All of the edges have been inked with Frayed Burlap distress ink.


Tilda Gift Basket


Challenges:


Magnolia-licious Highlites - Anything Goes
Magnolia Stamp Lovers - use Kraft paper
Stampavie & More - Hearts


Sunday, January 1, 2012

Beary Christmas Easel Card


It's been two and a half months since I sliced the end off my thumb, and finally that bandage is off!  There's still some healing to be done, the thumb itself feels like it has a mega case of the prunes, like it's been sat in water this whole time.  It's very sensitive to touch, and any pressure on the pad still brings discomfort, and after being bandaged straight for 10 weeks the tendons have shortened and it's hard to bend, but the bandage is off!  And that means I can start picking up some crafting tools again *doing-the-happy-dance*
The January challenge for Christmas Crafting! is to make an easel card, and boy it feels good to be able to contribute again this month.  I still don't have all my dexterity back so I had to limit myself to something fairly basic, but this gave me the perfect excuse to go through my stash of "Card Buddy" cards from Aimee Asher Crafting

Card Buddy's are sold as a set of downloadable files that you print on your own computer.  You cut them out and assemble them to create cute-as-can-be cards in no time at all.  Best of all they are under $2.00 each, which is less than the cost of a generic Hallmark card, and you get to print off as many as you want, and always have them around for last minute emergencies.

At first I felt a little guilty at doing something so 'easy' but then I thought, you know, we all start somewhere, usually with limited supplies, or limited time, or limited capabilities for various reasons, and why should that stop us from being creative? You shouldn't feel guilty about making something that is quick and easy, because at least you are making something!

Anyway, that's it from me today, it feels sooooo good to be blogging again.  I won't be back in force for a little while yet, but it felt amazing just to be able to do something!

Happy New Year everyone, may your year be a creative one!

Monday, October 10, 2011

Townscape Tea Lights

Townscape Tealights


Technique:  Papercraft

Materials:
grungepaper
musical tissue tape
Barn Door Distress Ink
Townscape On The Edge die
Craft Snow
cardboard tube (ie toilet roll tube)
glitter
adhesive

I saw this idea on Tim Holtz' blog, and this is my spin on his idea.

Cut a piece of grungepaper to the same size as the townscape die and cover it with strips of tissue tape.  Run it through the die cutting machine.  You can see in the photo I have made two different heights, which is simply a matter of trimming the bottom border of the die cut at varying widths.

Cut a piece of cardboard tubing to the same width as the bottom border of the townscape die you just cut and attach with tacky glue or strong double sided tape.  In the one Tim Holtz showed he attached his die directly to the tea light candle, but I wanted a sleeve that I could change according to the season, which is why I attached it to a piece of tubing.

Add a touch of colour using Barn Door distress ink and heat set before applying craft snow to the roof tops and base of the buildings.  You can't see it in the photo, but the snow has a layer of vintage glitter glass added also.

Always, ALWAYS, make sure you use battery operated tea lights, a real tea light would be very dangerous with a paper wrapper so close to the flame.  I think these would look lovely lined up along a mantle piece in different colours and heights.