 |
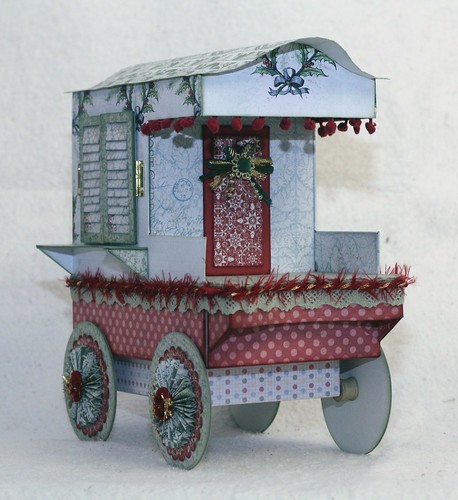
| Caravan front. |
I am totally in love with this project. The concept is just fabulous, and open to so many different style interpretations. The pattern is called Gypsy Caravan by Laura Denison of Following The Paper Trail.
 |
| Caravan side, with the shutters closed. |
This is just my practice project, one I 'whipped' up to make sure the instructions and pattern was accurate, before using my good paper. I am glad I did too, because the instructions are at times a little mysterious, which is helped somewhat by watching the Ustream videos, but even then I threw out the first attempt because one of the measurements were incorrect and you weren't advised until the second video that this was the case, at which point it was easier to just ditch the one I had made and start again. There are also instructions not included in the downloadable pattern that she goes through on the video, so be prepared. If you want to make this project I strongly urge you to sit through all the videos before you start construction.
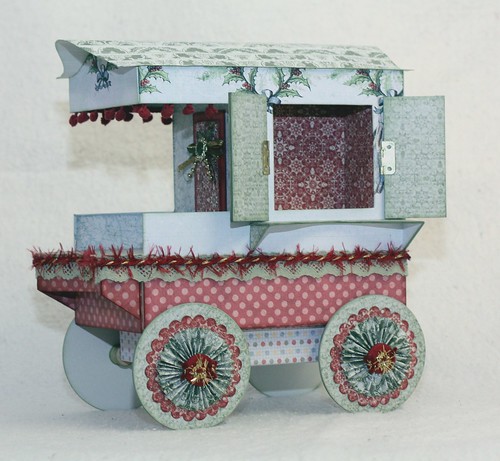 |
| Caravan side, with the shutters open showing the cubby space. |
I buy my chipboard in 30" x 17" sheets, and this used almost a full sheet to put together. The paper range I used is by Jodie Lee called Father Christmas Papers which you can still find in scrapbook stores printed under the Pink Paislee label, or you can download it digitally from Jessica Sprague. That is exactly what I did, and then printed it out on matte photo paper using my inkjet.
 |
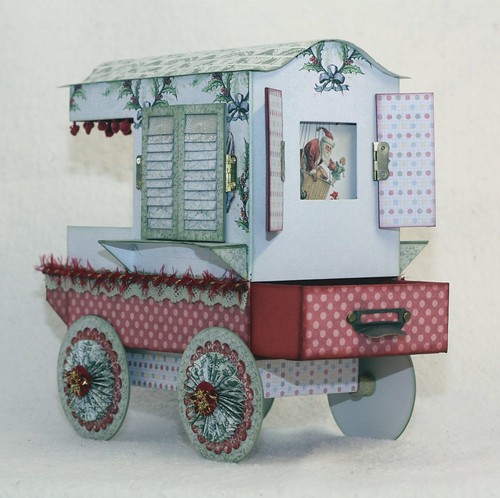
| Caravan rear, with shuttes and drawer closed. |
The pattern comes with instructions to make a mini album to fit in the trunk of the caravan, but I wanted something simpler and quicker to make, and also something that would suit anyone, not just photo enthusiasts. So I whipped up a little drawer that fits in that space which could hold all manner of doo-dads. Notice it's a wee bit wonky? That's why I do a test run, it lets me see what fits and what doesn't, so when I do a 'proper' one I am aware of any issues before hand.
 |
| Caravan rear, with shutters and drawer open. |
The fabric trims and buttons I bought in 2011 in a clearance sale at Spotlight(Australia's poor cousin to Joann's or Michael's). I liked them so much I held onto them and held on to them waiting for that special project... sound familiar? Aside from the fabric trims I haven't added any embellishments. As this was a practice project I think I will probably donate it to my son's school for a raffle, or donate it to the local hospital or something like that, and let the recipient fill it with goodies and add any extras.
Linking up with the following blogs:
Make it Monday: Always Anything Goes
Use it Tuesday: Make It Sparkle (gold tinsel on buttons and trim)
Inky Chicks: Anything Goes
Shopping Our Stash: Use Your Old Buttons (buttons as hub caps on wheels)
Through the Craft Room Door: Anything Goes
Simon Says Stamp & Show: Embrace the Old (used up hoarded trims and buttons)