Showing posts with label chinese new year. Show all posts

Tuesday, February 8, 2011

Green Dragon Herbal Tea

Technique: Herbcraft

A spicy blend that captures the essence of chinese green tea and mixes it with flavours of chai.

50g green tea
8g cardamom seeds
10g cinnamon sticks
5g dried ginger slices
5g cloves
2.5g whole black pepper

For those interested in herbal mythology and lore, all the ingredients have a fiery energy, which is where the name comes from.

To make, place the cinnamon sticks, ginger slices and pepper into a mortar and pestle and break down into small pieces. You don't want a powder, but you do want to break it down to a more manageable size. Combine with the green tea, cardamom and cloves and store in an airtight container. Use at a rate of one teaspoon per cup.  With traditional herbal teas you would not add milk, however as this has a green tea base, you can freely add milk and sugar to taste.
Monday, February 7, 2011

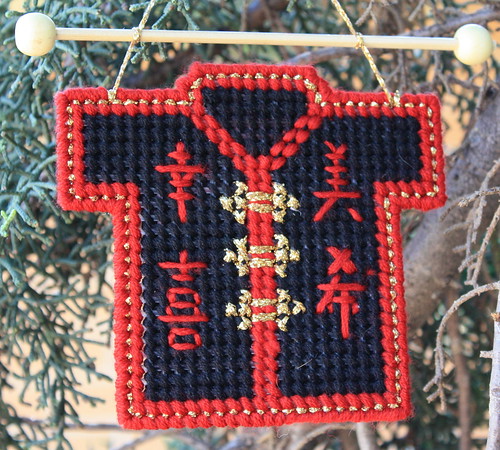
Chinese New Year Jacket

chinese top


One of the Chinese New Year traditions is to create banners and write upon them symbols of luck, fortune, health, wealth or whatever else you would like to bring into your life in the new year. This cute little jacket incorporates four such symbols.

Technique: Plastic Canvas

Materials
worsted weight wool (8-12 ply)
7 count plastic canvas
bamboo skewer
wooden beads
felt
tacky glue

Tools
tapestry needle
scissors

Using the chart below as a guide, complete the jacket with continental stitch, overcasting edges in red. A line of backstitching in gold was done between the outer red border and the overcast edge.


I have drawn the symbols in gold on the chart to make the lines more visible, you could do them on the jacket in gold if you wish, or red as I did. This is what the symbols on the jacket represent:


Cut the bamboo skewer slightly wider than the jacket and glue wooden beads at each end. Using the metallic gold yarn and thread through one sleeve of the jacket from back to front, then tie around hanger, then form a loop, tie around hanger and then through the other jacket sleeve, front to back and tie off. Cut a square of felt slightly smaller than the back of the jacket and adhere to the back to finish.

Sunday, February 6, 2011

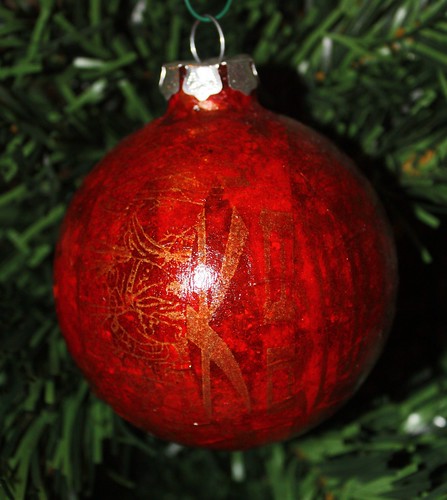
Chinese New Year Bauble

Red & Gold Oriental Bauble


Materials:
glass bauble
red joss paper
Liquitex Gloss Medium & Varnish

Tools:
scissors
kitchen sponge

Cut the joss paper into strips. The bauble I used was 3" in size, so I cut my strips 1" x 4", if you are using a smaller bauble cut your strips thinner to accomodate. Paint a strip of liquitex onto the glass and smooth down a strip of joss paper, using a clean and barely damp kitchen sponge to press down on the paper. This softens the paper and encourages the bond between the Liquitex and glass, which helps the paper form around the curve of the bauble.

Continue in this manner until the entire bauble has been covered with strips of joss paper. Allow to dry overnight. Give the entire bauble a coating of Liquitex to seal and varnish.

Saturday, February 5, 2011

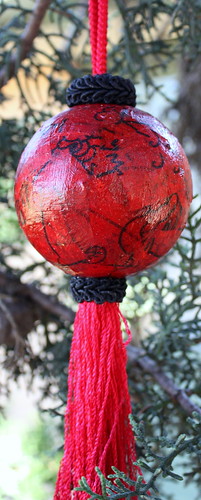
Chinese New Year Lantern

Chinese Bauble


Techniques: Cut and Paste, Basic Crafting

Materials:
3" styrofoam ball
red and black joss paper, or similar
Liquitex Gloss Medium & Varnish
red fringe
pva glue
black gimp braid
15cm red cord

Tools:
paintbrush
kitchen sponge
hot glue gun

Cut the joss paper into 1/2" squares. Brush a small amount of Liquitex onto the styrofoam ball, place on a square of joss paper, brush over with paintbrush to smooth down. Repeat this over half the ball, overlapping squares randomly. Allow to dry for several hours and finish the remainder of the ball in the same manner. Once thoroughly dry give a finishing coat of Liquitex.

Take a 15 - 20cm piece of black gimp cord, place a dab of glue at one end and place the cut edges of the red cord in place so that it forms a loop (this is your hanger). Wrap the piece of braid tightly around the cord to form a roll. Secure the end with a dab of glue to prevent fraying and glue into place on the top of the ball.

Lay a 15cm - 20cm piece of red fringing flat on your workbench. Run a thin line of glue along the top edge and roll up tightly. Wrap a small piece of black gimp braid around the top edge of the fringe and glue to the bottom off the ball, being careful to make sure it is not offset to the top, but in line so that it hangs properly.

Thursday, February 3, 2011

Year Of The Rabbit

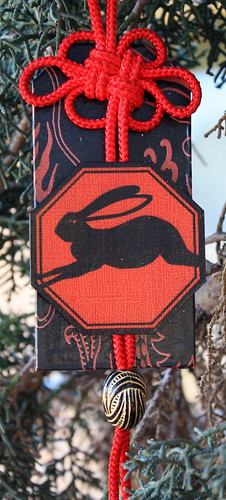
Year of the Rabbit


February 3rd marks the beginning of the Chinese New Year in 2011. This is the Year of the Rabbit in the Chinese Zodiac providing the inspiration for this ornament, however you could make this with the animal that symbolizes your birth year if you prefer.

Techniques: Knotting, Cut and Paste

Materials:
paper mache luggage tag
red and black joss paper, or similar
white chipboard or thick card
acrylic paints
sealant, such as Liquitex or Royal Coat
pva glue
1/2 metre red cord
double sided mounting tape or foam
large bead

Tools:
scissors

Cover the paper mache tag with the red and black joss paper. Print the image below onto a piece of red paper. I had some scrapbooking paper that was slightly textured, red background with a brushed gold over the top, that was perfect for this project. Glue the image onto a piece of white chipboard and cut to size. Seal both the back and front.

The square good luck knot is deceptively easy to make, all you need is a little cord, a square of paper and some good instructions. This site http://www.chineseknotting.org/luck/howto4/ shows a step by step guide to tying this knot, and if you feel adventurous, there are several other tutorials for different knots.

Glue the knot to the tag with one loop pointing upwards for hanging, and the loose tails pointing straight down the middle of the tag. Using double sided mounting tape stick the rabbit to the centre of the tag. Thread the loose ends of the cord through the bead and knot securely. Pull the bead back down to cover the knot. Fray the loose ends of the cord so it looks like a tassel.