Showing posts with label christmas card. Show all posts

Saturday, June 30, 2012

Happy First Birthday Christmas Crafting!


Winter Fairy Joy Fold Card


This month we are celebrating our first birthday over at Christmas Crafting-where has the time gone! Thanks to all of you who have taken part in the last 12 months and we hope we can count on you for your continued support. As part of our celebrations we have decided to have a blog hop around our very talented Design Team! We have four prizes up for grabs so definitely worth taking part! If you have arrived here from Debbie's blog then you are hopping in the right direction. If not then please return to the Christmas Crafting blog to start again.

All you have to do to be in with a chance of winning one of these fabulous prizes is to visit each blog in order, leaving a comment as you go, and then returning to the Christmas Crafting Challenge blog and leaving a final comment letting us know what you love about Christmas. On 1st August we will randomly draw four comments to win the prizes.

To continue with the hop, you now need to visit Darcy's blog.

Good luck and thanks for joining us at Christmas Crafting this month.

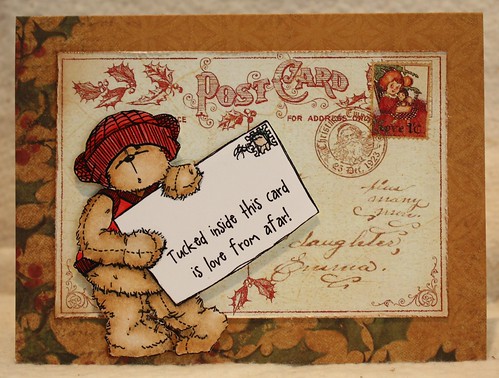
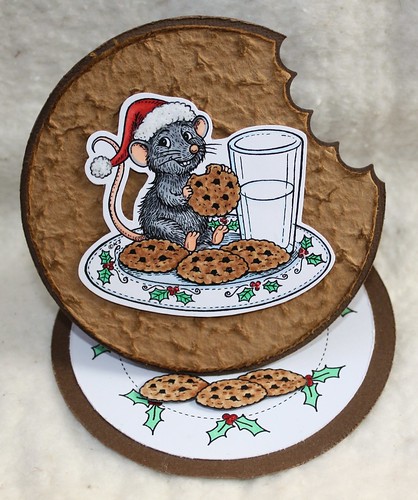
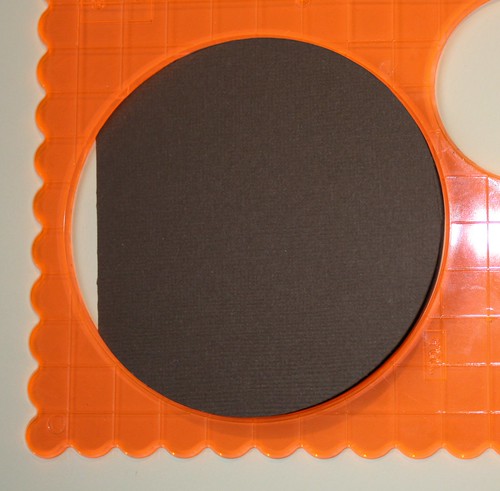
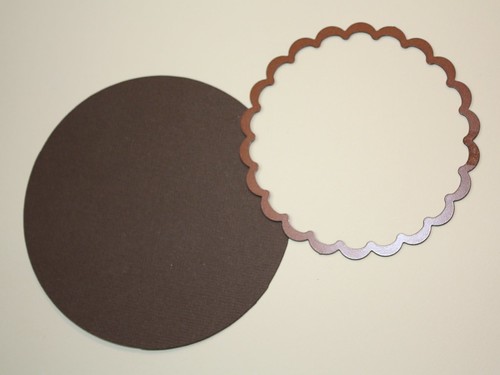
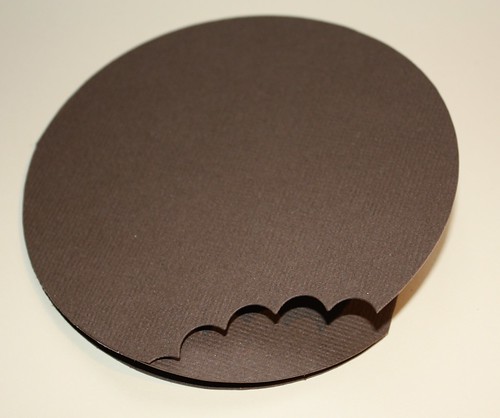
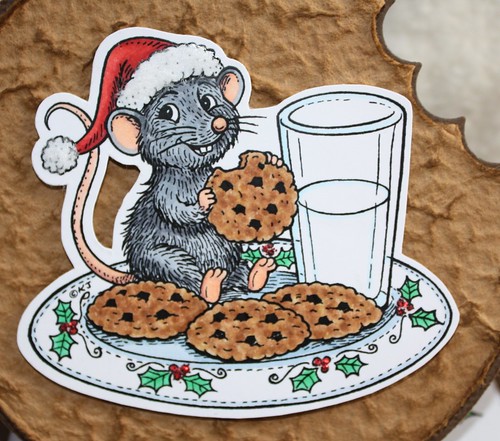
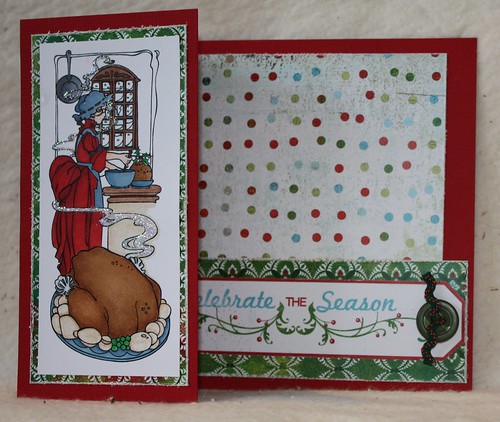
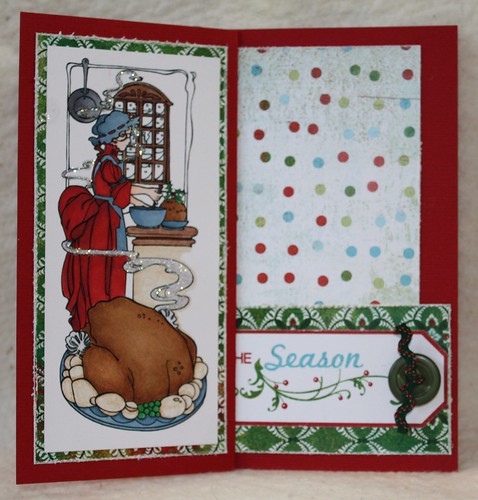
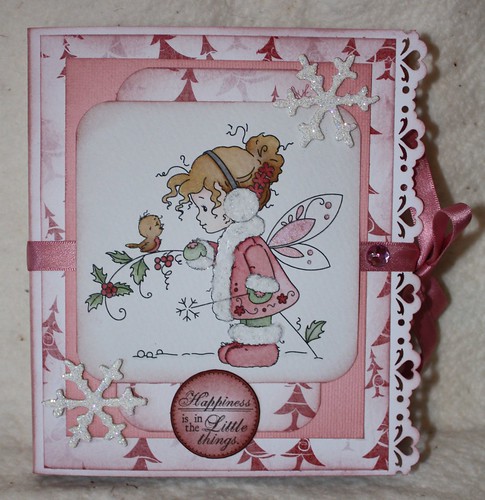
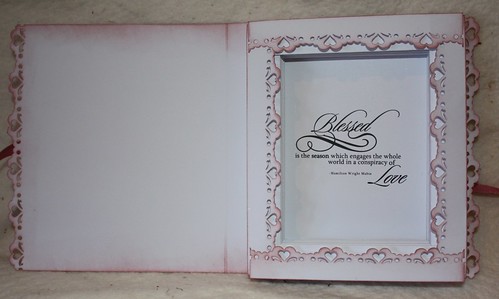
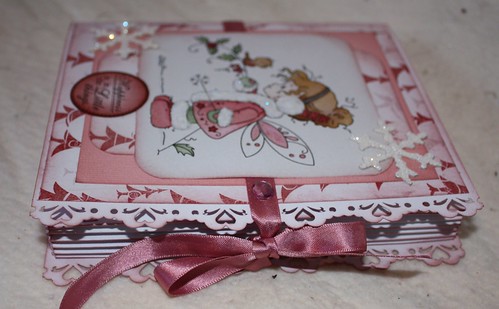
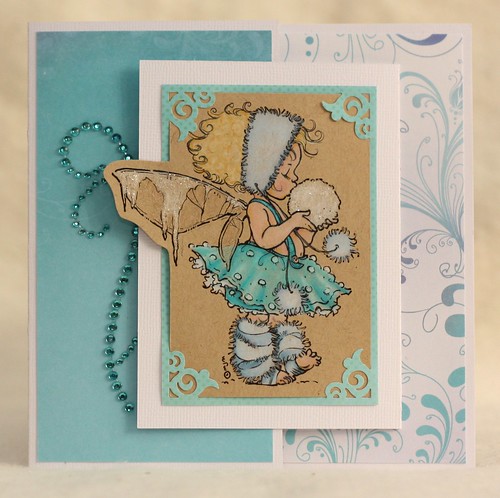
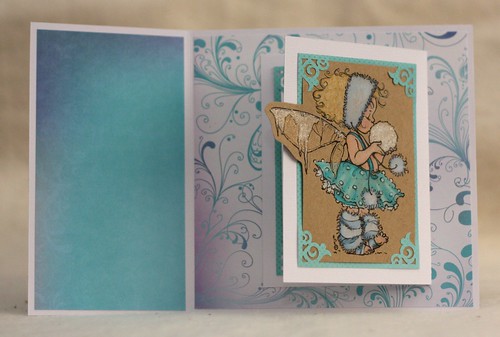
Exciting isn't it!  The cool colors and frosty theme I have used in my card this month seemed very fitting considering how cold it is here in South Australia!  The gorgeous little fairy is by Mo Manning, the papers are by Kaisercraft and the image has been colored with a combination of Lyra and Prismacolor pencils on Kraft card and it's been put together using a "Joy" fold technique I found on Split Coast Stampers.


Winter Fairy Joy Fold Card


My apologies to Arline and all for being a few hours late with my post, hubby went walkabout with the camera and I was hoping I could just scoot in under the deadline but I hope it was worth the wait!

I am entering this card in the following challenges:

52 Christmas Card Throwdown - Anything Goes 
Totally Gorjuss - Sweet and Simple
Totally Papercrafts Friday Challenge - Can You Digi It?
Fussy and Fancy Friday Challenge - Fancy Folds
The Kraft Journal - Anything Goes


Wednesday, May 9, 2012

Maisie Caroling

Maisie Carol 


This week was my birthday and I received a long admired set of Lyra Rembrandt Polycolor pencils, and I have been having a blast experimenting with them. They are oil based, whereas Prismacolor pencils are wax based, as such they have a harder core. They feel very different to use, and I have found a much lighter touch is required than with the Prismacolor. The only complaint I have about them so far is the limited colour range, 72 in the Rembrandt range versus 120 in the Prismacolor range, with the most lacking gap being the brown palette.


 Maisie Carol 


As well as the pencils I also bought a few tools that I have been pining over for a while. I got a Crop-o-dile edge cropper, and a few dies by Tim Holtz. I have also used the Tim Holtz Tattered Flower Garland strip die for the flowers, and the juniper sprigs are from the Tattered Pinecone die.


Maisie Carol


I've used the small easel die to create a stand alone picture rather than a card, and I have a feeling this is one die I will use a lot :o)


Maisie Carol


I am entering this into Mo's Digital Challenge, the theme this week is Anything Goes.

Thursday, February 9, 2012

Noel Card

Noel Card


Card Positioning Systems is celebrating their 5th Anniversary by releasing a sketch a day for 15 days.

This card is my interpretation of the day ten sketch.


I have used Webster's Pages paper as the background paper, December Journal.  I purchased it as a digital download, so I was able to resize it as I saw fit, so I made it fit a 6" x 6" card.  I love the versatility of digital papers.

The "postcard" stamp along the edge there is by Tim Holtz, inked with Vintage Photo Distress Ink, and the vintage Santa is a Bo Bunny acrylic stamp inked with StazOn Black on vellum.  A liberal shading with Vintage Photo has been done around most of the edges.

The wooden word NOEL I picked up during the post Christmas sales this year.  I painted it with Burnt Umber acrylic paint and sanded it back to distress it, then lightly inked the edges with Versa-color gold ink.

Saturday, September 24, 2011

Christmas Across The Miles

Teddy Bo Postcard


Technique:  Papercrafting

Stamps:
Teddy Bo 128
Postcards from the Mini Holidays set by Tim Holtz

Pens, Inks & Colours:
Prismacolor pencils
Aged Mahogany Distress Ink
Vintage Photo Distress Ink

Papers:
Kaisercraft Dec 25th Collection (Wish)
Graphic 45 Christmas Emporium Collection (Believe)

Other:
adhesive
odorless solvent
paper blending stubs

The challenge at Winter Wonderland this week is to create a card to send to loved ones who live abroad, and further....  "Please be sure to show on your card with your sentiment that this card is going across the miles."

I chose an image from Teddy Bo that features little Bo holding a letter, and I added the sentiment in Gimp (the font is called A Little Pot).

Teddy Bo is coloured with Prismacolor pencils, and this is my very first attempt at trying to colour with these pencils and odorless solvent.  The Teddy Bo blog has a tutorial each week, and if you follow the tutorial and enter using a Teddy Bo image they send you another one free, so he's being popped over there, and a thankyou to Nicole Tietje for writing the tutorial on using Prismacolors.  I need a *lot* more practise but the variation and tone in colour I could get even with no skill was fantastic.


Teddy Bo Postcard


The card is made from a sheet called Wish from the Kaisercraft Dec 25th Collection.  This is the first time I have made a card without using a co-ordinating plain card to make mats, I have just used the front and back as the exterior and interior, this was partially as experimentation and partially to keep the weight of the card down for postage.  The postcard on the front is from Graphic 45, and the postcard inside was made from plain white card, stamped with a Tim Holtz postcard stamp and aged with Vintage Photo distress ink.


Teddy Bo Postcard


A simple card, no bling or frou frou, I have several cards that need to go overseas and I wasn't sure whether this was going to be sent to a male or female so I wanted something with generic appeal, and I wanted something that would post well and not get damaged in transit with little fragile bits.

Monday, August 22, 2011

Naughty or Nice Inc Christmas Card

Naughty or Nice Card


Images:
Naughty or Nice Inc Labels by Two Peas in a Bucket
Xmas Hottie by Kenny K
Maude Christmas by Just Inklined

Pens & Inks:
Copic markers
Prismacolour pencils
odourless blender
paper blending stick
Black Soot Distress Ink
silver glitter gel pen

Oh what fun I had on this card!  The inspiration came from the Winter Wonderland challenge this week which is to make something for the men/boys.  This gives me a chance to use the sexy images from Kenny K, but then I also found Christmas Maude who, intentionally or by sheer co-incidence, looks like the Xmas Hottie will in about 50 years time!  

The sentiment on the front of the card is my own concoction, printed onto a Naughty or Nice Inc label.  As I got several laughs whilst showing the men around the house I am hoping that the card is funny to most, and not just myself!  The tickets and tags inside the card are once again from the Naughty or Nice Inc kit.


Naughty or Nice Card


I also had a lot of fun making several of my own elements on this card.  The wordy paper used throughout has the lyrics to "Santa Clause is Comin' to Town" repeated across, and then inked with Black Soot.


Naughty or Nice Card


Both ladies have been coloured with Copics and shaded with a black prisma pencil., and they both have some sparkly fluff and glitter for the fur trim on their outfits.  Maude has some silver glitter gel pen on her glasses to make them sparkle, and some Stickles glitter glue on the cuffs to her stockings and gloves. 

Naughty or Nice Card

Challenges:

Winter Wonderland:  Cards for men/boys
Kenny K's Krafty Girls: Layers (layers inside and out, felt like I was making a Sarah Lee Danish!)
Sparkles Forum Challenge:  For the boys
Christmas Card Challenges:  Glitter (Maude's glasses and cuffs on stockings and gloves)
Totally Papercrafts:  Christmas in August
ABC Christmas Challenge: Based on a quote or song (Santa Claus is Comin' to Town)

Tuesday, August 16, 2011

Cookie Card

Bigsby's Cookies


Technique:  Papercraft

Images:
Bigsby Cookies digi
free holly image from here

Papers:
tan mulberry paper
dark brown Bazzill paper

Pens & Inks:
Copic Markers
Walnut Stain distress ink

Other:
Merry Christmas sentiment by Tim Holtz
glitter glue

When I checked what the challenge was at Karen's Doodles this week I could have sworn black and blue it was was to make a shaped card, and as I had never tried making one, I was so eager to participate.  LOL when I actually went to enter the card, it turns out the challenge was actually for Fancy Folds, yeah it's really been that kind of week!  Anyway...

I won three digi's for participating in their challenge recently and chose the cute little Bigsby eating Santa's cookies, and I had it in my head to do a round cookie shaped card.  I am not sure that what was in my head translated to paper, but this is the adventure I had!

First came the round card.  I don't have a round die set yet, so I used my trusty Fiskars template.  I cut a 4.5" x 9" piece of dark brown card and scored it in half, then slipped the template over the top, making sure that the top edge was not being sliced so it formed the fold.  I can tell you the very next thing I invest in will be a set of circle dies!


I wanted to make an easel card, so I cut another circle from the same card that would form the top.  To give the impression that a bite had been taken out of it, I used a scalloped circle die to form a chomp mark.


Bigsby's Cookies


The circle with the bite mark is then adhered to the base card. You could put the bite mark anywhere, but I aligned it near the top so that when it was open it had a cute little outline.


Bigsby's Cookies


The "cookie" that Bigsby is on is a circle cut from a sheet of tan coloured mulberry paper. The texture was just perfect for a cookie. I repeated the bite marks and distressed the edges with a paper distressing tool, and brushed over the edges and the raised parts of the paper with walnut stain ink.


Bigsby's Cookies


The bottom plate, well I was actually going for a plate! Using a free holly image I found, and Microsoft Word, I created a dotted circle and surrounded it with holly. When it was cut out I thought it reasonably resembled the plate that Karen had drawn in the original digi. The Merry Christmas sentiment is from Tim Holtz Mini Holiday stamp set. I printed Bigsby twice, and used just the cookies to form the prop for the easel.


A little bit of glitter glue on the holly berries and Bigsby's Cookies was done.


Bigsby's Cookies


Challenges:
Karen's Doodles: Fancy Folds (here's hoping an easel card qualifies!)
Pollycraft:  Distressing

Monday, July 4, 2011

Christmas Buffet Card

Christmas Buffet
The card viewed open

Technique:  Papercraft

Materials:
cardstock
digital stamp
Copic markers
adhesive
patterned paper
button
ribbon

Tools:
paper cutting/scoring tool
scissors

The challenge at Winter Wonderland this week was a Christmas Buffet,  where we were offered a smorgasbord of patterened paper, 1 charm, ribbon, snowflakes, buttons/gemstones or brads, and from that list we had to choose three.  I chose patterened paper, a button and ribbon.

The past two weeks I had done very cutesy cards, this week I wanted to get away from that and try something with a vintage feel.   The image I used is actually a colouring book image that I found on this site.  Aren't they just gorgeous!  Incredibly detailed, and quite challenging to colour with copics when scaled down to a size suitable for cards, but the end result was worth it I think.  I took the 'christmas buffet' theme a step further and chose an image that suited that theme also :)

The patterned paper is Basic Grey, Dasher, which you can download digitally from their site here.  The tag that I used is included in their Dasher Starter Kit.

The card has a half flap on the front, so the centre back of the card shows.  I'm new to card making so I am not sure what that style is called?  I felt it suited the narrow image I had chosen nicely though.  The card is finished with a sprinkle of glitter, one button with a teensy bit of ribbon. 

Christmas Buffet
The card when closed

I had a look through all the challenge entries this week, the quality is simply stunning!  Over the moon to have  had two cards chosen in the top three now, thankyou! :o)

Monday, June 27, 2011

Pretty in Pink Winter Wonderland Challenge

Winter Fairy Card

Technique:  Papercraft

Materials:
cardstock
designer paper
Distress Ink:
* Victorian Velvet
* Bundled Sage
* Vintage Photo
* Aged Mahogany
watercolour paper
Wee Stamps Digi Winter Fairy
Sparkly Fluff
pink glitter glue
various embellishments

Tools:
paper cutting/scoring tool
Fiskars Border Punch
printer

The challenge over at Winter Wonderland this week is Pretty in Pink  As my range of copics is still very limited to traditional Christmas reds and greens, that meant using a water colour palette with my distress inks and choosing a dusty pink, so I wanted a project that was a little vintage, but not the grungy type of vintage that is so popular, I wanted a soft, feminine feel.

I found the idea for the 'book card' here.  The photos are clear and easy to follow, and the measurements in metric, which is a bonus for me!  All the edges on my card are sponged with Victorian Velvet, and I used a Fiskars border punch for the edges.  If you haven't made one of these before they come together quickly and easily and are perfect for giving small gifts inside.

Open Card


I purchased the Wee Stamps Winter Fairy digi from Cuddly Buddly because it allows me to download instantly, rather than waiting for someone to email me the image.  She is printed with a laser printer onto water colour paper and then painted using the palette listed above.

Her wings are highlighted with glitter glue, and her fur trim is done with Sparkly Fluff.

The sentiment I used for inside the book is from here.  Tonnes of fabulous word art freebies on the site, so spend some time checking it out.

The designer paper I used was a digital freebie that you can download here.  Another site with a large selection of free digital papers to download, worth the visit.


Side View

I had a great time putting this card together, learning some new techniques and a new card style.

Monday, June 20, 2011

Bentley With Poinsettia Christmas Card

Bentley with Poinsettias


Technique:  Papercraft

Materials:
cardstock in red, white and black
cobweb paper in red
glue stick
gold glitter glue
Sparkly Fluff
PVA glue
Bentley with Poinsettias digital stamp
Peeled Paint Distress Ink
No 10 red crochet thread
gold leaf

Tools:
paper trimmer & scorer
snowflake embossing plate
1.5mm crochet hook
2.00mm crochet hook
Sizzix Big Shot
Tim Holtz Alterations die
* Mini Flourish
* Tags and Bookplates
Copic markers:
Browns:  E31, E33, E37
Greens: G02, G05, G07
Reds:  R22, R27, R29
Greys: C-0, C-3, C-5


Christmas Flowers was the theme for the challenge over at Winter Wonderland this week and this gorgeous little Bentley digital stamp was perfect.  Bentley is coloured with copic markers, with a touch of gold glitter glue in the centre of the poinsettia.  His little friend has a touch of Sparkly Fluff to trim the hat.

The card is a 6" easel card made from red card stock.  Although it doesn't show up in the photo the white card has been run through the Sizzix to emboss a snowflake pattern onto it.  Two strips of red cobweb paper have been criss crossed over the white card, and then the image of Bentley was mounted to a piece of black card and glued into position.

The flourish is from the Tim Holtz Mini Flourish die, cut out of white card and coloured with copics and distressed with Peeled Paint ink.

The pattern for the poinsettias is actually a snowflake pattern.  Make two, one with each size of crochet hook, this will give you a large flake and a small flake.  When layered they will look like a flower.  The centre of the flower is made with gold seed beads and PVA glue, with a touch of gold glitter glue.


Crochet Poinsettia


The original pattern can be found here.   

Ch 4, sl st into 1st ch OR make magic ring.
Round 1: 12 sc in ring; sl st in starting sc. Pull magic circle tight, but leave opening big enough to allow stitches inside it to lay flat.
Round 2: *Ch 2, dc in next sc, ch 2, sl st in next sc; repeat from * around 5 times, sl st in sc of final sl st of Round 1.
Round 3: *Ch 4, dc in next dc, ch 4, sl st over next sl into sc below; repeat from * around 5 times, sl st in final sl st of Round 2.
Round 4: *4 sc in next ch 4 sp, ch 2, dc in next dc, ch 2, 4 sc in next ch 4 sp; repeat from * around 5 times, sl st in final sl st of Round 3; bind off. Weave in ends.


To prop the easel card open I created a 'santa buckle' using the rectangular book plate covered with gold leaf.  I have left the centre blank to hand write the recipients name.

I hope you enjoyed my card, it is only the second one I have made, and my first attempt at colouring with copics.