Showing posts with label decoupage. Show all posts

Thursday, November 1, 2012

Cookie Factory Recipe Album

Cookie Recipe Album


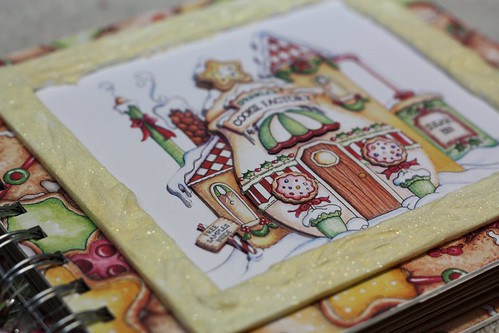
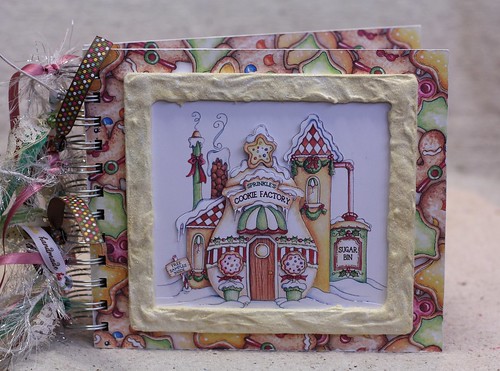
The challenge this month at Christmas Crafting! was to use decoupage.  I have a thing for recipe albums at the moment, and when I went through my stash and rediscovered my Santa's Village Collection by Laurie Furnell, I knew I wanted to make a recipe album with her gorgeous artwork.


To start I printed off four copies of the cookie factory image and sealed the back of them with Liquitex Gloss Medium (Modge Podge will do the same thing).  This is important because the Liquid Scrap Dots that I used for dimension is essentially the same stuff as silicone and will leach through the back of unsealed paper leaving a dark spot.

Once sealed, I set aside one image to be used as the base and then cut up each of the remaining three images for layering.  Most kits purchased today have done the guess work for you, but it's not that hard to look at an image and think about the perspective and then cut out what will be the background, middle and foreground.
Cookie Recipe Album


I didn't get too intensive with the layering as this is a functional item and I didn't want either too much height, or fiddly bits that might drop off when the album is used.

The yellow frame I made with scrap cuts of chipboard adhered together in two layers, and then covered it all with Jo Sonja Texture Paste.  This is a thick, white paste that lets you create dimension, in this case I used it to make the frame look like it was covered in frosting.  Once dry I painted with acrylic paints and dusted with glitter.

Cookie Recipe Album


Once the image and frame were ready it was just a matter of assembling them onto the cover.  The front and back covers are thick chipboard covered with papers included in the Santa's Village kit, and the interior pages are all cut from plain Kraft card.  I inked the edges of all of the pages with white ink to give it a 'dusted' appearance, and then used the Zutter to punch and bind it all together.
Cookie Recipe Album


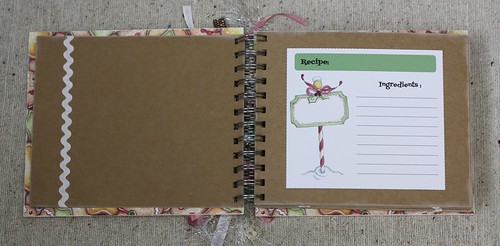
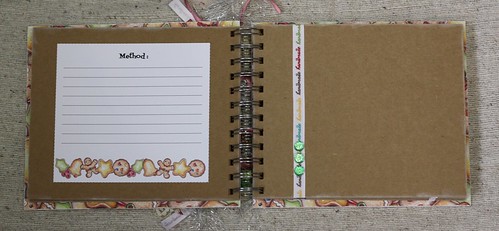
The recipe card was created using Word and the elements from the Santa's Village kit.  There are 18 pages in the album in total, 9 of which have the recipe card on the front and back, and the remaining 9 have been decorated with either white rick rack to simulate the icing on gingerbread, or with ribbon and 'gumdrop buttons'.  I left 9 blank pages so that the recipient could either put in photographs or use it as a scrap book and glue in recipes found in magazines.
Cookie Recipe Album


The finishing touch was to decorate the wire binding with ribbons and fibres. Don't tell anyone but this hides any imperfections in the binding!


Cookie Recipe Album
 
I hope I have inspired you to go and create something fabulous using the decoupage technique.  Remember you don't need to purchase special kits, just find an image that you like and use your own perspective to create dimension. 

Linking this up at Make It Monday:  Challenge #113
Tuesday, April 19, 2011

Easter Planter Pot

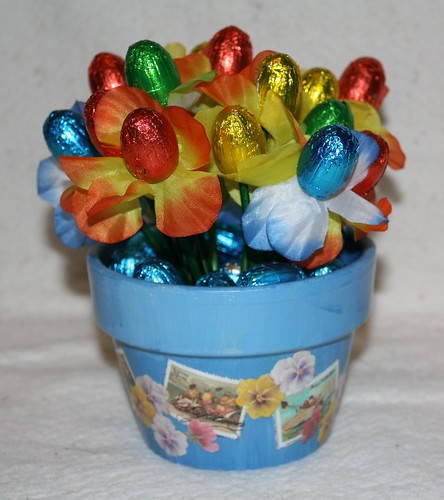
Easter Egg Flower Pot


Technique:  Decoupage

Materials:
terracotta pot
acrylic paints
Modge Podge or similar product
linen paper or other good quality ink jet paper
Blu-Tac

Tools:
scissors
printer
foam pad
tapestry needle
paint brush
spray sealant

Paint the terracotta pot using your favourite decorative method.  I often use a sponge to apply paint but this time I loaded up a wide brush with blue and white and streaked it down the pot for a colour variation.  Let it dry thoroughly and apply a second coat if necessary.  Seal using Modge Podge when totally dry.


Click on the images above to get the full size, then save and print out on linen paper on the highest quality setting your printer can manage.  The stamps were created by me using vintage post cards and Gimp to create postage stamps.  If you are making this for any other occasion, feel free to use the template below to make your own stamps.


Spray the front of the image with a spray sealant.  When I print out images I prefer to use a spray sealant as I have found brushing on something like Modge Podge can drag the ink particles and cause smearing.  You can use Modge Podge on the back of the print though.

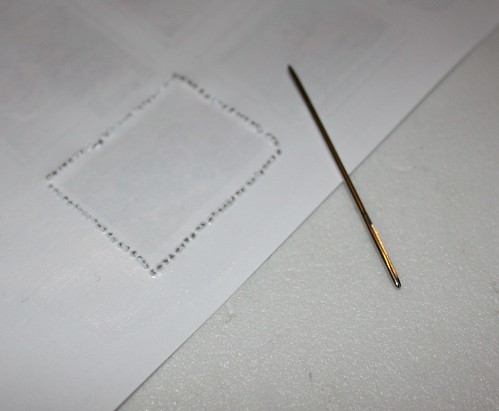
Easter Stamp Perforation

Lay the image over a sheet of styrofoam for support and perforate the edges with the tapestry needle.  This gives a lovely, authentic look to the stamp.  Cut out as many pansies from the first print as you think you might need.

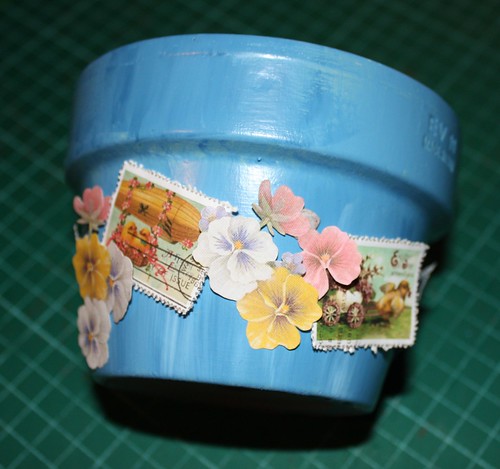
Easter Pot Design Phase

Once you have your images prepared use balls of Blu-Tac to design the piece.  This lets you move and rearrange until you get it exactly how you want it.  When you are satisfied use Modge Podge to stick the pieces permanently.  Allow the pot to dry over night and finish with a coat or two of Modge Podge.

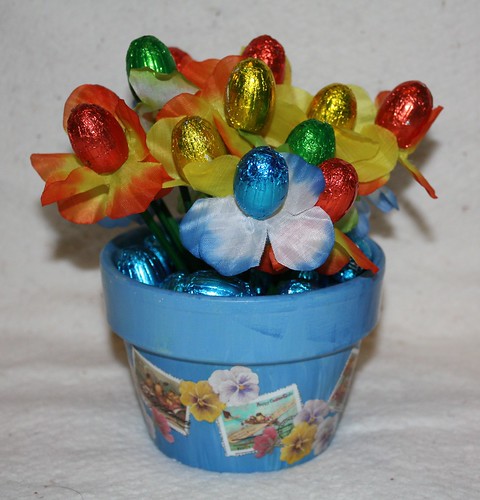
I made this for my Mum.  I used the Easter Flowers I made a few days earlier to create a chocolate floral arrangement.

Easter Egg Flower Pot

Monday, March 28, 2011

Tissue Paper Decoupage Easter Egg

Tissue Paper Egg

Technique: Paper Mache

Materials:
paper mache ornament
tissue paper
acrylic paints
Liquitex Gloss Medium & Varnish

Tools:
paintbrush

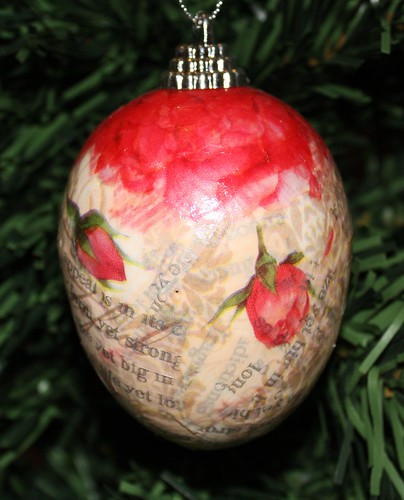
I was so happy with the way the ornament turned out here that I wanted to do a few more things using the lovely tissue paper.

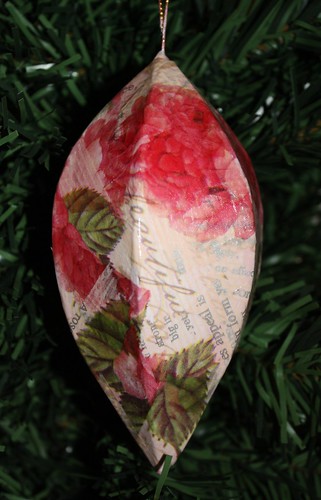
A wonderful thing happens as you layer it. It is so fine that it becomes semi-transparent. This allows you to build up layers of colour and tone, giving the impression of a bouquet of roses even though you haven't cut out a single flower. I think I will give this one to my Mum for easter.

Base coat the ornament in a shade of pale pink, or whatever compliments your tissue paper. Tear the tissue paper into 1/2" squares. Brush a small amount of Liquitex onto the ornament, place on a square of tissue paper, brush over with paintbrush to smooth down. Repeat this over half the ornament, overlapping squares randomly. Allow to dry for several hours and finish the remainder of the ornament in the same manner. Once thoroughly dry give a finishing coat of Liquitex.

Saturday, March 26, 2011

Roses Tissue Paper Decoupage

Tissue Paper Ornament


Technique: Paper Mache

Materials:
paper mache ornament
tissue paper
acrylic paints
Liquitex Gloss Medium & Varnish

Tools:
paintbrush

Base coat the ornament in a shade of pale pink, or whatever compliments your tissue paper. Tear the tissue paper into 1/2" squares. Brush a small amount of Liquitex onto the ornament, place on a square of tissue paper, brush over with paintbrush to smooth down. Repeat this over half the ornament, overlapping squares randomly. Allow to dry for several hours and finish the remainder of the ornament in the same manner. Once thoroughly dry give a finishing coat of Liquitex.

Sunday, February 6, 2011

Chinese New Year Bauble

Red & Gold Oriental Bauble


Materials:
glass bauble
red joss paper
Liquitex Gloss Medium & Varnish

Tools:
scissors
kitchen sponge

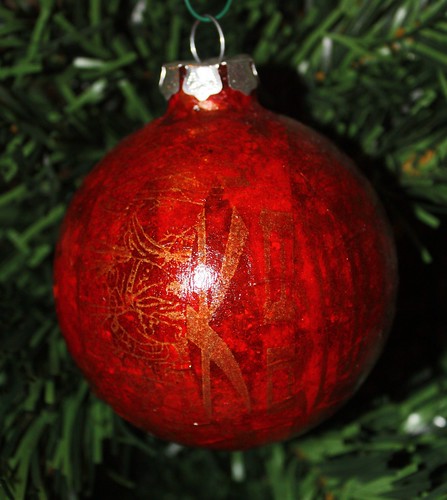
Cut the joss paper into strips. The bauble I used was 3" in size, so I cut my strips 1" x 4", if you are using a smaller bauble cut your strips thinner to accomodate. Paint a strip of liquitex onto the glass and smooth down a strip of joss paper, using a clean and barely damp kitchen sponge to press down on the paper. This softens the paper and encourages the bond between the Liquitex and glass, which helps the paper form around the curve of the bauble.

Continue in this manner until the entire bauble has been covered with strips of joss paper. Allow to dry overnight. Give the entire bauble a coating of Liquitex to seal and varnish.

Monday, January 31, 2011

Back To School Chalkboard

Back To School


Technique: Painting, Decoupage, Mixed Media

Materials:
wooden coaster
acrylic paints
all purpose glue and sealant such as Modge Podge
alphabet chipboard cutouts
scraps of red and green fabric
flexible wire


Tools:
paintbrush
scissors
sandpaper
wire snips
needle nose pliers
hot glue gun

Today was the first day back at school after more than six weeks of holidays! As much as you love your kids, by the end of the holidays they are bored and restless, and I am usually frazzled! I only have one child of school age, and he started upper primary today. The little man was quite excited, and proclaimed he felt rather "upper".

Give the coaster two coats of black acrylic paint, sanding lightly between coats, and then a coat of sealer.

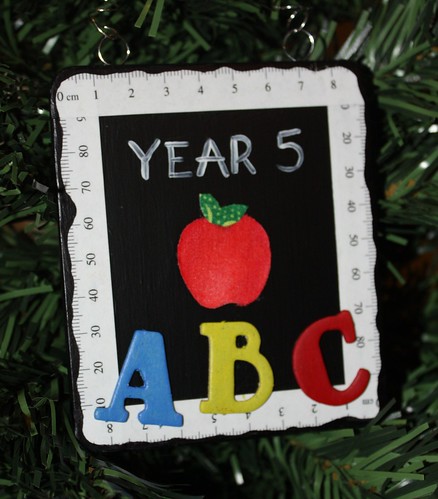
This site has a wide variety of paper rulers available to print out. In Australia we are metric, but there are imperial rulers available also. Print out the ruler of your choice and cut strips that will become the border of your "chalkboard" (a little trivia here in Australia we call it a black board, because, well, it's black!!). Once your ruler strips are trimmed, glue into position and allow to dry.

Paint your chipboard letters in bright primary colours and allow to dry. Glue into position along the bottom of the board. Cut a small circle from the red fabric for the apple, and a few leaf shapes from the green fabric. Glue these into position in the middle of the board. With white acrylic and a fine brush, write the year or grade level of your child. Allow the entire project to dry thoroughly and give a finishing coat of sealer.

Wrap the wire around a pencil about a dozen times and then slip off. Bend and stretch as necessary to form a hanger. Make two loops of wire and hot glue to the back of the coaster, then attach the hanger through the loops.

On the reverse of the coaster, which I haven't photographed for privacy reasons, I have glued the school logo, and also made a note of what his teacher's name is and what class room number he is in for this year.

Wednesday, January 26, 2011

Give Me A Home Among The Gum Trees

Koala Ornament


Technique: Decoupage, Painting, Modelling, Mixed Media

Materials:
glass bauble
Australiana wrapping paper
acrylic paints
green polymer clay
gumnuts


Tools:
curved cuticle scissors
Liquitex Gloss Medium & Varnish
paintbrush
kitchen sponge
hot glue gun

Mix about two tablespoons of white acrylic paint and a pea sized blob of blue acrylic paint and swirl lightly together to get a marbled effect, it should be the consistency of pouring cream. Pour into the glass ornament, swirl around to ensure the entire inside is covered, then drain the remainder out. Allow to dry overnight.


These cutting instructions are for right handers, lefties need to reverse it around.  Hold the image in your left hand and the scissors in your right, make sure that the curve of the scissors are pointing toward your right also, you want the curves of the blades to be cutting away from your picture, not into it.


First you want to cut away all of the background, so that all you are left with is the koala.


He is not a very big fellow, but even a small image can present a challenge when being glued to a curved surface.  If you tried to glue him as a whole image, you would find that the bulkiest areas of the image would crease and buckle.  What we need to do is identify which areas we suspect that will occur in, and clip into them.  The theory is much like clipping the seam in a garment so it lies flat.

The best areas to cut are along the natural lines in your image, these will become invisble when glued down and give the appearance of a flat, seamless image.  For our koala we would cut along the dotted lines indicated.


Now you have quite a floppy and flimsy piece of paper.  When we glue him down, because of our cuts, little pieces of him will tuck in and overlap, this is exactly what we want to happen.  We do, however, need to make sure that we glue him down so that the right bits are tucked away.  For example, if we glued his head down first, then when it came time to do his chest that would overlap up over his nose, looking out of place.  So identify which portion of the koala is the most background and start there, which is the chest area just under his nose.

Start with a small brush dab a little liquitex directly onto the glass ornament and then using your fingers to keep the area you don't want glued yet lifted, brush the first area into place.  Now add a little more liquitex and smooth his face into position.  Keep his arms lifted up, smooth his right leg down, then his tummy, then the arms and shoes.  He should now be loosely held to the glass with Liquitex.  Give him a good checking, ensuring that there are no gaps between the slits you have made in the paper and everything is in the correct order.  Once you are satisfied apply firm pressure with a barely damp sponge over the top of the image, working a small section at a time.  This is important to ensure that the image flattens and that all air bubbles are removed.  Once he is smooth and fully secured set aside and allow to dry overnight.

The next day, using a clean, damp sponge, gently wipe over the top of him and clean the surrounding glass.  You can now place another coat of Liquitex directly over the top of him as a final coat of sealant. 

To finish:

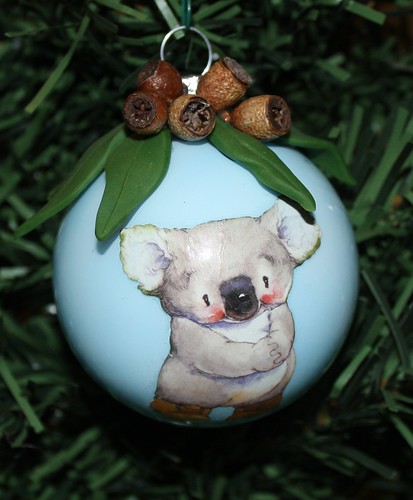
Condition and soften a small amount of green polymer clay. Run it through a pasta machine on the widest setting, or roll out with a brayer. Cut long, thin leaves to resemble gum leaves. Make a mark down the centre for the vein and curl the leaves a little to make them appear more natural. Place onto a sheet of baking paper and cure in oven according to manufacturers directions. When cool, apply the leaves and gumnuts to the top of the bauble with hot glue.

Happy Australia Day!!