Showing posts with label santa. Show all posts

Thursday, February 9, 2012

Noel Card

Noel Card


Card Positioning Systems is celebrating their 5th Anniversary by releasing a sketch a day for 15 days.

This card is my interpretation of the day ten sketch.


I have used Webster's Pages paper as the background paper, December Journal.  I purchased it as a digital download, so I was able to resize it as I saw fit, so I made it fit a 6" x 6" card.  I love the versatility of digital papers.

The "postcard" stamp along the edge there is by Tim Holtz, inked with Vintage Photo Distress Ink, and the vintage Santa is a Bo Bunny acrylic stamp inked with StazOn Black on vellum.  A liberal shading with Vintage Photo has been done around most of the edges.

The wooden word NOEL I picked up during the post Christmas sales this year.  I painted it with Burnt Umber acrylic paint and sanded it back to distress it, then lightly inked the edges with Versa-color gold ink.

Monday, October 3, 2011

Santa's Other Matchbox Suit!

Santa's Other Suit


Technique:  Papercrafting

Papers:
Crimson Weave by American Crafts
black card
white card

Other:
scrap of black ribbon
silver buckle
sparkly fluff
double sided adhesive
matchbox or matchbox die

Do you ever make something and then a day or two later you see it as a theme on a challenge blog and go Doh!? I just made that! On the 29th I posted my Santa's Matchbox Suit:-


Santa's Suit Matchbox


and the very next day the Christmas Stamping challenge blog listed it's challenge which was to make a holiday card or package with no stamps at all! Well I can't back link and I didn't think I could explain it away with some fuzzy date/time line logic, so the only option left was to make another one, a different one, a better one!

So here is Santa's Second suit, actually looking at the two together the one with rhinestones looks like it belongs to Mrs Claus, doesn't it?

For this entry I have used a strip of white card that has sparkly fluff applied to represent the middle cuff on Santa's coat. I've used the same buckle but a different style of ribbon for the belt.


Matchbox Suits


Just so there is no confusion, the one on the left is the one made specifically for this challenge, the one on the right is the one I made the day before the challenge was listed and is not being entered - I just thought it would be cute to have a side by side shot to compare the two. 

Also going to pop a link over at Make it Monday #57.  If you haven't checked their blog out yet it's pretty fabulous.  It's always anything goes, and rather than a traditional challenge it's a link party where you are encouraged to visit and comment on other blogs.  Being anything goes, there are a vast and wonderful array of all types of projects each week.  AND the winner last week was Avril who left a comment on my entry!  Thank you Avril and congratulations :o)

Wednesday, September 28, 2011

Santa's Matchbox Suit

Santa's Suit Matchbox


Technique:  Papercrafting

Papers:
Crimson Weave by American Crafts
black card

Other:
scrap of black ribbon
silver buckle
rhinestone brads
double sided adhesive
matchbox or matchbox die

A cute little treat box that can be whipped up in no time at all.  I recently purchased the Quickutz Matchbox Die because I was using so many matchboxes that I felt it was actually more environmentally friendly to cut my own out of card scraps and recycled boxes, than the buy the matchboxes when I don't really need the matches just the boxes.

So my box above was cut from red and black card using the die, but you could just as easily cover a matchbox with coloured card.  The buckle is the type used on wedding favours threaded through a little scrap of ribbon, and a few rhinestone brads popped in for buttons.  You could whip up a dozen or more in an hour I reckon.

Do you ever have too many ideas going around in your head?  So much so that you actually end up spending all your time thinking and none of your time creating?  I am hoping that this clean, quick little project is like a mini detox for my brain LOL

Monday, September 26, 2011

Vintage St Nick Ornament

Vintage St Nick


Technique:  Stamping

Stamps:
Bo Bunny St Nick Santa Dear

Pens, Inks etc
Vintage Photo Distress Ink
Versacolor Black Ink
Versacolor Metallic Gold Ink

Papers:
Kaisercraft Timeless Sheet Music paper
sheet music from a hymn book
corrugated card

Other stuff:
Scor-pal
adhesives
glitter
Spellbinders Circle Nestabilities

I adore this Bo Bunny stamp, it's an old release (2009) and I found it by rummaging through a neglected box of stamps at a local scrap book store.  I've stamped St Nick using black ink directly onto a hymn sheet and used black embossing ink to bring him to life.  I finally managed to find someone in Australia who had the circle nestabilities dies (yay!) and have used these to create the the circles for both Santa, the corrugated card and the backing circle.

The rosette is made from two 1.5" strips cut from the Kaisercraft Timeless Sheet Music paper, scored at half inch increments and then joined together.  The edges of just about everything have been inked with Vintage Photo distress ink.  The corrugated card is inked with just a smidge of gold ink and then has a rim of gold glitter applied.  Finally a small piece of gold cord is adhered to the back so it can be hung on the tree.

Linkies:
Make it Monday:  Always Anything Goes

Monday, September 12, 2011

Chocolate Belly Band for Blokes

Blokes Choc


Technique:  Papercraft

Stamps & Images:
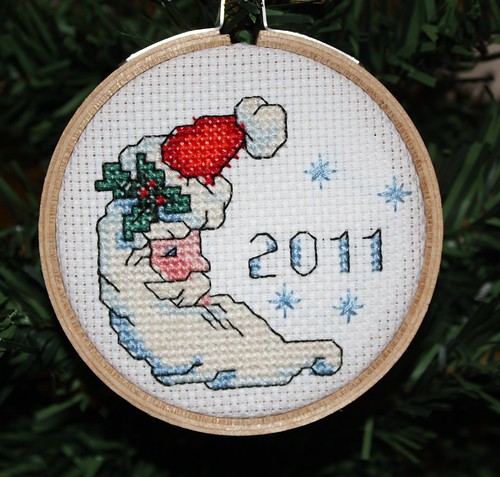
Sitting Santa Flippin Decoupage

Pens and Inks:
Peeled Paint Distress Ink

Papers:
American Crafts Crimson Weave
We R Memory Keepers White Christmas
sports pages from the newspaper

For the longest time I was a Christmas Grinch.  I hated Christmas, I felt the yearly ritual of buying socks, jocks and chocolate was a farce.  Office parties, end of school get togethers, Secret Santa, I hated it all.

That has all changed now, and I realized that for me, if I gave a meaningless gift (generic junk or gift cards) then the gesture was meaningless because I wasn't giving of myself, I was only giving of my wallet, and I begrudged the financial obligation.

So now, I love gifts that I can make quickly and easily, that don't break the budget, but have meaning for both myself and the recipient.  It's doubly good if I can give something that makes the recipient laugh or smile, because that's the best gift of all :o)

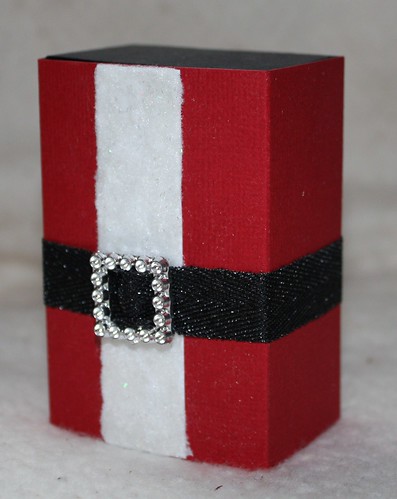
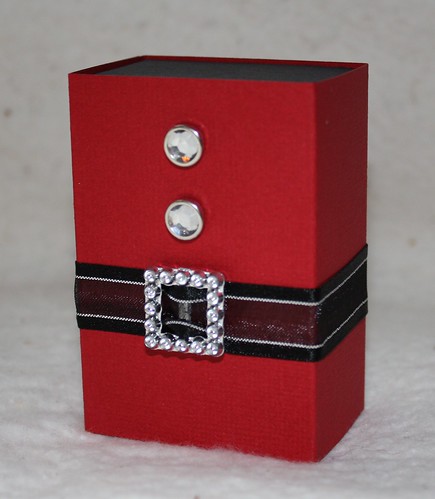
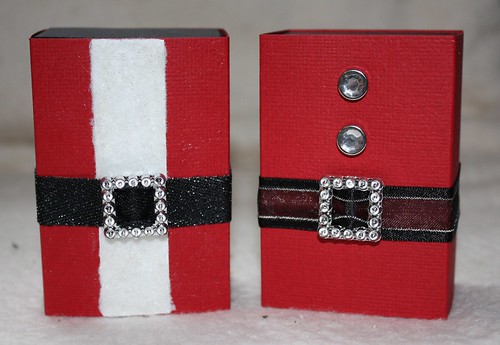
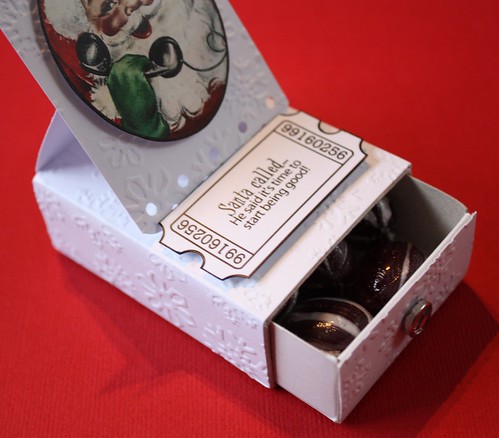
I am going to make a stash of these chocolate belly bands for last minute gifts, stocking stuffers and basket fillers, door and raffle prize donations and secret santa swaps.  The construction itself is very simple, intentionally so, I wanted these to be quick to make, easy to give and fun to receive. 

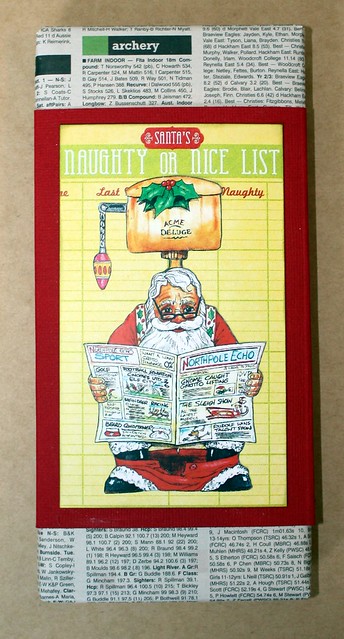
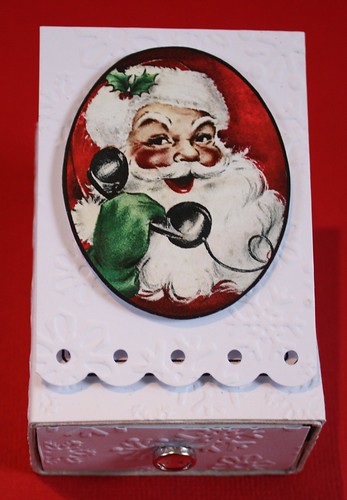
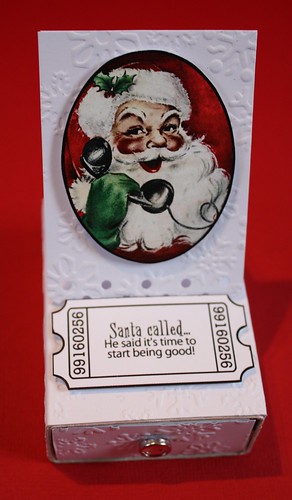
The image I chose features Santa having "a break" while reading the paper, so I picked up on the paper theme and carried that throughout the project.  Santa is placed on a "naughty or nice" list taken from a We R Memory Keepers paper called White Christmas. The edges have been inked with Peeled Paint distress ink before being placed on a red belly band which is slipped over a block of chocolate that has been wrapped in the sports pages from the weekend paper, giving this a distinctly masculine feel.

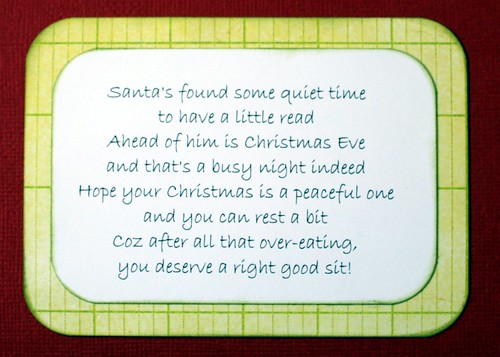
On the back is the sentiment which reads:


Blokes Choc


Thanks for looking and I hope your sense of humour is as warped as mine and you got a good giggle out of this :o)

Challenges:
Winter Wonderland:  Santa Clause is Coming to Town
Totally Gorjuss:  It's a Man Thing 
Cards for Men:  Anything but a square 
The Corrosive Challenge Blog:  Funny or Punny

Monday, August 8, 2011

Humbug! A Sweet Treat

Santa Called


Technique:  Papercraft

Materials:
white card
"Santa Called" image from here
sentiment from here
tickets from here
large matchbox

Tools:
printer
snowflake embossing folder or plate
sizzix big shot
border punch

The theme this week at Winter Wonderland is white on white, only the image is allowed to be coloured.

I looked through the other cards entered into the challengee and was in awe, but as I was looking at these beautifully embossed and die cut creations I was thinking to myself that I couldn't make anything like that because I have so few dies and tools still.

So for this challenge I wanted to do something totally different, go back to grass roots and make something that was fun, clean and crisp, and easily duplicated for very little cost.  This is also equally suitable to give to kids and boys/men of all ages.

I have used an oversized matchbox as the base for my easel card, measured the sides and face of the box and multiplied that by two, and then measured the height of the box and cut a strip of paper to suit.  I ran this through my sizzix with a Fiskars snowflake plate, but Fiskars plates can also be used with a texturing tool which is only a few dollars, and it will give the same embossed effect.  Alternatively you can buy pre-embossed and textured papers in the scrapbooking section of most craft shops.

Santa Called


The easel card is made just like any other easel card, and I made sure that I attached the base of the card to the matchbox first, then glued the wrapper of the top of that, for a neat, seamless top. 

The ticket I made myself, with a combination of the blank ticket template I listed above and the sentiment, simply merging one of the top of the other so I had the sentiment I wanted.

I lined the inside of the box and the front panels of the drawer with the same snowflake pattern, in fact the whole box was made with about half a sheet of plain white card, very economical!  A little diamond set brad forms the knob on the drawer.

Santa Called


Inside I have placed hard boiled sweets that we call humbugs, perfect for those who go around during the holiday season exlaiming Bah!  Humbug!


Saturday, April 9, 2011

Santa Cross Stitch 2011

Santa Cross Stitch 2011


Technique: Cross Stitch

Materials:
embroidery floss in the listed colours
14 count aida
small wooden embroider loop

Tools:
scissors
embroidery needle

Saturday, March 5, 2011

Santa's Belly Bauble

Santa's Belly Bauble


Technique: General Crafting

Materials:
glass bauble
red acrylic paint
black ribbon
silver buckle jewelery finding

Tools:
scissors
hot glue gun

Pour red acrylic paint into the glass bauble, swirl to coat the inside then drain out the excess. Allow to dry thoroughly.

Cut a length of ribbon long enough to wrap around the mid-section of the bauble and glue into position. Glue a buckle over where the ribbon joins. Voila! A big, round, santa belly!