Showing posts with label mixed media. Show all posts

Friday, January 26, 2018

Let Yourself Shine


This is a recycled canvas of a painting I did several years ago that I was never really happy with however I couldn't bring myself to just toss the thing away. To prep the canvas for repainting I gave it a light sand and then used an old credit card to apply texture paste over the entire surface. I then applied antiquing medium and once dry used a credit card to scrape white paint loosely over the top. I painted the girl with acrylic paints and then used texture paste to mould the dress.


Once dry I added vintage glitter glue and a phrase typed on my brand 'new' typewriter.


Never be afraid to let yourself shine.

Thursday, February 5, 2015

Art Society - Plaster Angel

Plaster Angel

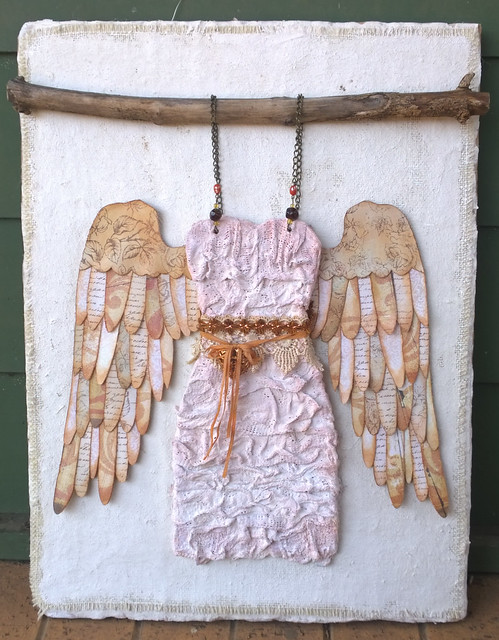
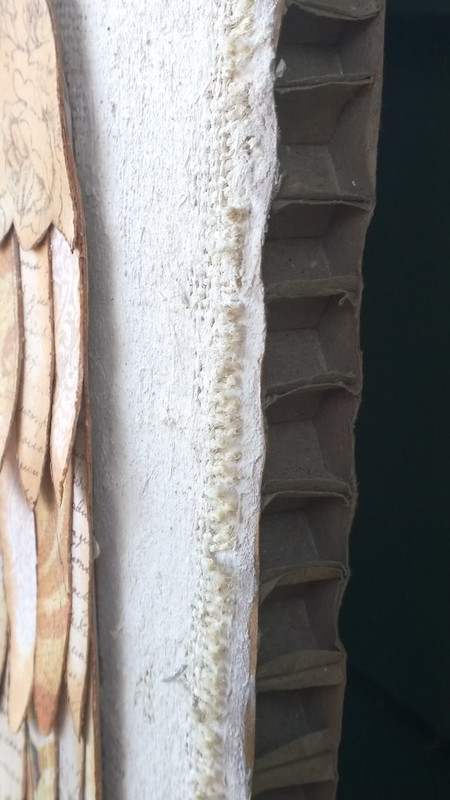
This project was taught by the fabulous Christy Tomlinson via her monthly Art Society Club. This project taught us how to make our own canvas using burlap and plaster of paris to cover a piece of recycled cardboard. You can see that I started with a very thick piece of corrugated cardboard as my base.

  Plaster Angel

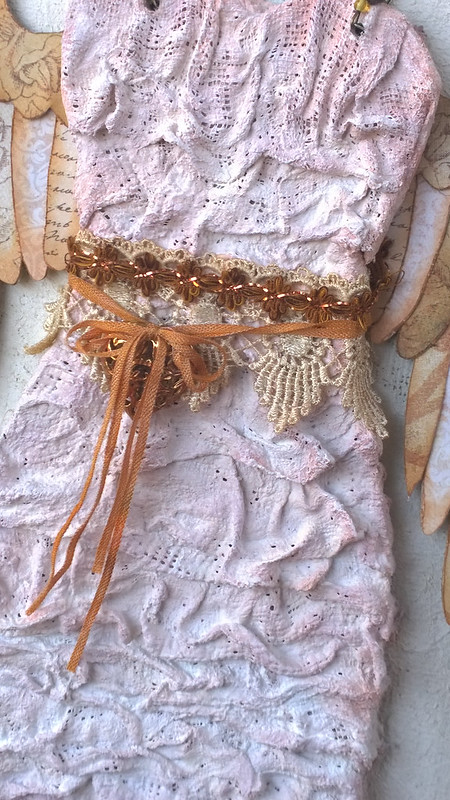
The dress form is also plaster wrapped around a cardboard base. I used pre-purchased plaster bandages and they are just fabulous. They become silky and buttery very quickly and are a dream to work with.

  Plaster Angel

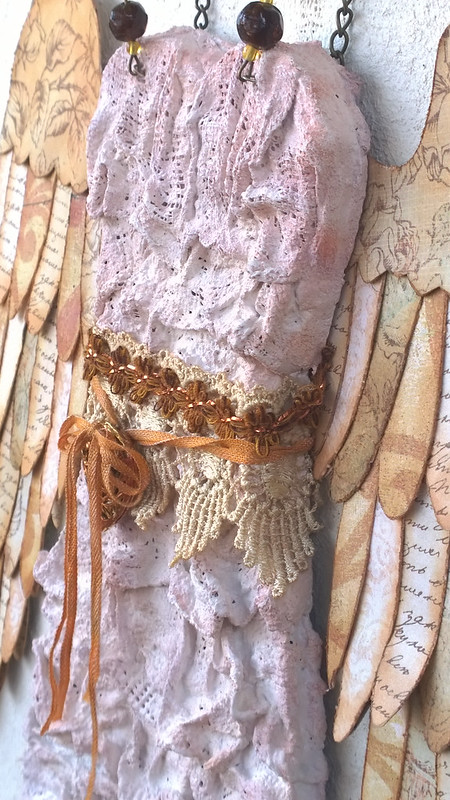
The plaster strips start take about 15 minutes to start to harden, and a good day to dry thoroughly. I coloured mine with distress inks and gesso. The plaster sucked up a lot of the colour, and although it doesn't look like it, the dress has about 5 coats of colour added to it.  Look at all that delicious texture!


Plaster Angel


The wings are cut from various scrapbook papers, tattered with a distressing tool and inked with distress inks. Each of the feathers are cut individually and glued down in layers to give dimension.
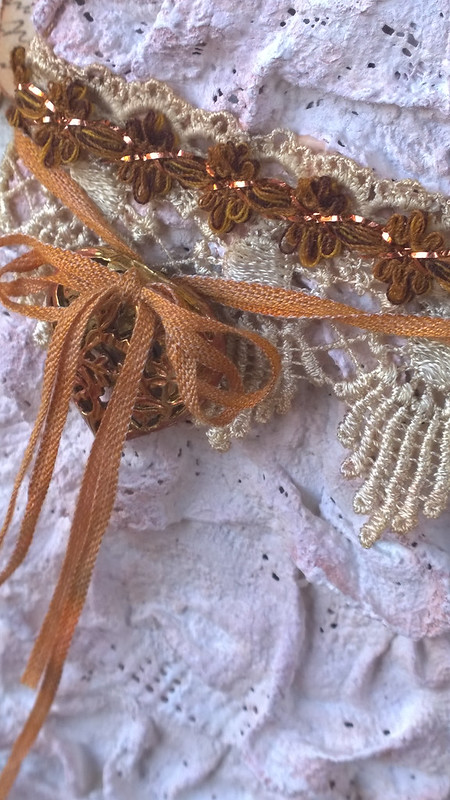
She is finished with a few pieces of hand dyed lace and ribbon with a metal heart taken from a recycled piece of dress jewellery.

Plaster Angel

Thursday, January 22, 2015

Life Book 2015 Balance

Life Book 2015 Balance

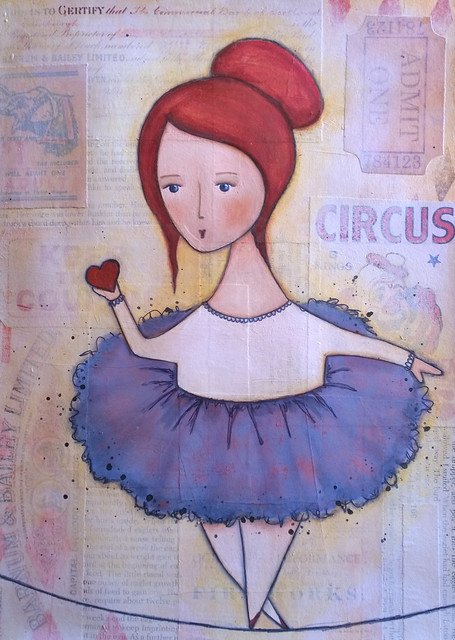
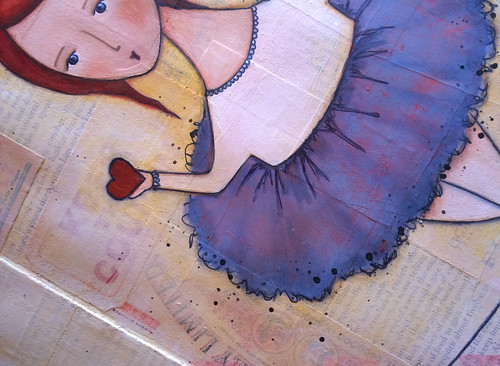
Our guest teacher this week was Patti Ballard  who presented a delightful ballerina on a tight rope painted over collage with the quotation "Courage Dear Heart".

I adjusted the theme to suit me and changed the ballerina to be a full figured model rather than the traditional very thin girl.  I am really noticing that there is little in the way of body positive messages and imagery out there and I want to change that!

 Life Book 2015 Balance


Have a fabulous week!

Wednesday, January 14, 2015

Art Society - Standard Of Grace

Grace Tag


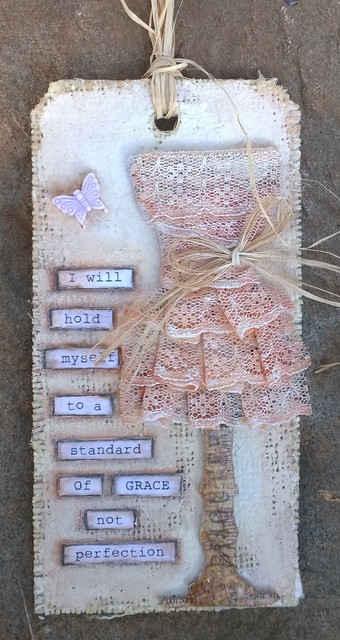
I just love Christy Thomlinson's artistic style, unlike mine it's so free and spontaneous.  This project is inspired by her monthly Art Society Club.

The tag is covered with burlap and plaster of paris.  The dress form is a Tim Holtz die covered in book paper.  The dress is made from strips of lace dipped in PVA glue, then dyed with distress ink and dry brushed with acrylic paint.

Wednesday, January 7, 2015

Life Book 2015 - Joy Jar

Joy Jar

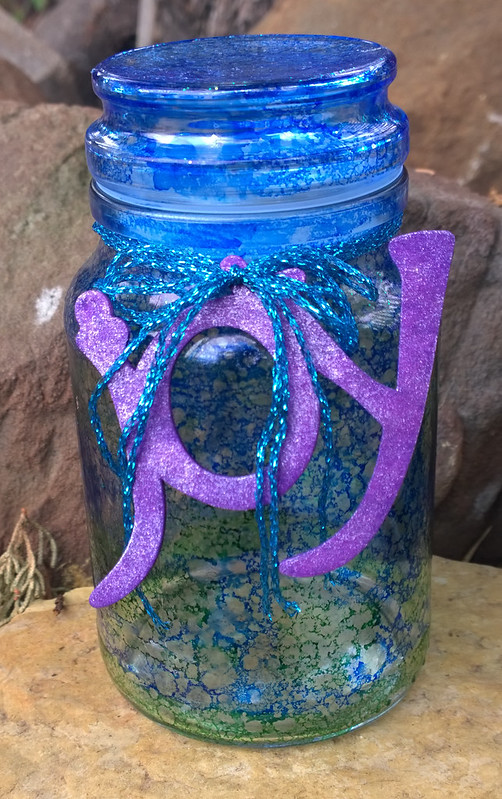
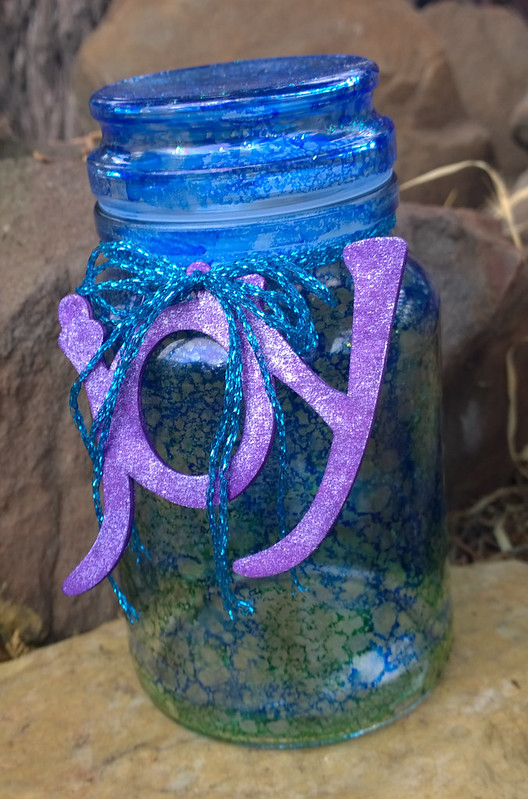
Week 2 of Life Book introduces a fun project called the 'joy jar'.  The idea is to keep the jar somewhere prominant and every time something joyous happens write it down on a slip of paper and pop it into the jar.  Continue to fill the jar throughout the year, then on New Years Eve open it up and reminisce about all the joyful things that happened throughout the year.

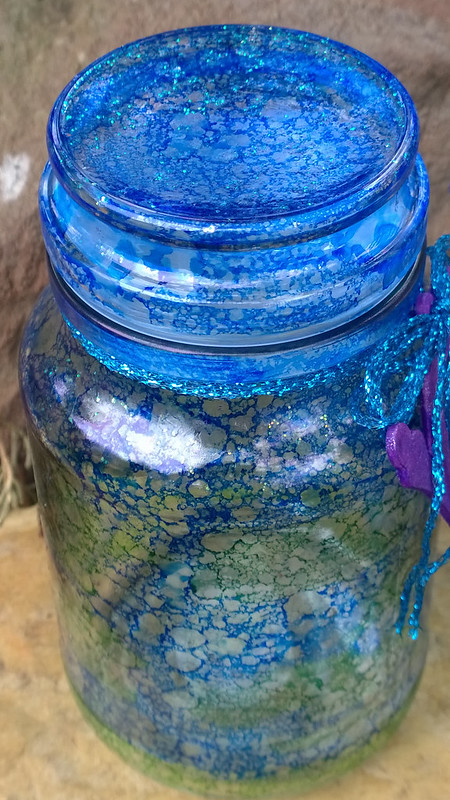
The tutorial showcased a collaged jar, but I wanted my jar to remain transparent so that you could see the scraps of paper inside as it fills up.  I used copic markers to colour the jar in blues and greens and then spritzed it with isopropyl alcohol to get the mottled effect.  I really loved the bubbly effect this technique created.  The copic markers are alcohol based, once dry they won't smear or smudge.  I also added a sprinkling of fairy dust (glitter).

Joy Jar

The 'joy' tag is a wooden ornament I bought at a thrift shop a few years ago, sprayed with ink and then rubbed with iridescent medium to give it some shimmer.  This was a really simple project, but I think the end result was really special!  Have yourselves a joy filled day!

Joy Jar

Sunday, February 2, 2014

Life Book 2014 - Sugar Sugar

Life Book 2014 Week 5 


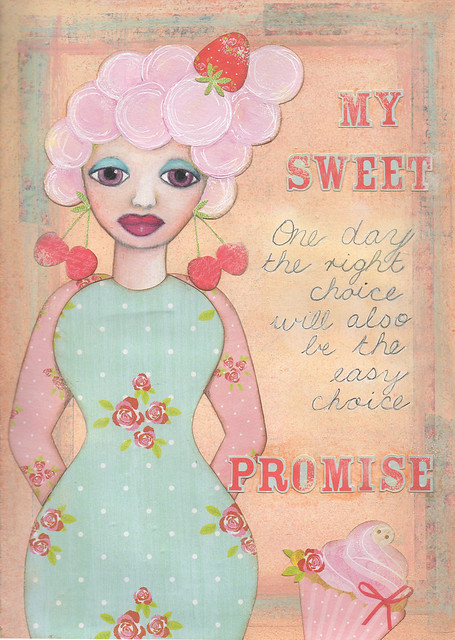
Week 5 of Life Book 2014 is with Marieke Blokland.  Her theme was all things sweet!  Candy, chocolate, cakes and lollipops with the thought being that these represent the sweet things in your life. 

I went in a slightly different direction and used my page to highlight the struggle between making the right dietary choices, and the promise that one day the right choice will also be the easy choice.  I wish I liked my handwriting more!

Thursday, January 23, 2014

Trying To Read - Altered Book

Altered Book 

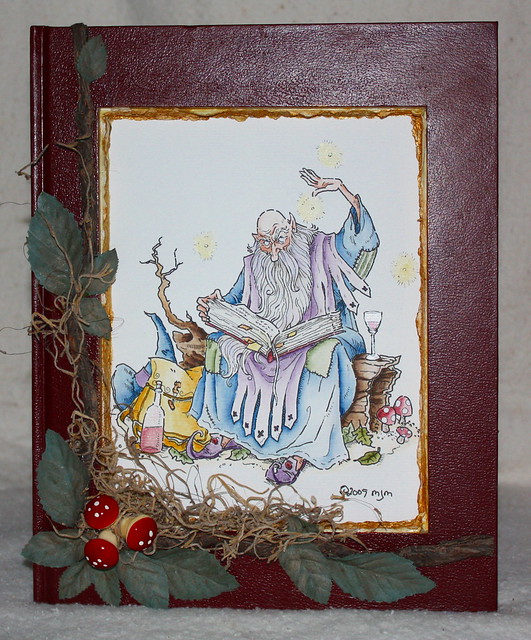
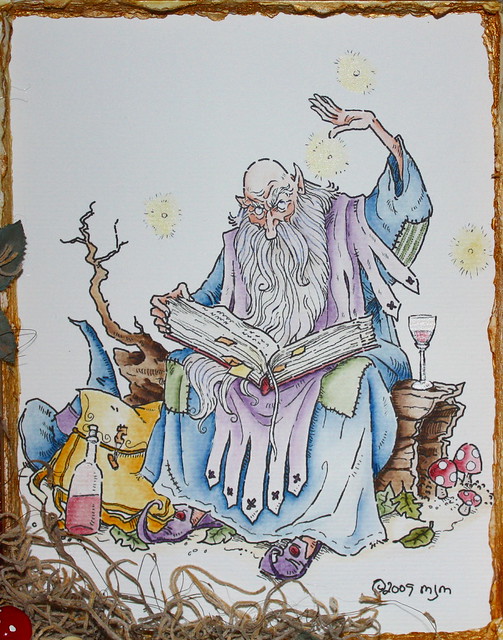
I bought this fabulous digital stamp from Mo Manning titled "Trying to Read" just for the sheer joy of colouring it in, and it was after it was finished I wondered what on earth I was going to do with such a large scale image.  Then like a smack upside the head inspiration came and I knew it was meant to be put into an altered book!

The image itself is printed onto watercolour paper and I used Distress Markers and a Tombow Blender pen.  It takes several layers of colour to build up the shadows and even then it's still quite soft, but I love that about watercolour.  I have also added a layer of iridescent water colour to the bottle, glass and fireflies.

To make the book itself I cut a rectangle out of the hard cover and using a ruler and sharp exacto knife I cut a criss cross through several layers of the pages at once.  I then unceremoniously ripped these out which creates the fantastic jagged edge frame.  Once I had torn through about half the book to get the depth of layering that I wanted I placed a sheet of plastic between the pages where I wanted the image to go and used Mod Podge to adhere the inner torn edges and the outer page edges together.  When dry I brushed gold paint on the edges.

Altered Book

The front layer of the book is decorated with a branch made from paper ribbon, some silk flowers, a bit of oakmoss and some plastic toadstools torn from an unloved and gaudy Christmas decoration.

Altered Book

When all of those layers were dry I removed the sheet of plastic and slipped the finished image into the middle of the book and sealed it shut with one final layer of Mod Podge.  Doing it this way meant that none of the hot glue, paint or adhesive accidentally got on my precious image.

This book has picture hangers on the back so it can be hung on the wall, but it could also easily be displayed on a book stand.  I enjoyed this so much am already thinking about my next one!

Linking this up with:

Mo's Challenge Blog: Lots of Layers
Make it Monday:  Anything Goes
Simon Says Stamp:  A is for...

Monday, January 31, 2011

Back To School Chalkboard

Back To School


Technique: Painting, Decoupage, Mixed Media

Materials:
wooden coaster
acrylic paints
all purpose glue and sealant such as Modge Podge
alphabet chipboard cutouts
scraps of red and green fabric
flexible wire


Tools:
paintbrush
scissors
sandpaper
wire snips
needle nose pliers
hot glue gun

Today was the first day back at school after more than six weeks of holidays! As much as you love your kids, by the end of the holidays they are bored and restless, and I am usually frazzled! I only have one child of school age, and he started upper primary today. The little man was quite excited, and proclaimed he felt rather "upper".

Give the coaster two coats of black acrylic paint, sanding lightly between coats, and then a coat of sealer.

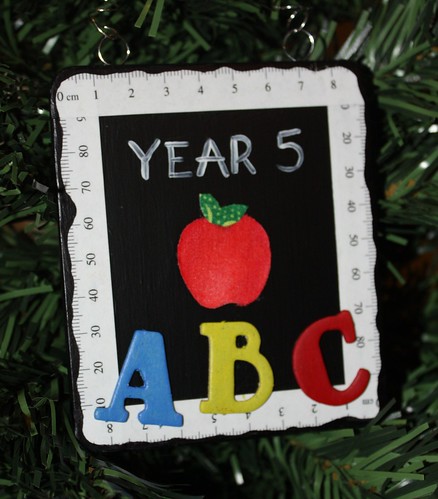
This site has a wide variety of paper rulers available to print out. In Australia we are metric, but there are imperial rulers available also. Print out the ruler of your choice and cut strips that will become the border of your "chalkboard" (a little trivia here in Australia we call it a black board, because, well, it's black!!). Once your ruler strips are trimmed, glue into position and allow to dry.

Paint your chipboard letters in bright primary colours and allow to dry. Glue into position along the bottom of the board. Cut a small circle from the red fabric for the apple, and a few leaf shapes from the green fabric. Glue these into position in the middle of the board. With white acrylic and a fine brush, write the year or grade level of your child. Allow the entire project to dry thoroughly and give a finishing coat of sealer.

Wrap the wire around a pencil about a dozen times and then slip off. Bend and stretch as necessary to form a hanger. Make two loops of wire and hot glue to the back of the coaster, then attach the hanger through the loops.

On the reverse of the coaster, which I haven't photographed for privacy reasons, I have glued the school logo, and also made a note of what his teacher's name is and what class room number he is in for this year.

Wednesday, January 26, 2011

Give Me A Home Among The Gum Trees

Koala Ornament


Technique: Decoupage, Painting, Modelling, Mixed Media

Materials:
glass bauble
Australiana wrapping paper
acrylic paints
green polymer clay
gumnuts


Tools:
curved cuticle scissors
Liquitex Gloss Medium & Varnish
paintbrush
kitchen sponge
hot glue gun

Mix about two tablespoons of white acrylic paint and a pea sized blob of blue acrylic paint and swirl lightly together to get a marbled effect, it should be the consistency of pouring cream. Pour into the glass ornament, swirl around to ensure the entire inside is covered, then drain the remainder out. Allow to dry overnight.


These cutting instructions are for right handers, lefties need to reverse it around.  Hold the image in your left hand and the scissors in your right, make sure that the curve of the scissors are pointing toward your right also, you want the curves of the blades to be cutting away from your picture, not into it.


First you want to cut away all of the background, so that all you are left with is the koala.


He is not a very big fellow, but even a small image can present a challenge when being glued to a curved surface.  If you tried to glue him as a whole image, you would find that the bulkiest areas of the image would crease and buckle.  What we need to do is identify which areas we suspect that will occur in, and clip into them.  The theory is much like clipping the seam in a garment so it lies flat.

The best areas to cut are along the natural lines in your image, these will become invisble when glued down and give the appearance of a flat, seamless image.  For our koala we would cut along the dotted lines indicated.


Now you have quite a floppy and flimsy piece of paper.  When we glue him down, because of our cuts, little pieces of him will tuck in and overlap, this is exactly what we want to happen.  We do, however, need to make sure that we glue him down so that the right bits are tucked away.  For example, if we glued his head down first, then when it came time to do his chest that would overlap up over his nose, looking out of place.  So identify which portion of the koala is the most background and start there, which is the chest area just under his nose.

Start with a small brush dab a little liquitex directly onto the glass ornament and then using your fingers to keep the area you don't want glued yet lifted, brush the first area into place.  Now add a little more liquitex and smooth his face into position.  Keep his arms lifted up, smooth his right leg down, then his tummy, then the arms and shoes.  He should now be loosely held to the glass with Liquitex.  Give him a good checking, ensuring that there are no gaps between the slits you have made in the paper and everything is in the correct order.  Once you are satisfied apply firm pressure with a barely damp sponge over the top of the image, working a small section at a time.  This is important to ensure that the image flattens and that all air bubbles are removed.  Once he is smooth and fully secured set aside and allow to dry overnight.

The next day, using a clean, damp sponge, gently wipe over the top of him and clean the surrounding glass.  You can now place another coat of Liquitex directly over the top of him as a final coat of sealant. 

To finish:

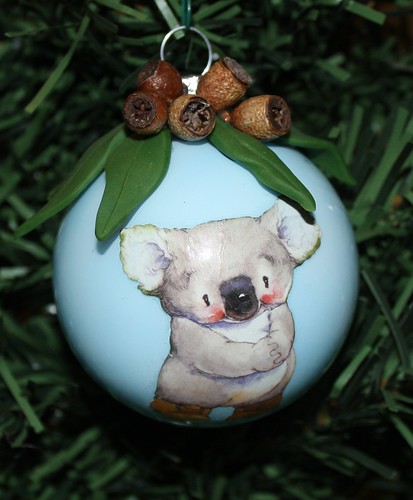
Condition and soften a small amount of green polymer clay. Run it through a pasta machine on the widest setting, or roll out with a brayer. Cut long, thin leaves to resemble gum leaves. Make a mark down the centre for the vein and curl the leaves a little to make them appear more natural. Place onto a sheet of baking paper and cure in oven according to manufacturers directions. When cool, apply the leaves and gumnuts to the top of the bauble with hot glue.

Happy Australia Day!!