Showing posts with label romantic. Show all posts

Saturday, March 19, 2011

Rose Petal Bauble

Rose Petal Bauble


Technique: General Crafting

Materials:
clear glass bauble
dried rose petals
lace and ribbon embellishments

Tools:
hot glue gun

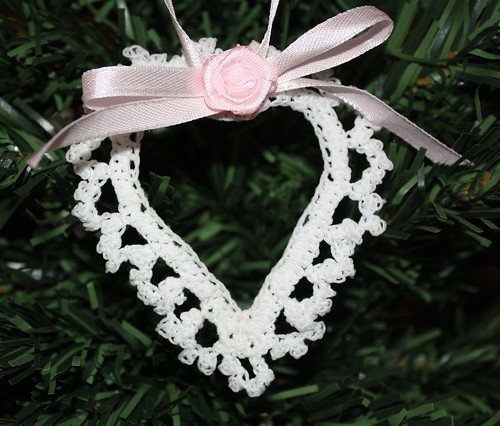
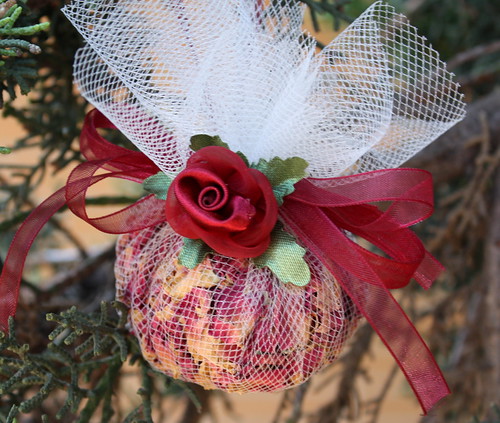
These glass baubles are excellent for showing off pretties, and what could be prettier than roses! Fill the bauble with rose petals and replace the hanger. I used hand dyed lace, I have a huge stash of it from way back when I was teaching tassle making, but any good fabric store should have a large range to choose from. Hot glue on lace, ribbon roses and any other embellishments you like.

Thursday, March 3, 2011

Crochet Heart

Crochet Heart


Technique: Crochet

Materials:
crochet cotton size 10
fabric stiffener
hot glue

Tools:
size 5 steel crochet hook

Round 1: Ch 56, join to form a ring, ch 3, 2dc in base of ch 3, [2 hdc in next ch, hdc in next ch] 12 times, 2 hdc in next ch, ch 3, sk 2 chs, sc in next ch, ch 3, sk 2 chs, rep [] 12 times, 2 hdc in next ch, join in 3rd ch of beg ch 3.

Round 2: Ch 1, sc in same place [{ch 4, sl st in 4th ch from hook} 4 times], sk 1 st, sc in ea of next 2 sts, *rep between [], sk4 sts, sc in next st*, rep from * to * 4 times, **rep between [], sk 3 sts, sc in next st**, rep from ** to ** twice, ch2, sc in centre sc at top, ch 2, sc in next hdc, rep from ** to ** 3 times, rep from * to * 5 times, join in beg sc, fasten off.

Follow the manufacturers directions for using the fabric stiffener. Shape in the form of a heart and allow to dry thoroughly. Embellish as desired.

Wednesday, February 16, 2011

Rose Petal Sachet

rose petal


Technique: General Crafting

Materials:
30cm circle of tulle
dried rose petals
rubber band
ribbon
silk or dried rose buds

Tools:
Scissors

A very pretty, and fragrant, ornament that can be hung to add a touch of romance and elegance to a room. Coupled with a vial of rose fragrant oil, it makes a lovely gift.

Lay the circle of tulle on a flat surface and place a handful of rose petals in the centre. Draw up the edges firmly around the petals and secure with a rubber band. Decorate with ribbon, silk or dried roses, baby's breath, whatever takes your fancy.

Wednesday, January 12, 2011

Cherub Tag

Cherub Tag


Techniques: Paperclay, Scrapbooking

Materials:
paperclay
luggage tag, either chipboard or strong card
scrapbooking embellishments
PVA glue
sealant
acrylic paints

Tools
Brown Bag Cookie Mold, or similar
rolling pin
paint brushes

With damp hands knead a golf ball sized amount of paperclay until smooth and pliable. This doesn't take long, paperclay is such a lovely medium for this type of project. It's easy to handle, forms into moulds very well, air dried, lightweight, easy to paint.

Place the ball of paperclay into the centre of your cookie mould and squish down firmly. Use a rolling pin to force it into all the creases and to ensure it reaches the edges. Once you have rolled it you should be able to gently peel back a corner and lift it out of the mould. Trim edges and allow to try.

Basecoat entire cherub plaque with a basecoat of white acrylic and allow to dry. Then paint in desired colours. Allow to dry overnight and give front and back a coat of sealant.

Embellish luggage tag with scrapbooking elements. Use the PVA glue to stick the cherub plaque to the tag. Allow to dry overnight and add a hanging cord.