Technique: Papercraft
Stamps:
Drew's Cupcake digi by Designed to Delight
Two Apples digi by Designed to Delight
Pens & Inks:
Reds:
Greens:
Denim Blue: B91, B93, B95
Sky Blue: B24, B26, B28
Flesh: E0000, E000, E02
Red: R22, R24, R27
Green: G03, G05, G07
Grey: C0, C3, C5, C7, C9
Bundled Sage Distress Ink
clear Spica Pen
glitter gel pens
Papers:
Waiting for Santa Collection by Webster's Pages
Other:
old CD
wide double sided tape
double sided foam adhesive
ribbon
Sparkly Fluff
Rock Candy Stickles
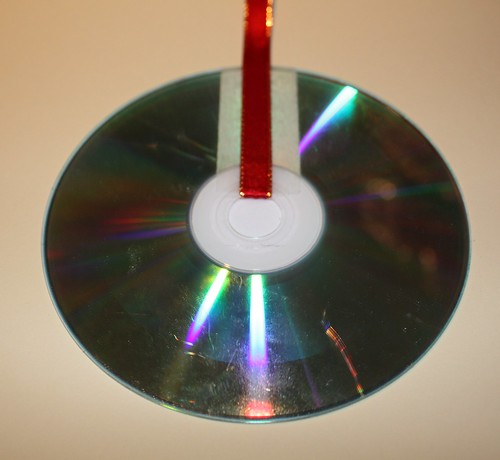
We have stacks and stacks of old compact discs lying about the place, quite literally in the hundreds I would guess, which predate the portable hard drives that now store all our data. I have been itching to find a way to use one, this challenge was perfect :o)
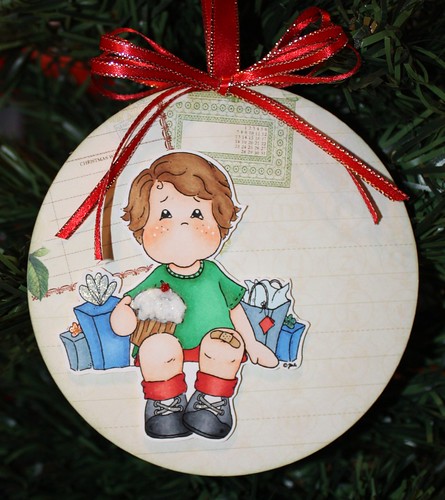
Using the CD as a template, cut two circles from your designer paper. I used the Waiting for Santa collection by Webster's Pages, the paper has ornaments with the alphabet and drawn lines giving a very school book type feel, and this is going to be an ornament for my son's teacher.
I used strip of double sided tape on each side of the CD to secure the ribbon into place, sorry for the terrible photo, I should have done the non reflective side first, but I wanted to show you how I secured the ribbon.
Once the ribbon was secure I covered one side with double sided tape and stuck the first circle of paper into position.
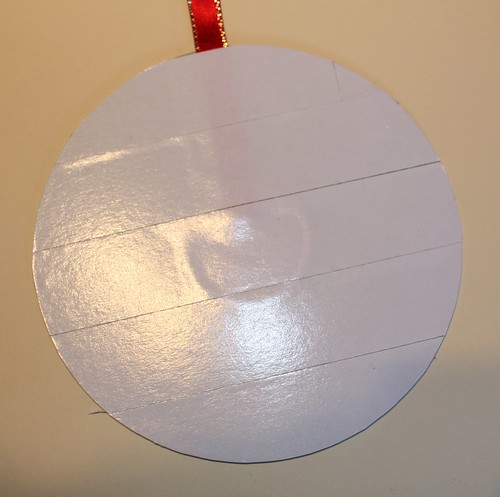
The edges were trimmed with scissors, and then I took an emery board to the edges and lightly sanded to remove any overhang still remaining and smooth the edges.

Both sides of the CD are covered in the same way, then the edges inked with Bundled Sage distress ink.
One side of the ornament has the Drew with Cupcake digi sitting to one side, I've used sparkly fluff and glitter glue to make it look less like a birthday cupcake and a little more Christmas-y. I haven't put on much in the way of embellishments, because the blank space you see there next to Drew, will be where my son writes a personal message to his teacher.
The other side of the ornament has a Christmas wreath made from apples (apple for the teacher). I used Gimp to make the background on the apples digi transparent, and then used Word to fiddle about until I had a wreath shape I was happy with and then after printing and colouring, fussy cut it to make a photo frame.

The finishing touch is a double bow on each side, made from the same ribbon as was used to create the hanger, but a thinner version.
Challenges:
Christmas Stamping All Year Long: Teacher's Pet
ABC Christmas Challenge: R is for Recycled plus Ribbon or Rhinestone
Crafty Ribbons Challenge: Christmas Cheer in September
Papertake Weekly: Anything Goes