Showing posts with label magnolia. Show all posts

Tuesday, May 1, 2012

Twas The Night Before Christmas

... when all through the house
Not a creature was stirring, not even a mouse.
The stockings were hung by the chimney with care,
In hopes that St Nicholas soon would be there.

Magnolia Stocking


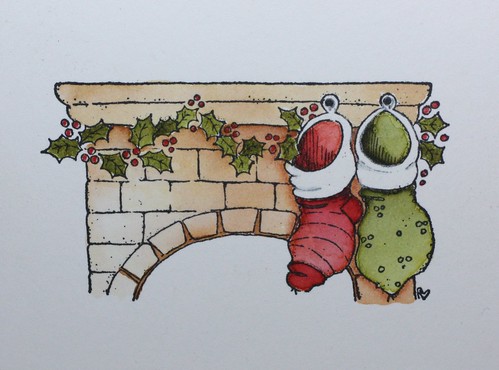
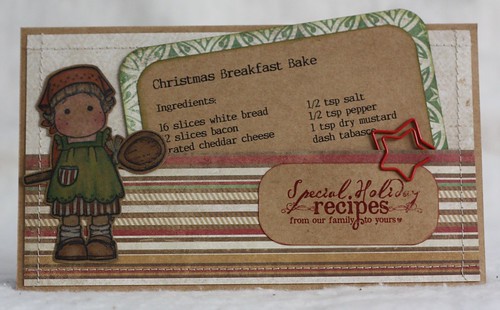
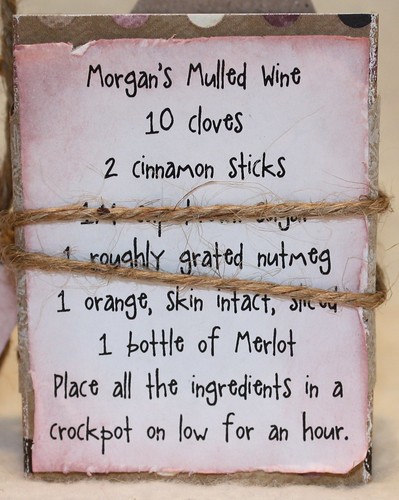
It was my turn to choose the theme this month at Christmas Crafting! and I chose the poem Twas The Night Before Christmas.  

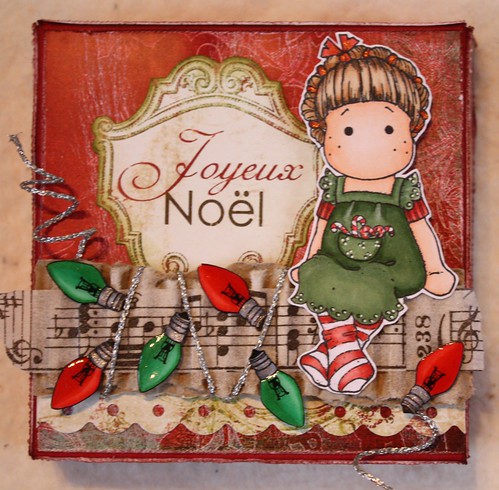
I tried a new technique with this project.  The stamp is from Magnolia, and I stamped that onto Bristol Board using black Stayz On ink.  I then used Distress Inks and a water brush to colour the main parts of the image.  Once completely dry, I used Prismacolor pencils to deepen the shadows and put in any fine work such as the berries.

I used Bristol Board rather than watercolour paper because it's intended for multimedia, and it takes the addition of the coloured pencils better than traditional watercolour paper does.  I can see where a few watermarks have been left, but overall I was happy with this as a first attempt and can see the potential for a lot of creativity, and I feel I had a lot more control of the inks using the Bristol Board.

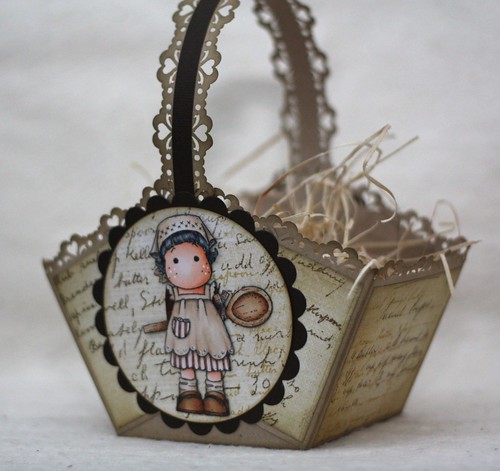
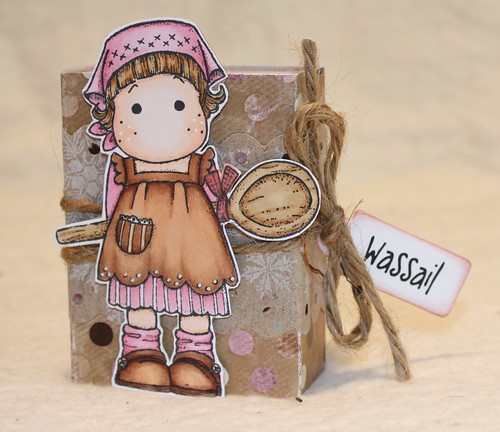
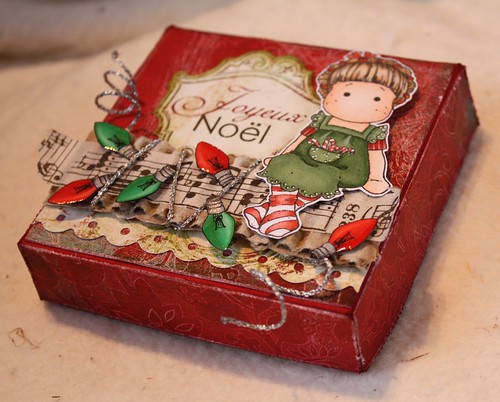
The box that I chose to decorate is an upcycled box from Domino's Pizza, they use these for their dippers and sweets.  The manager of my local store was kind enough to give me some brand new ones to play with.


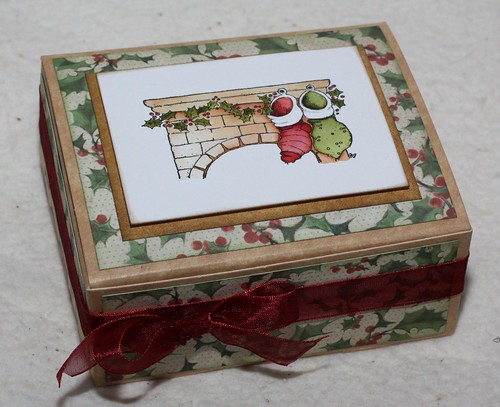
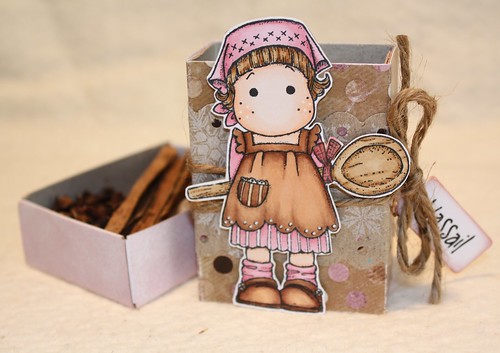
These little boxes are great for altering.  They have a lovely parchment colour as the base, the commercial branding is easily covered with paper, and the inside is wax coated, making it ideal for giving food treats.

I hope I have given you some inspiration this month, why not try altering or upcycling a project! 

Monday, February 6, 2012

Christmas Baking with Tilda

Tilda with Recipe


Card Positioning Systems is celebrating their 5th Anniversary by releasing a sketch a day for 15 days.

This card is my interpretation of the day seven sketch.


I've used Kraft card as the base for this card (yes again!) but this time it's a darker Kraft, much darker than the Bazzil version.  The patterned papers are by Kaisercraft, part of the December 25th collection and have a lovely, muted tone to them that works very well with the Kraft.

I struggled a little colouring Tilda on the darker Kraft, the Prismacolor pencils weren't really doing what I wanted them to do and in sheer frustration I dampened a cloth with baby oil and wiped over the whole thing, with the intent of taking it back to the base, and voila!  I had exactly the look I wanted :o)

Tilda with Recipe


The recipe card is removable, with the striped bar across the bottom acting as a sleeve for the card.  If you are interested in my recipe I posted it back in December last year, you can find it here.

The sentiment is a free download from the Shabby Princess, it came as part of a holiday recipe kit.

This card is probably my favourite of all the ones I have made for the CPS Challenges so far.  The Tilda with spoon stamp is an all time favourite of mine, and the colours and vintage feel all worked really well.

Thursday, January 5, 2012

Tilda Gift Basket

Tilda Gift Basket


Materials:
Kraft card
Cookie Dough by Kaisercraft
Spellbinders circles and scallop circle dies
Frayed Burlap Distress Ink
Magnolia Tilda with Spoon rubber stamp
Copic markers
border punch

This project felt really good to make, as it's my first attempt at colouring in months.  My thumb is still quite rigid so my technique is a little different, but I was still relatively pleased with the results I got.

I followed >this< tutorial for putting the basket together.  The measurements included in that tutorial are in centimetres, and my Scorpal is in inches, so I cut my 12" x 12" Kraft card down to 10.5" x 10.5" and scored it at 3.5" and 7" on each side.  Any measurement divisible by 3 would work, e.g. for a smaller basket cut a 6" square and score it at 2" and 4" on each side.

Tilda Gift Basket


Before assembling I used a heart shaped border punch by Fiskars on the uncut edges, and I used the same punch to create the handles.  All of the edges have been inked with Frayed Burlap distress ink.


Tilda Gift Basket


Challenges:


Magnolia-licious Highlites - Anything Goes
Magnolia Stamp Lovers - use Kraft paper
Stampavie & More - Hearts


Monday, September 19, 2011

Wassail Package

Wassail Package


Technique:  Papercraft

Stamps:
Chef Tilda
snowflake stamp

Pens & Inks:
Copic Markers
Dusty Pink: R81, R83, R85
Earth Tones: E11, E13, E15, E17, E19, E21, E23, E25, E29
Flesh: E0000, E000, E02
Sakura Gellyroll Pen in white
Versacolor in white

Papers:
brown craft paper
spotty patterned paper is a free download from here

Other:
Threading Water punch by Fiskars
string

Wassailing is the pre-cursor to the Christmas tradition of caroling, wassailing refers to a traditional ceremony that involves singing and drinking the health of trees in the hopes that they might better thrive.

Wassail the beverage is a hot, mulled punch often associated with Yuletide. Historically, the drink was a mulled cider made with sugar, cinnamon, ginger, and nutmeg and topped with slices of toast. Modern recipes begin with a base of wine, fruit juice, or mulled ale, sometimes with brandy or sherry added. Apples or oranges are often added to the mix. 

The tradition, as it was taught to me, included villagers going around from house to house with a wassail bowl (a toasting mug).  At each house their bowl would be filled with a warm alcoholic cider and they would give a loud WASSAIL! (the toast).  There are several versions of wassailing songs that were sung as the wassailers went from door to door, I imagine the more often their wassail bowl was emptied the rowdier they became!

Wassail (mulled wine) is something I make when we celebrate "Christmas in July" or the mid-winter solstice.  One of my friends has often asked me for the recipe, but I have always told it to her verbally, you know how it is "oh its just a bit of this and a bit of that", so this is my gift to her.  Cooking is one of her passions, and she spent a great deal of her childhood in Holland, so little Chef Tilda felt perfect for her.

Wassail Package


I am entering this into the Winter Wonderland challenge this week, which is Girly Christmas (must have an image of a girl).  I doubt it's fancy enough to win anything other than a big smile at Christmas, but that's worth more than anything :o)

Wassail Package


Morgan's Mulled Wine
10 cloves
2 cinnamon sticks
1/4 cup brown sugar
1 roughly grated nutmeg
1 orange, skin intact, sliced
1 bottle of Merlot
Place all the ingredients in a 
crockpot on low for an hour.

Saturday, August 13, 2011

Christmas Lights

Tilda with Christmas Lights


Technique:  Papercraft

Materials:
Free christmas lights digi here
Tilda sitting with candy rubber stamp
Momento Tuxedo Black ink
Copics markers
silver gel pen
Glossy Accents
silicone
corrugated card
designer paper
tissue tape
silver beading wire
adhesive


Tools:
scallop border punch
scissors

This cute little Tilda isn't perched on a card, but rather a 4" pizza box, you can find an excellent tutorial at Split Coast Stampers.


Tilda with Christmas Lights


The Joyeux Noel comes from a Bo Bunny paper, fussy cut around the edges and inked up a bit, and the scalloped bottom is cut from the same paper.  Tilda's perch is a strip of corrugated card, inked with white versa ink and then a strip of tissue tape is places across the middle.  A length of silver beading wire has been twisted around the strip of card and little curlicues formed at top and bottom.


Tilda with Christmas Lights


The Christmas lights are a free digi you can find here.  I reduced them in Word so they were size appropriate and then once coloured I used a silver gel pen on the screw part of the bulb, and glossy accents on the glass part.

Going back to my old habits I have used silicone to adhere Tilda and the light bulbs.  Silicone is used in 3D decoupage (also called paper tole) and it is preferable to mounting foam as you can use tiny little amounts, it adheres to just about anything rapidly and the pieces can be angled for further dimension.  The only thing you must do if you use silicone is seal the back of your images with an acrylic medium (glossy accents will work), otherwise it will form a stain over time.

Challenges:
Winter Wonderland:  Light It Up