
I didn't put all of the decorations I made during the year on the tree, I was a little concerned at the 6 month old mastiff puppies finding them tasty treats. I did add a few of my favourites, high up on the branches where I thought they would be safe. The decorations that received the most comments were by far the crochet snowflakes. They were beautiful, delicate and glittering as they wafted around gently in the air conditioned breeze. This year I want to make a few dozen more, for both my tree and as gifts for my family, and by far my favourite site for fabulous patterns is Snowcatcher.
There are dozens of beautiful patterns to be found there, all of them free for personal use. If you would specifically like the pattern I used for this snowflake you can find it here.
Finishing

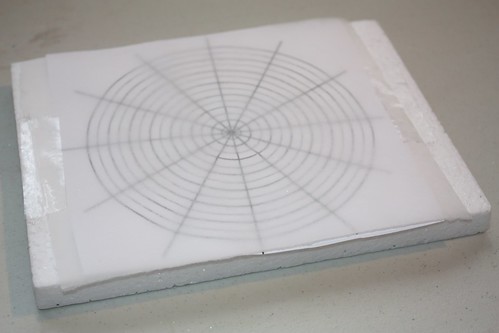
Print the above image out onto ordinary paper. Tape the piece of paper to a sheet of styrofoam. Tape a piece of baking paper or wax paper over the top of that. This creates a non stick blocking template. The above grid allows you to easily line up your snowflake spokes so they are symmetrical.
In a small bowl dilute a little white glue until it is the consistency of pouring cream. Saturate the snowflake and squeeze well to force out any excess. Make sure you are using rust free pins, and pin to your template. Give a sprinkle of glitter if you like, I like quite a bit as I use them on the tree and really makes them sparkle. Allow to dry for 24 hours and then remove the pins and peel away from the paper. You can re-use that printed template several times.
So pretty. I was lucky and my Mum has crocheted a few for me and they are attached each year to our curtains.
ReplyDelete