Monday, February 28, 2011

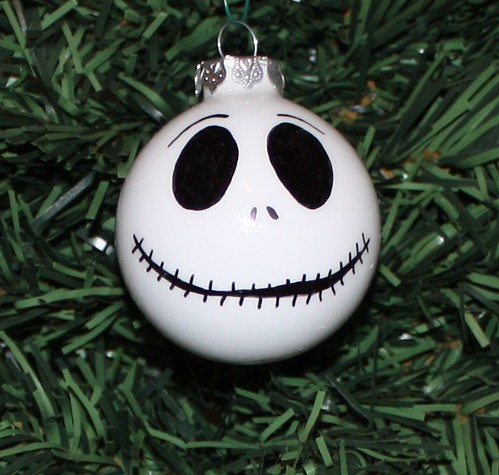
Jack Skellington Part 2

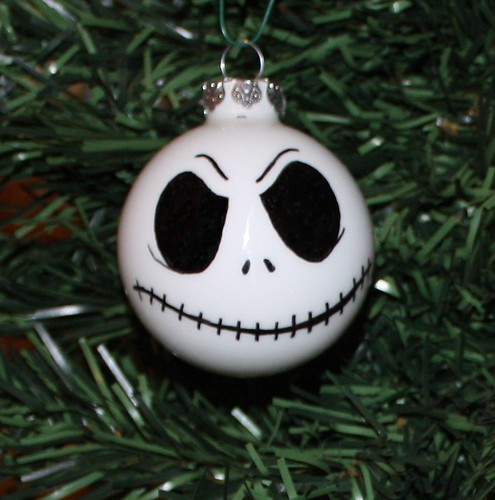
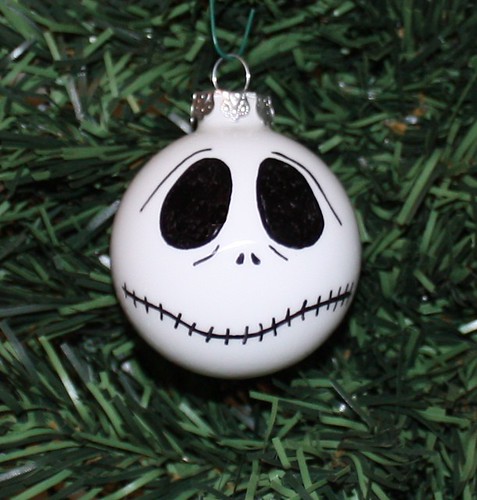
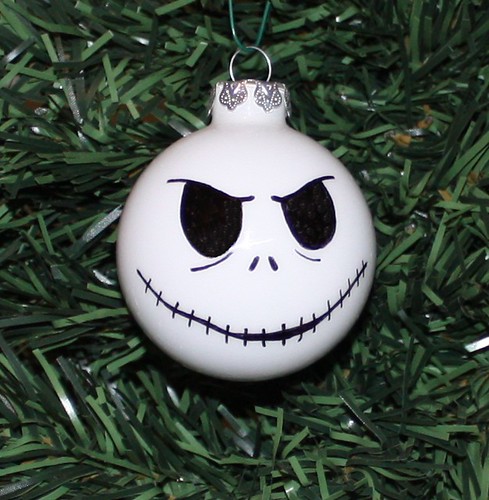
Jack Skellington Ornament


Technique: Freehand Drawing

Materials
white acrylic paint
glass bauble
Bic Mark It pens

Add a little water to the white paint until it is the consistency of pouring cream. Pour into the bauble and swirl around to coat the inside fully and then tip upside down and drain. I have a little lab beaker that I use for this, works a treat!

Draw Jack's details onto the bauble with a black permanent marker. If you make a mistake simply dip an orange stick or toothpick into some isopropyl alcohol and rub away the boo boo. This is the second in a series of Nightmare Before Christmas Ornaments.

Set 6 Jack Skellington Ornaments


Jack Skellington Ornament

Jack Skellington Ornament

jack3Jack Skellington Ornament

Jack Skellington Ornament

Jack Skellington Ornament

Jack Skellington Ornament

Sunday, February 27, 2011

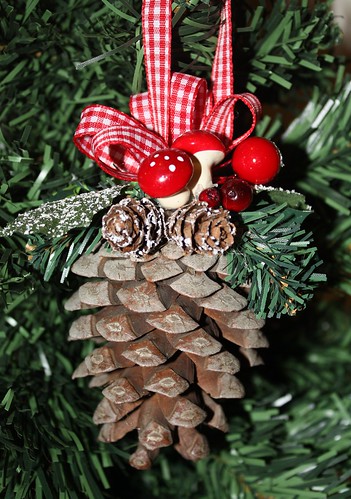
Pine Cone Ornament

Pine Cone Ornament


Technique: Basic Crafting

Materials:
pine cone
embellishments
glue

Tools:
hot glue gun

This is another ornament where I pulled embellishments from broken or trashy Christmas ornaments and used them to make a new, improved version. There really isn't much to this ornament, simply get a pine cone of a size that you like and to the top hot glue some ribbon and any other embellishments that you like.

Saturday, February 26, 2011

Recycled Ribbon Spool

Recycled Music


Technique: General Crafting

Materials:
empty ribbon spool
music print paper or fabric
miniature musical instrument
ribbon
glue

Tools:
hot glue gun

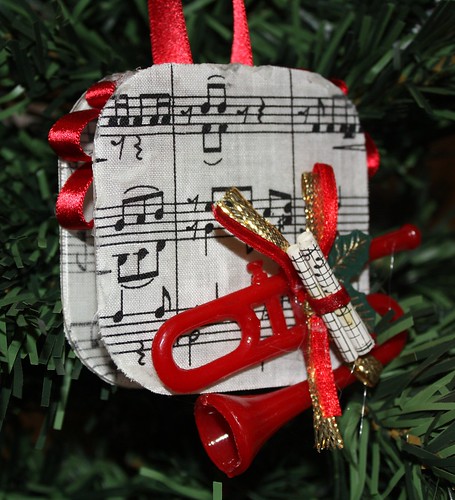
This ornament was made from the plastic spool that ribbon was wound around, combined with a piece of a broken christmas ornament. Cover both sides of the spool with paper or fabric, on mine I used fabric. Wrap ribbon around the cardboard centre of the spool to cover and add decorative bows and a hanging loop. Hot glue embellishments into place.

Thursday, February 24, 2011

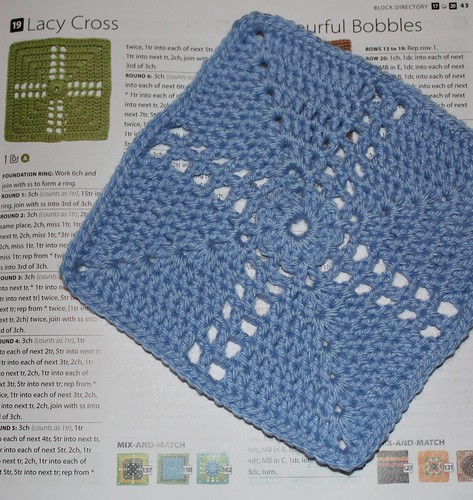
Six Inch Crochet Blanket Sampler - Lacy Cross

Lacy Cross


Technique: Crochet

Materials:
8 ply yarn in 3 colours

Tools:
4mm crochet hook

Finished Size:
6 inches


The original pattern comes from the book 200 Square Crochet Blocks by Jan Eaton.

Wednesday, February 23, 2011

Vintage Music Ornament

Vintage Music Ornament


Technique: Paper Mache

Materials:
Liquitex Gloss Medium & Varnish
sheet music (see below)
styrofoam ball
cord and trim
painting sponge

Tools:
scissors

Vintage is the hot catch word when it comes to decorating, but it's not hard to make something new look old. The Duke University Library has an excellent collection of vintage sheet music here.

I used Ave Maria.

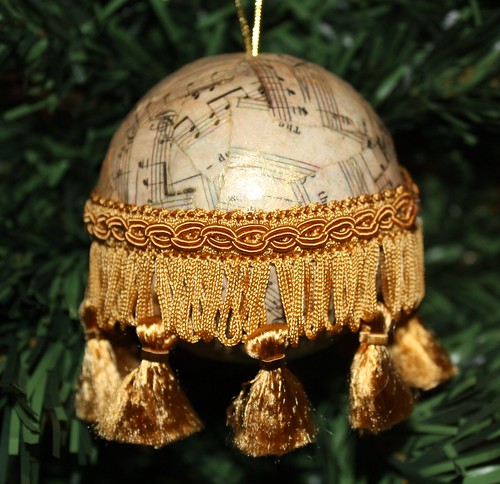
Tear the music into small pieces, about half an inch squares. Using the Liquitex to both glue and seal, cover the entire ball and allow to dry. Give a second coat of sealer and allow that to dry. Rub a generous amount of gold paint over the entire ball with the sponge to 'age' and then wipe off any excess. This gives the ball a lovely golden look. Pin or glue trim and hanger into place.

Tuesday, February 22, 2011

Painting The Roses Red

Paper Rose


Technique: Paper and String

Materials:
an old novel
thin beading wire
acrylic paint
matt spray sealer
hot glue
bamboo skewer
string

Tools:
scissors
paintbrush
wire cutters
hot glue gun

There are plenty of ways to make paper roses, a google search will even pop up with several videos. The way I made mine was a hybrid from floral artistry, first using wires to attach to the petals and leaves, and then using the wires to attach to and form the stem.

Stack five pages from the novel together and cut out 4-6 different size petals. You can do this free form without the need for a template and you will have a more natural looking flower. Start with a small teardrop shape, about the size of the fingernail on your ring finger and work up to larger almost heart shape petals. You will need about 20-25 shapes, depending on how big you want your bloom to be. Cut 2 - 3 leaf shapes as well. Cut one strip of paper about 6 inches long and half an inch wide and fold this in half so it is 6 inches long and one quarter of an inch wide.

Cut 20 or so pieces of beading wire, about twice the length of your index finger, and then fold them over in half so that they are the length of your index finger with a small loop at one end, and the two cut ends at the other. Use small dots of hot glue to attach to the pointy end of the petals.

Using red acrylic paint, colour 2 or 3 petals from each size, so that about one third of your petals are painted red and allow to dry before proceeding.

Put a dab of hot glue on the end of your skewer and attach one end of the long strip you cut, you are attaching the short end in such a manner that the folded edge is facing up and away from the tip of the skewer. Wind it around the skewer to form the inner bud of the rose. Secure with hot glue.

You should now have a skewer with a small spiral of paper stuck at one end, this will act as the foundation for wiring all of your other petals. One petal at a time, hold in place with your fingers until you have the position you desire, then twist the wire around the skewer to secure. Continue in this manner from small petal to large until your blossom is the size you require. Wire two or three leaves into position.

Cut the bamboo skewer and any long wires so that your stem is around 3 - 4 inches in length. Securing with hot glue, wrap string around the stem to cover the wires and give a nice finish. You could use green florists tape here, or ribbon, if you preferred, but I wanted to keep with the paper and string theme.

Monday, February 21, 2011

Primitive Plum Pudding

Primitive Pudding


Technique: No Sew Fabric

Materials:
styrofoam ball
unbleached calico
acrylic paints
string
cinnamon powder

Tools:
pinkingshears or regular fabric scissors
painting sponge or brushes
printer
dusting brush, or a cosmetic blusher brush
hole punch

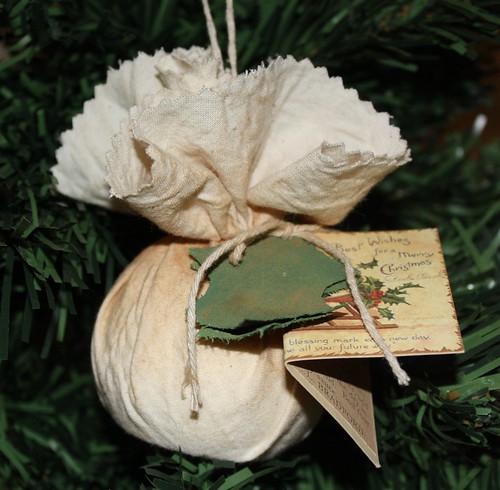
Cut a small slice from the styrofoam ball so that it has a flat bottom. Cut a circle from the unbleached calico large enough to cover the ball and be tied at the top. I used a dinner plate as a template for mine. Gather and tie off with string.

Using the dusting brush, dust the ornament with cinnamon. Not only does this give it a gorgeous smell but it gives it that aged, primitive appearance. Cut two holly leaf shapes from the calico and paint them green and set aside to dry.

Print the two images below and glue back to back to make a double sided hang tag. Age the holly and the card with cinnamon. Make holes in the holly and tag with a hole punch and tie to the pudding with the string.


Sunday, February 20, 2011

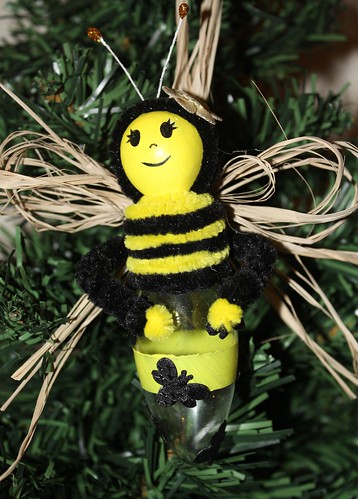
Queen Bee Lightbulb Ornament

Bee My Valentine

Technique: Recycled, General Crafting

Materials:
screw in candelabra light bulb, cleaned out
black and yellow chenille sticks
little bees (mine were made from ribbon)
hot glue
styrofoam ball & paperclay (or large wooden bead)
acrylic paints
glass and tile medium
masking tape
cake decorating stamens
raffia
spray varnish or sealant

Tools:
hot glue gun

Abdomen: Using masking tape create a stripe in the middle of the lightbulb. Following the manufacturer's directions, mix some yellow paint with glass and tile medium and paint the stripe. Allow to dry thoroughly. Apply the little bee's using hot glue.

Thorax: Determine which side of the abdomen is your best side, so that you know which will be your back. Starting at the back wind black and yellow chenille sticks around the screw in part of the globe, securing with hot glue as necessary.

Arms: Find the centre of a yellow chenille stick and fold the ends in towards that. Leave about 1/4" of yellow free at each end (for hands) and wrap the remainder in black chenille, you will most likely need to use two sticks to fully cover the arms. Bend at the elbows and glue into position at the back.

Head: You can get wooden beads that are specifically designed for using as heads on clothespin dolls, but here in Australia they are proving very difficult to source. I have had to become very creative! If you can get those beads, then they are the perfect size, go ahead and use those. If you can't get them, you can use either a small styrofoam ball just as it is, or cover it with a thin layer of paperclay like I did. I prefer the paperclay coating to the plain styrofoam ball because it's a nicer surface to paint on, but do whatever works for you. DO NOT cover a styrofoam ball with polymer clay, the baking process will release toxic fumes from the foam, always use paperclay when using foam.

Give your head 2-3 coats of yellow paint, drying between coats. Paint on details of face, spray with clear sealant or varnish and then wrap black chenille around the rest of the head, using hot glue to secure where necessary. Use stamens or bits of chenille as antennae.

Finishing: Glue head into position on top of the lightbulb. Make a bow out of the raffia and glue onto the back of the bee for wings. Give your bee a little heart to hold. If desired, you can write a cute little phrase on the heart such as "Bee Mine!"

Saturday, February 19, 2011

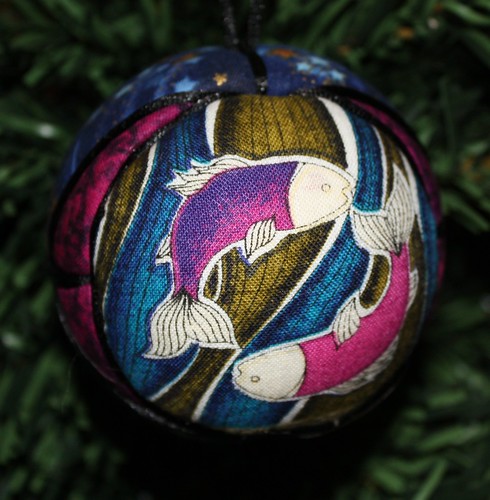
Pisces Kimekomi Ball

Pisces Ornament


Technique: Kimekomi (Or New Sew Fabric)

Materials:
styrofoam ball
fabric
cord, braid etc
paper
piece of string

Tools:
orange stick (cuticle stick)
scissors
ruler
scalpel
compass

Long before it had the name Kimekomi, I had seen fabric Christmas ornaments at fetes and fairs. Now that it has the name Kimekomi there are of course specialized tools you can buy, but it's not necessary at all.

Firstly, wrap a piece of string around the middle of your styrofoam ball to measure the circumference. Whatever length it is, divide that by six, and mark that on your string. Your ball should have a mould line, a straight line around the circumference. Using the string, mark the 6 segments around the mould line.

There are lots of tutorial videos to show you how to segment Kimekomi balls, this is just how I do it. Using your string, make marks around the ball, then with a pencil, join opposite marks, like a dot to dot around a ball. This should create six evenly spaced segments around the ball, like an orange.

Set your compass to the same width as the segments, and starting at lines that intersect begin drawing circles around your ball. Rather than give you a specific pattern direction, I encourage you to draw circles on the ball until you find a pattern you are happy with.  The larger the pattern segments the easier the ball will be to construct, so bear that in mind. I will often have many circles overlapping before I find a pattern that repeats that I like.  When I did find the pattern I wanted, I outlined the score lines in red, so that it was clear which lines I needed to score.

Score each of these lines lightly with a scalpel, you want to cut down about 1/4" of an inch.

Start with one colour of fabric and cut a piece that is going to be just a bit larger than the segment you wish to cover (you can trim this as you tuck so its better to be generous than skimpy here). Hold firmly in the centre of the fabric and using the cuticle stick, tuck one edge into the groove, and then the other, working each side evenly so that the fabric remains true and doesn't distort and end up uneven. Tuck the points in and trim any excess fabric if necessary. Continue in this manner until all six wedges of fabric have been used.

Chose a cord or braid that compliments your fabric. If using a thin cord this will sit neatly into the channels, and the ends will tuck into the ball nicely. Braid is thicker and will sit over the channel, you can use glue or decorative pins to secure this in place. The same process applies to the hanger. You can push some cord into the top of the ornament with a skewer, or use a decorative pin to secure a loop of braid to the top.
Thursday, February 17, 2011

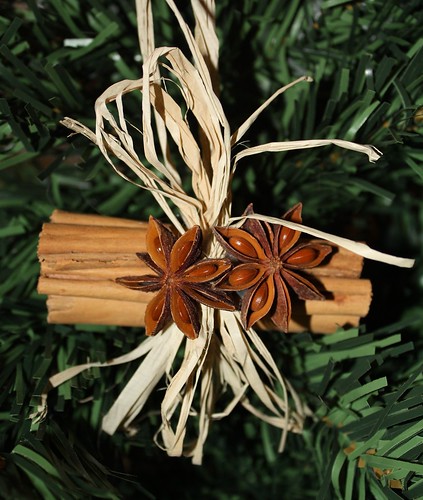
Cinnamon Anise Cluster

Cinnamon Anise Cluster


Technique: Basic Crafting

Materials:
cinnamon sticks
star anise
raffia
hot glue
rubber band

Tools:
hot glue gun

A classic country style ornament, made in many kitchens over the holidays in dozens of different variations. They are easy to make, the ingredients are easy to get, they fill the home with a beautiful scent and add a simple, rustic appearance to any kitchen or tree.

To make, bind three or four cinnamonsticks together with a rubber band. Wrap raffia around the band to hide and tie to form a bow. With hot glue, attach 2 or 3 star anise buds. Attach a loop off raffia to hang.

You could embellish with ribbon instead of raffia, use nutmeg instead of star anise, or add dried orange or apple slices.

Wednesday, February 16, 2011

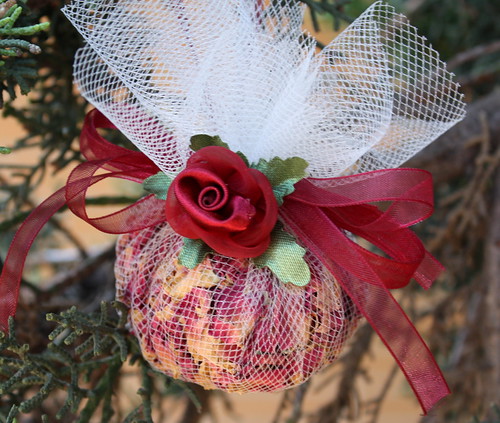
Rose Petal Sachet

rose petal


Technique: General Crafting

Materials:
30cm circle of tulle
dried rose petals
rubber band
ribbon
silk or dried rose buds

Tools:
Scissors

A very pretty, and fragrant, ornament that can be hung to add a touch of romance and elegance to a room. Coupled with a vial of rose fragrant oil, it makes a lovely gift.

Lay the circle of tulle on a flat surface and place a handful of rose petals in the centre. Draw up the edges firmly around the petals and secure with a rubber band. Decorate with ribbon, silk or dried roses, baby's breath, whatever takes your fancy.