Wednesday, August 3, 2011

Bigsby's Christmas Wish

Mouse Dreams


Technique:  Papercraft

Materials:
matchboxes
masking tape
corrugated card
various complimentary cards and papers
Rock Candy Stickles
miniature wooden spools
embroidery thread
adhesive
string
buttons
Distress Inks

Tools:
Sizzix Big Shot
Tim Holtz Texture Fade, woodgrain
Martha Stewart Holly Punch

Mouse Dreams
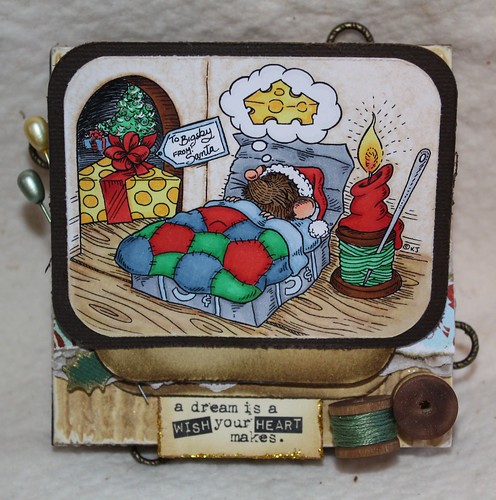
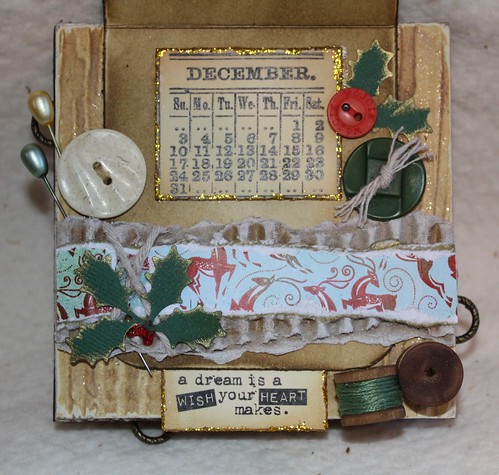
This is the card as it will be given, with the easel laying flat.

I had so much fun making this little card!  He measures a wee 4" x 4" in total, so the design space was quite limited, but the multi layers gave me a lot of area to work with.  The entire card was inspired by the digi Bigsby's Christmas Wish, I wanted to create a diorama effect, so that the corrugated card with woodgrain gave the appearance of being the floorboard that Bigsby's bed was on.

Mouse Dreams
The interior of the card, when completely opened.

There were a lot of steps to this card, I hope I don't bore you!  First step was to line both sides of the corrugated card (as you will see both sides).  The uppermost surface is covered with woodgrain.  This was done using Tim Holtz wood grain texture fade and a piece of manila card, and then inked with burlap, walnut stain and vintage photo distress inks with a coat of rock candy Stickles to blend the colours and give it a little sparkle.  The other surfaces are covered with a textured rich brown paper.
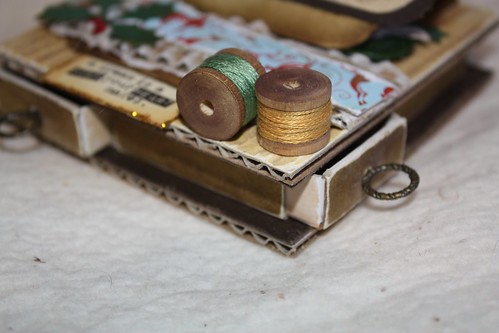

Mouse Dreams


The sides and drawers of the matchbox are covered with small strips of manila card that have been inked with walnut stain.  I have used gel medium as the adhesive for all the major construction as it forms a very strong bond, yet it still has some flexibility to it.  Once the strips had been adhered to the match boxes and completely dried, a little sanding around the edges further added to the distressed look.  The handles are made from a jewellery toggle.  I drilled a hole through the front of the drawer and pushed through the little ring on the end of the toggle and secured it in place with a jump ring.  I've seen a few matchbox drawers that use beads as the handle, but I keep my fingernails trimmed very short so I needed something easy to grip.

Next step was to join the matchboxes together so that when the card was glued on top they didn't jiggle about and move out of place.  Looking at the photo you can see that on each side the matchboxes are arranged so that you have one short side (which acts as a drawer) and one long side.  Tape them together and then glue the 4" pieces of corrugated card into place to make a sandwich.

That's the base constructed, which gives you a 4" by 4" surface to decorate.  The easel portion of the card is manila card inked with walnut stain, and the frame is the same textured brown paper that I used to line the 'floor boards' with.  I felt this gave design continuity to the card as a whole.

Mouse Dreams


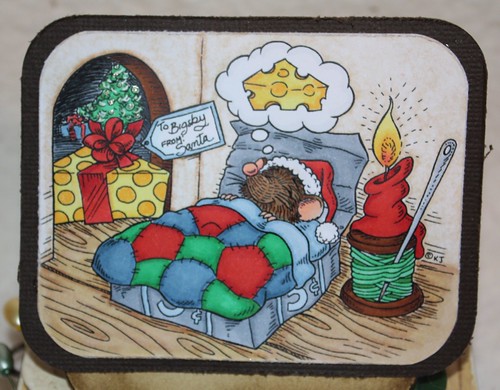
Bigsby has been coloured with Copic markers as follows;
Reds: R22, R24, R27, R29
Greens: G02, G03, G05, G07
Floorboards: E31, E33, E35
Walls: E11 then 'scumbled' with the colourless blender
Bigsby: E33, E35, E37, E29
Blues: B91, B93, B95, B97
Greys: C0, C3, C5
Yellows: Y11, Y15, Y17

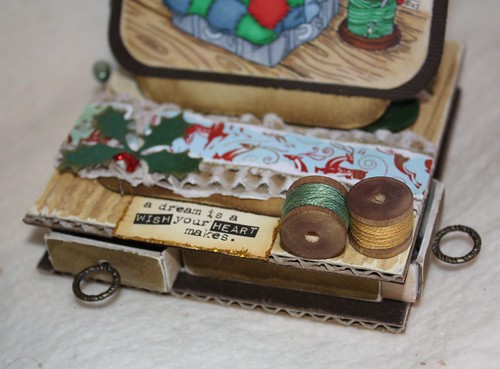
The 'floorboards' are decorated with a strip of corrugated card that has been brushed with white ink, topped with a torn strip of Dasher paper by Basic Grey.  A few buttons, a bit of string, some holly leaves and red seed beads.

Mouse Dreams


The little wooden spools were from my local craft store, I have inked them with walnut stain and wound a few strands of embroidery floss around the core.  The sentiment and calendar are Tim Holtz, stamped onto manila and aged with vintage photo distress ink, and a touch of gold glitter glue around the edges.  I love the tie in between the sentiment and Bigsby dreaming about cheese, so cute!

Challenges, a lot this week but a lot of work went into this one!

Simon Says Stamp - Christmas in August
ABC Christmas Challenge - Make a gift or gift box (this is a combination card and gift box with four little drawers for gifts)
Sew Many Challenges - Anything Goes 
Stamps + Fun = Creativity - Christmas 
Christmas Crafting - Cute Christmas 
Paperplay Challenges - Christmas in August
Little Red Wagon - Put a critter on it 
Fussy and Fancy - Christmas in July 
Creative Belli - Non Paper Materials 

Last but not least, naturally I had to enter into into Karen's Doodles Challenge, as that is where the lovely Bigsby comes from.  Their challenge this week was to use it up.  Lots of recycled elements in this card, the matchboxes, the corrugated card was from an old cardboard box, the scraps of embroidery thread, and old buttons.

Tuesday, August 2, 2011

Sympathy Card

Toby Tumble Friendship


Technique:  Papercraft

Materials:
Toby Tumble Friendship digi
Copic Markers
Greens: YG61, YG63, YG65
Browns: E31, E33, E35, E37
Greys: C0, C3, C5, C7
Blues: B91, B93, B95
Script patterned paper by Kaisercraft
co-ordinating Bazzill card
ribbon
Antique Linen Distress Ink

Tools:
Sizzix Big shot
Nestabilities scalloped circles

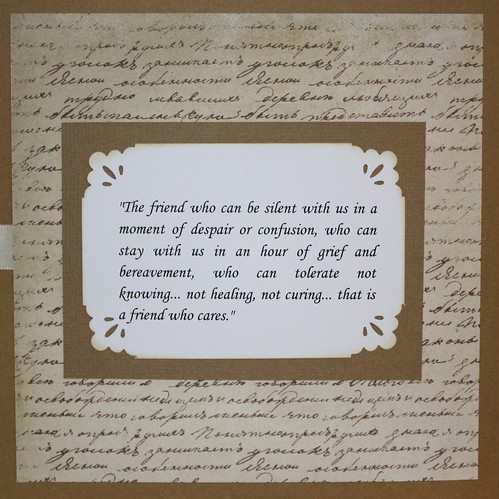
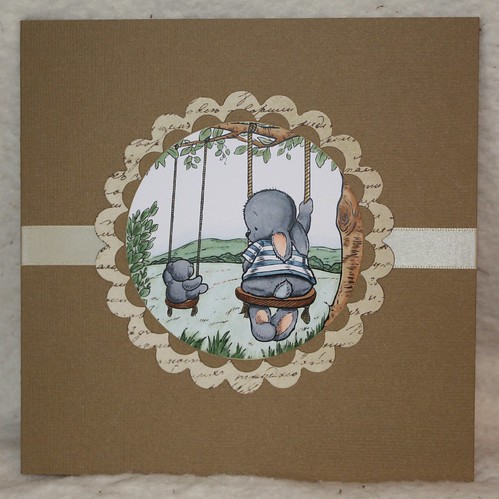
Sadly I had to make a sympathy card for my best friend this week.  I think sympathy cards are probably the hardest to create, and I was tempted to create one based around around a sentiment.

I've always thought Toby Tumble had a rather sad face, and this particular image I feel conveys a very strong message of friendship, and probably says more in a picture than words.

In the end I used the image of Toby combined with a poignant quote:

“The friend who can be silent with us in a moment of despair or confusion, who can stay with us in an hour of grief and bereavement, who can tolerate not knowing... not healing, not curing... that is a friend who cares.” Henri Nouwen
 

Sympathy Card

Monday, August 1, 2011

Steampunk Tag

Steampunk Tag


Technique:  Papercraft

Materials:
Scarlett West digi
Copics Markers
Skin: E0000, E00, E02
Golden Brown: Y23, Y26, Y28
Leather Brown: E31, E33, E35, E37, E29
Green: YG61, YG63, YG67
Black: C0, C3, C5, C7
Steampunk Debutante paper by Graphic 45
Distress Inks;
* Vintage Photo
* Antique Linen
* Black Soot
* Walnut Stain
Vintage Photo Stickles
Copper Gel Pen
cardstock
craft metal
metallic copper embossing powder

Tools:
Sizzix Big Shot
Tim Holtz Alterations die, Tag and Booksplates
Cuttlebug embossing folder, Clockworks
Spellbinders Spritely Sprockets
Steampunk Charity Wings rubber stamp set by the Rubber Cafe
heat gun

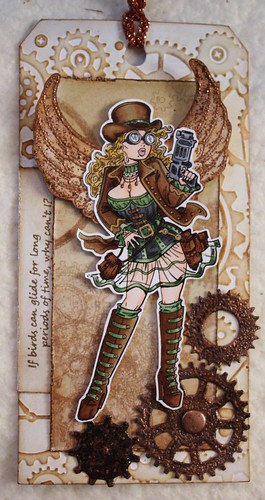
Did I mention my love for all things steampunkery? :0)

This tag I made specifically for the Simon Says Stamp and Show challenge this week, the theme of which was to show a tag

Do you remember when you first started papercrafting?  You were probably like me and started with very limited supplies, and even a spending spree only meant getting a few prized tools and materials.  Slowly, over time, the collection grows and grows and you can start making what you envision in your head without need for substitution or compromise.  That's been the case with this tag.  First came the Big Shot, then some distress inks, some dies, some embossing folders, and the rubber stamps, don't even get me started on Copics, do you know how long it takes to build up a colour library when you budget to buy 3 at a time LOL.

The main image is called Scarlett West from Kenny K.  No doubt you will get bored with how many times I will use this particularly lovely!

The tag is made using a Tim Holtz die, tag and bookplates, I use this all the time, well worth the investment.  The cog pattern on the background is made with a Cuttlebug embossing folder I am beginning to prefer these over other brands as they are considerably larger.  No need to butcher the folder apart to fit in a tag.  The embossed areas are inked with antique linen and vintage photo distress inks.

The wings and sentiment come from a set by Rubber Cafe called Steampunk Charity Wings, it's one that I can see myself using again and again.  The set was designed especially to support an organization called Charity Wings which is a California Non-Profit Organization that serves as a resource for Crafters and Artists that want to raise money and awareness for charity.


The sentiment is a quote by Orville Wright which reads "If birds can glide for long periods of time why can't I?"  The wings were stamped in vintage photo and then embossed with copper embossing powder.

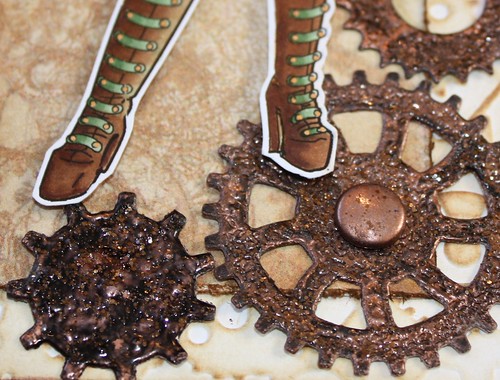
The cogs are cut from card using a Spellbinders die, Sprightly Sprockets.  Inked with vintage photo, embossed with copper embossing powder, inked again with soot black, and then given a sprinkle of vintage photo Stickles.  The larger of the cogs has been attached with a brad that has likewise been embossed with copper and kissed with Stickles.


Steampunk Gears


Do you ever wish companies would make things just for you?  I wish Texture Fades embossing folders were larger and I wish Spellbinders would make steel rule dies so I could cut chunky materials.  What would you wish for?

Sunday, July 31, 2011

July Angels

July Angels


Technique: Crochet

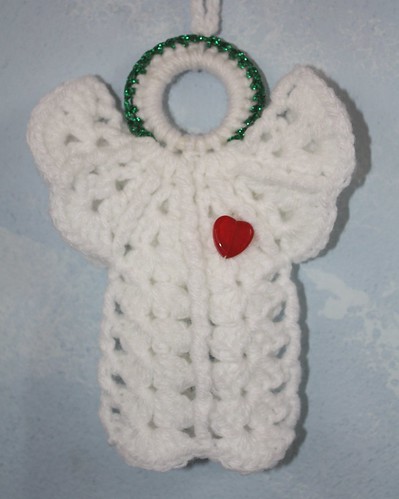
Every week I crochet an angel and send it off to someone around the world that I don't know who is need of hope. This is fantastic way to let people know that no matter what they are dealing with, that they are not alone. Each week I post about it in the hopes that someone who stumbles across my blog will read it to continue try and raise awareness of this wonderful organization.

All of my angels in July featured white yarn with a green halo.  The red heart is a glass bead, and is part of the Angels for Hope symbol, to let the recipient know that someone cares.  Last angel for July, looking forward to a new colour scheme for August!

If you would like to register for Angels for Hope you can do so here. Also, if you know someone who is need of an Angel, you can put in your request there.

Saturday, July 30, 2011

Winter Fairy Christmas Card

Red Winter Fairy


Technique:  Papercraft

Materials:
cardstock
Distress Ink:
* Victorian Velvet
* Bundled Sage
* Vintage Photo
* Aged Mahogany
Basic Grey Digital Papers:
*DSH-621 Yule Log
*DSH-630 Tree Skirt
watercolour paper
Wee Stamps Digi Winter Fairy
paper doily
Sparkly Fluff
pink glitter glue
various embellishments

Tools:
paper cutting/scoring tool
flower paper punch
holly punch
printer

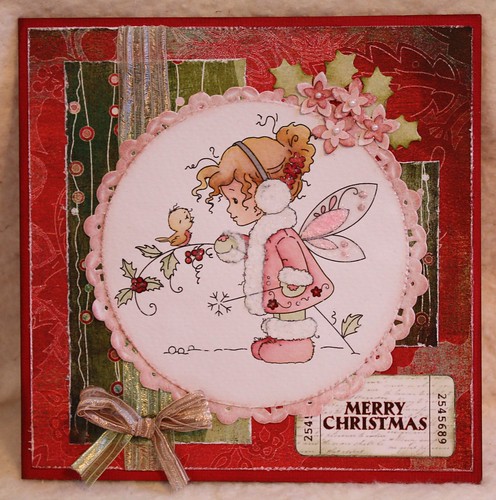
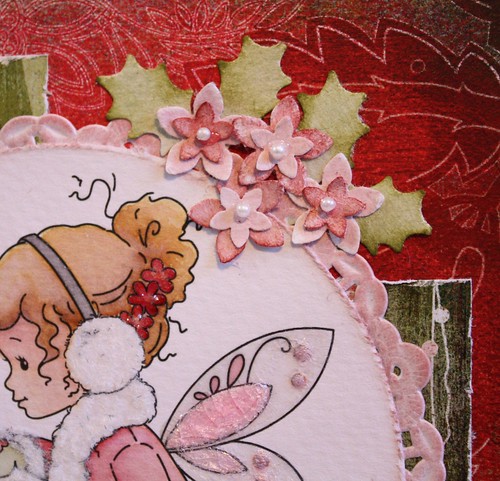
I love working with Sylvia Zet's images, so sweet!  She is printed on water colour paper and painted with distress inks.  She has a touch of pearl pink paint on the centre part of the wings topped with a light coat of crackle medium.

The little flowers were made with two sizes of a flower punch cut from water colour paper, I love the texture this paper has, the edges are brushed with distress inks, with a wee little pearl for the centre.


Red Winter Fairy


Challenges:

Basic Grey - Sketch
Totally Gorjuss - Christmas in July
Crafty Catz - Christmas in July
Winter Wonderland - Fairies or Angels
Cuddly Buddly - Petals and Pearls

Wednesday, July 27, 2011

Trick or Treat Mini Book Box

tot3Trick or Treat Book Box


Technique: Papercraft

Materials:
over sized match box
patterned paper
Vintage Photo Distress Ink
Rock Candy Stickles

Tools:
Sizzix Big Shot
Sizzix Halloween #2 Textured Impressions
pin stripe embossing folder

This wasn't what I had in mind when I first sat down, I had originally intended to include a coloured image, but it took on a life of it's own!

I didn't take photos of every step I took, just of how I made the book jacket from the matchbox, as the remainder was simply just decorating which you could do any which way you choose.

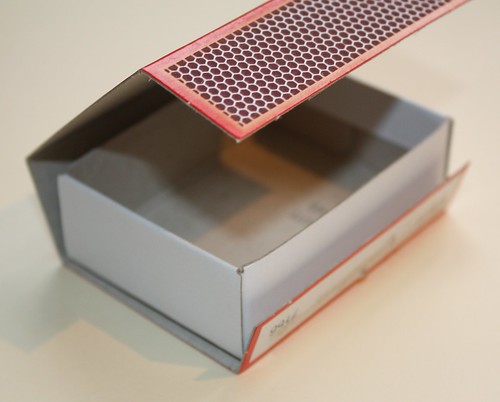
First, split the box open along the seam.


Trick or Treat Book Box


Cut tabs from both flaps, this forms the front and back closure for the book.


Trick or Treat Book Box


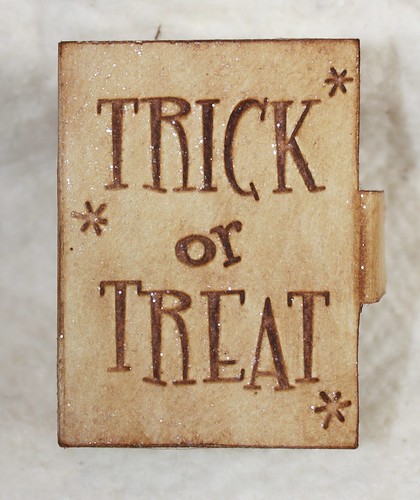
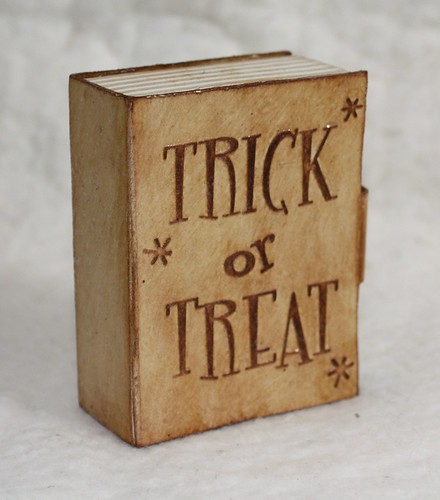
From here the decorating commenced. The 'trick or treat' wording is one of the mini embossing folders from the halloween set #2 by Sizzix. I embossed this onto a strip of cream paper and then cut it to fit the book jacket. Once glued into position I distressed heavily over the embossing to highlight the words, and around the edges to age the book. I also distressed the inside of the book cover heavily

The 'pages' of the book are made from the matchbox drawer. Emboss plain white card with a pinstripe pattern, distress with ink to bring out the pattern and then cut into strips to cover the sides. You only need to cover 3 sides of the drawer, both short sides and one long side, as the final long side forms the spine. Glue the drawer into place.


Trick or Treat Book Box


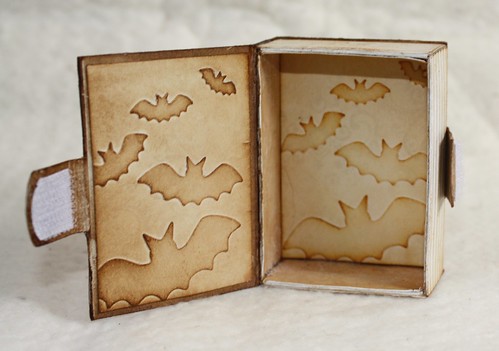
The two panels inside of the book are made with the bat texture folder, distressed with vintage photo to bring out the details. The two little 'flaps' that form the book closure have had velcro attached so that it holds shut.  I used a stiff brush to scumble rock candy Stickles all over the exterior of the box, which has given it the lovely texture you see below, and a gorgeous sparkle, not too much though that's what I love about Stickles, it's a subtle sparkle.


Trick or Treat Book Box


I chose to stop adding anything at this point, as I wanted it to be a candy holder/treat box, but you could continue to embellish and add all manner of little halloween do-dads inside to make a spooky interior.

Tuesday, July 26, 2011

Edwin's Holly Wreath

Edwin as Santa Holly Wreath


Technique:  Papercraft

Materials:
Martha Stewart Holly Punch
two shades of green paper
adhesive
Rock Candy Stickles
red seed beads
Edwin as Santa Magnolia Mini Worlds
Copics:
Reds: R25, R27, R29
Greys: C-3, C-5, C-7
Browns: E11, E21
Buckle: Silver Gel Pen
White trim: Opaque White pen
wooden curtain ring
green acrylic paint
red ribbon

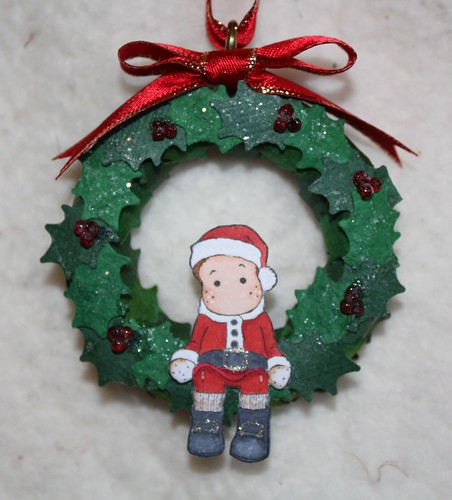
I know we aren't supposed to rave over our own projects, but I love the way this one turned out, so cute!

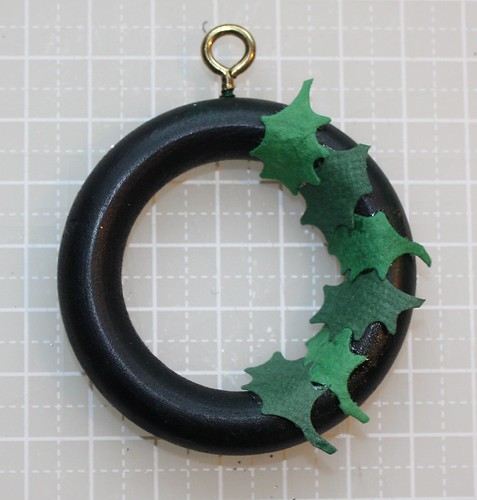
I started with a wooden curtain ring and gave it a lick of green paint.  This ensures that any little gaps in the holly leaves won't be noticed.

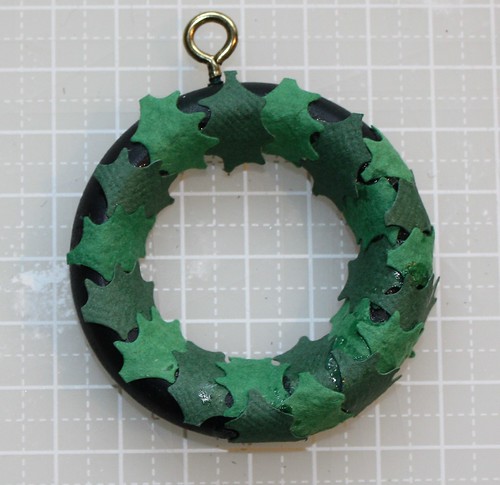
I used two shades of green, and two textures of paper also.  The darker green has a weave pattern to it, the lighter green is mulberry paper and has that lovely, rugged texture to it.  Chomp, chomp, chomp with the holly punch! I also cut the leaves apart so rather than dealing with a pair of leaves, I could glue on individual leaves.

Holly Wreath
Here's the first circle of holly leaves going around the inner circle.


Holly Wreath
Then the second circle of holly leaves going around the outer circle.


A final ring of holly leaves is placed directly on top to finish the wreath and little clusters of red seed beads are glued around for the holly berries. A touch of fairy dust (aka Rock Candy Stickles), a ribbon and a wee little Edwin.

Challenges: 
Winter Wonderland - Holly and Ivy
Polka Doodles - Christmas in July
Christmas Stamping All Year Long - All About You
Jellypark Friends - Christmas in July 
iCopic - Anything but a Card

Monday, July 25, 2011

Happy Birthday To Ewe

Happy Birthday To Ewe


Technique: Papercraft

Materials:
600gsm card
Distress Inks:
* Antique Linen
cord and ribbon
charm
Happy Birthday to Ewe digital stamp
Religious Christmas Herd paper
1/8" inch hole punch
black card
velcro dots

Tools:
Sizzix Big Shot
Box with Scallop Flap Scoreboard Die
2" scallop circle die

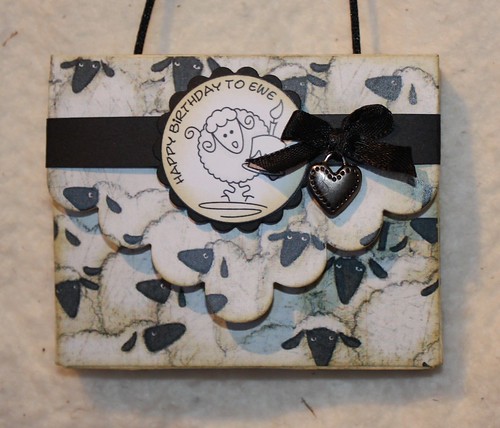
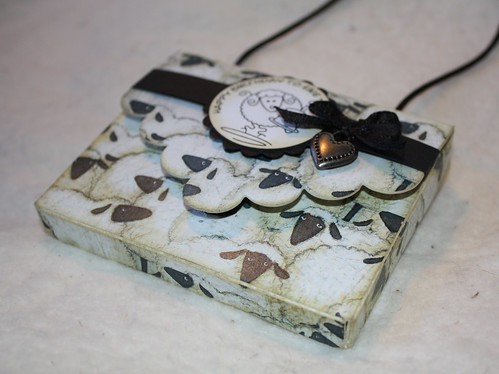
I bought this scoreboard die months ago thinking I would use it all the time, but this is the first time!  It's a great size, idealt for storing a pack of gum, or breath mints, or a travel pack of tissues, or band-aids, or for discreetly storing feminine products.  You could put a mini sewing kit in there, it's big enough to hold an ATC, and of course it's the perfect size for gift cards, it's shameful that I haven't made anything with this die yet!

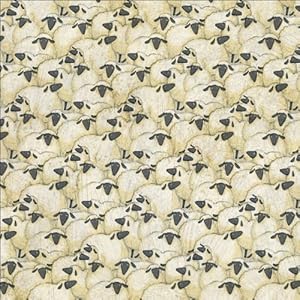
My middle daughter will be 19 in a few days (July is a busy month for me with 4 birthdays in total).  I knew that Cuddly Buddly had an awesome range of digi stamps that use the word "ewe" instead of "you" so when I found the Religious Christmas Herd paper it was a match made in heaven!


The scoreboard dies are intended to cut and score quite thick materials.  If you run regular paper through it will cut it, but it's not thick enough to have the score lines imprinted (you can buy a score mat separately).  I used 600gsm card, which is about as thick as you can get without getting into foamcore.  Using spray adhesive I attached the sheep paper to one side and then ran it through and cut out the die.  The edges and inside have all been inked with Antique Linen distress ink, which matches the paper beautifully.  It's then a simple matter to fold along the scored lines and glue the edges to form the envelope shape.

I have used a 1/8" hole punch in the top through which I have strung some black cord so it looks like a mini purse.  A velcro dot under the flap and on the front edge of the purse ensures it will stay closed.  A 1/4" band of black card has been wrapped around the top of the purse, which acts as the base for the digi and embellishments.  This can be removed, if desired, without damaging the purse. Finish with a bow, a charm and the "ewe" digi of your choice!


Happy Birthday To Ewe


Challenges:

Cuddly Buddly - add a charm
Simon Says Stamp and Show - anything goes
Craft Us Crazy - anything goes

Sunday, July 24, 2011

July Angels

July Angels

Technique: Crochet

Every week I crochet an angel and send it off to someone around the world that I don't know who is need of hope. This is fantastic way to let people know that no matter what they are dealing with, that they are not alone. Every week I post about it not just to try and raise awareness of this wonderful organization.

For July, in the spirit of Christmas in July, I have decided to make white angels with a green halo.  How lovely it would be to have a winter Christmas! 

If you would like to register for Angels for Hope you can do so here. Also, if you know someone who is need of an Angel, you can put in your request there.

Wednesday, July 20, 2011

Robot Ornament

Robot Ornament


Technique:  Papercraft

Materials:
1.5mm balsa wood
Xtron paper by Kaisercraft
adhesive
beading wire
silver glitter
sandpaper
small wooden beads
silver acrylic paint

Tools:
craft knife
scissors
hot glue gun

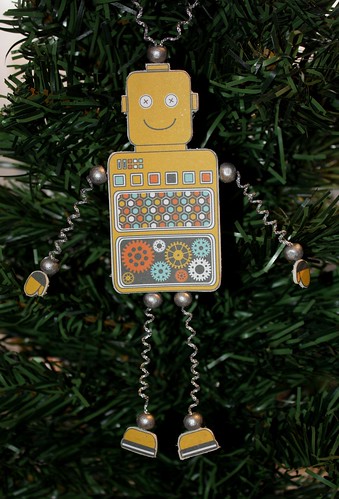
After making the card for my son's birthday I thought the robot paper I used could be adapted to make a great ornament.

Start by painting 9 small wooden beads in silver acrylic paint and set these aside to dry.

Choose an image that you like and glue it onto a sheet of balsa.  I chose balsa wood for the base, rather than chipboard, because it is so much easier to cut with a craft knife and it sands back so easily (I used an emery board!).  When the image is dry cut around a few millimetres from the paper and then sand it into shape.

Wrap some beading wire around a knitting needle to form the coils of the limbs and one to form the hanger/antenna from the top of the head.  Thread a bead onto each end and then glue into position on the back of the robot with hot glue.  Coat the back of the wood with glue and cover liberally with silver glitter, this will camoflauge where the limbs were attached.

Tuesday, July 19, 2011

Robots In Love

Robots In Love


Technique:  Papercraft

Materials:
patterned paper
coloured card
adhesive
gold spray paint

Tools:
Spellbinders Sprockets die
Sizzix Big Shot
cutting board, tools etc

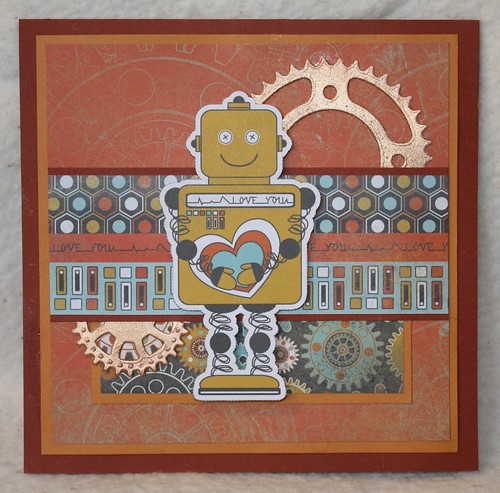
My son's eleventh birthday is coming up this week and what boy that age doesn't like robots?  He's at a magical age, still young enough to be beautifully innocent and joyful, still young enough to cuddle and hold down for tickles, but smart enough to engage in an intelligent conversation.  

It's funny a week or so ago I was going through my paper stash and I found the orange and rust coloured papers and thought to myself, I am never going to use those...  proof that you should never, ever throw anything away! :o)