Technique: Sewing, Painting, General Crafting
Materials
clothes pin
wooden bead for head
assorted felt
acrylic paints
tacky glue
yarn for hair
Dremel or small drill
flexible but firm wire
chenille sticks
flesh tone embroidery floss
jingle bell and holly embellishments
Tools:
scissors
sewing machine
wire cutter
pinkingshears
paintbrush
Follow this tutorial for a step by step guide on how to get the doll ready up to the dressing stage.
Using the templates below, cut one of each from felt.


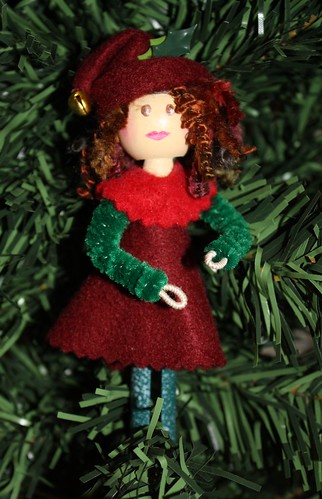
Sew or glue the edges of the hat together, turn right side out and fold up the lower edge to form the brim. Sew or glue the edge of the dress and turn right side out. Glue into position right up in the 'underarm' section of the doll. Cut a small strip of contrasting felt, using pinkingshears to get the zig zag edge and glue into place around the neck of the doll, this is the collar of the dress.
Paint the details onto her face, glue yarn into place for her hair. With needle and thread attach a jingle bell to the end of her hat, and then attach the point of the hat to the brim to fold it over as shown in the photo. Tuck a few holly leaves into the brim.

The link for the tutorial isn't working. Do you have another link or possible a pdf? This elf is just so darn cute and I would like to make one, or two or....
ReplyDeleteMelinda
The link for the tutorial isn't working. Do you have another link or possible a pdf? This elf is just so darn cute and I would like to make one, or two or....
ReplyDeleteMelinda
Thanks for letting me know the link wasn't working, I have fixed it so it works now, there is also a link to this tutorial in the right hand side bar.
ReplyDelete