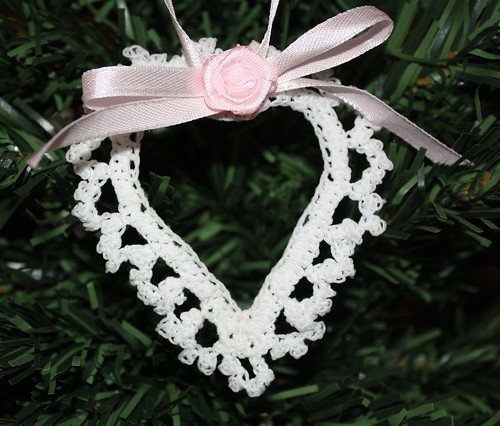
Thursday, March 31, 2011

Prosperi-Tea Herbal Tea

Technique: Herbcraft

A lovely floral and sweet tea, with a glorious scent of chamomile and orange.

Recipe:
3 cups chamomile flowers
1/2 cup bergamot leaves
1/2 cup red clover
1 cup lemon balm
1/2 cup jasmine flowers
5 tablespoons dried orange peel

For those curious about herbal lore, the herbs I have chosen to make this tea are reputed to have energies that attract wealth and prosperity.

I have a food dehydrator rack that I use to dry the peel, you could just hang the peel up in long strips and let it air dry over the space of a week and then grind up the peel in either a food processor or a mortar and pestle.  Combine all the ingredients and store in an air tight container.  As this is made with whole flowers, rather than finely ground, I use at a rate of around a tablespoon per cup.

Last year all the gifts I gave at Christmas were handmade.  There were cookies, cordials, candies and about six different selections of herbal teas packaged in a little tub with a hand made swing tag.  Three months later and I am still getting compliments and thank you messages from friends and family, which feels nice knowing they are getting enjoyment months later.
Wednesday, March 30, 2011

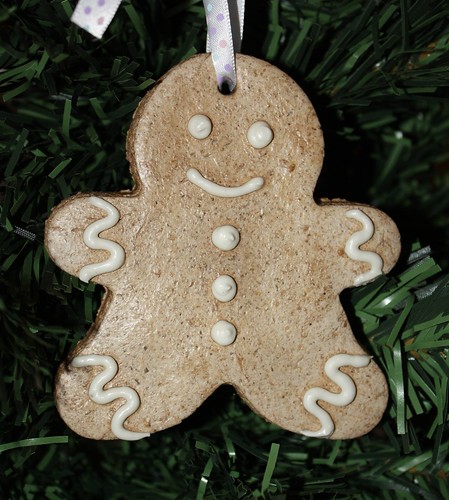
Gingerbread Cookie Ornament

Gingerbread Salt Dough


Technique: Salt Dough

Materials:
all purpose flour
salt
wallpaper paste
acrylic paints
polyeurethane

Tools:
cookie cutter
paintbrushes
oven

Salt Dough Recipe
2 cups all purpose flour
1 cup salt
1/2 cup ground allspice
2 tspn wallpaper paste
1/2 cup water

Combine all the ingredients and knead until smooth, approximately 10 minutes. Allspice is a combination of nutmeg, ginger and cinnamon that has a wonderful gingerbread smell. If you can't find it commercially prepared, you can substitute in half a cup of cinnamon. I'm not typically a fan of salt dough, although cheap to make it doesn't have the versatility of polymer clay, however this recipe is excellent for making "cookies".

You can treat this salt dough exactly as you would roll out cookie dough.  Roll it to the desired thickness, usually about 1/4" thick and use cookie cutters to form shapes.  Use a straw to push a hole in the top of the cookie for hanging later.  Lay on a baking tray and bake in an oven at around 250F/120C for an hour, turn and cook for another hour. Let cool in the oven.  After baking they should be dry, light and have a hollow sound when tapped.
Once the cookies are fully dried and cooled you can paint and decorate however you wish.  For best results and a cookie that will last many years, give several coats of varnish, making sure you coat inside the hanging hole also.  Salt is a humectant, and will draw any moisture in the air to the dough causing it to soften, it is essential to seal it properly to prevent your cookie from going soggy.

If you would like to have iced cookies, rather than simply painting them, products such as Jo Sonja Texture paste has the consistency of royal icing and can be tinted with acrylic paints and piped onto your cookies. Modeling materials such as paperclay can be rolled out and used just like fondant.

For my gingerbread man I used texture paste which pipes beautifully and let it dry overnight. I then sealed front and back with two coats of Modge Podge.

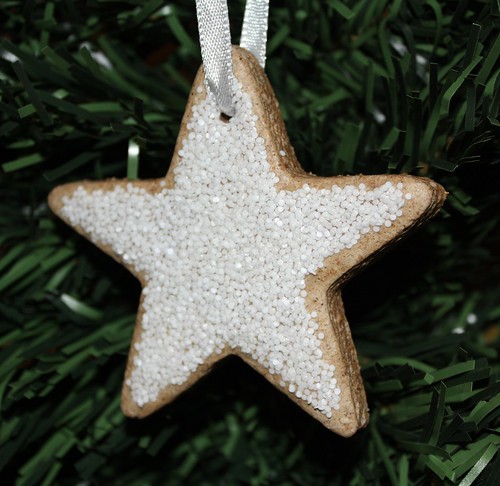
Below you can see a different variation using a star cookie cutter. I coated the front with a white sprinkle and then sealed with Modge Podge.

Gingerbread Salt Dough Star

Tuesday, March 29, 2011

Jack Skellington Part 3

Jack Skellington Ornament

Technique: Freehand Drawing

Materials
white acrylic paint
glass bauble
Bic Mark It pens


Add a little water to the white paint until it is the consistency of pouring cream. Pour into the bauble and swirl around to coat the inside fully and then tip upside down and drain. I have a little lab beaker that I use for this, works a treat!

Draw Jack's details onto the bauble with a black permanent marker. If you make a mistake simply dip an orange stick or toothpick into some isopropyl alcohol and rub away the boo boo. This is the third in a series of Nightmare Before Christmas Ornaments.

Set 6 Jack Skellington Ornaments


Jack Skellington Ornament

Jack Skellington Ornament

jack3Jack Skellington Ornament

Jack Skellington Ornament

Jack Skellington Ornament

Jack Skellington Ornament

Monday, March 28, 2011

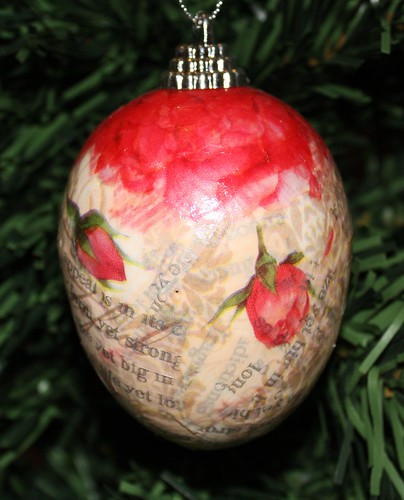
Tissue Paper Decoupage Easter Egg

Tissue Paper Egg

Technique: Paper Mache

Materials:
paper mache ornament
tissue paper
acrylic paints
Liquitex Gloss Medium & Varnish

Tools:
paintbrush

I was so happy with the way the ornament turned out here that I wanted to do a few more things using the lovely tissue paper.

A wonderful thing happens as you layer it. It is so fine that it becomes semi-transparent. This allows you to build up layers of colour and tone, giving the impression of a bouquet of roses even though you haven't cut out a single flower. I think I will give this one to my Mum for easter.

Base coat the ornament in a shade of pale pink, or whatever compliments your tissue paper. Tear the tissue paper into 1/2" squares. Brush a small amount of Liquitex onto the ornament, place on a square of tissue paper, brush over with paintbrush to smooth down. Repeat this over half the ornament, overlapping squares randomly. Allow to dry for several hours and finish the remainder of the ornament in the same manner. Once thoroughly dry give a finishing coat of Liquitex.

Sunday, March 27, 2011

March 27th - Angels for Hope

Technique: Crochet

Every week I crochet an angel and send it off to someone around the world that I don't know who is need of hope. This is fantastic way to let people know that no matter what they are dealing with, that they are not alone.

If you would like to register for Angels for Hope you can do so here. Also, if you know someone who is need of an Angel, you can put in your request there.

Saturday, March 26, 2011

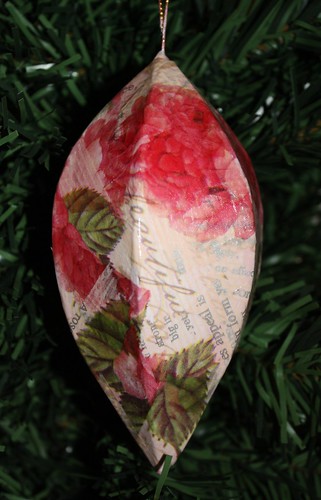
Roses Tissue Paper Decoupage

Tissue Paper Ornament


Technique: Paper Mache

Materials:
paper mache ornament
tissue paper
acrylic paints
Liquitex Gloss Medium & Varnish

Tools:
paintbrush

Base coat the ornament in a shade of pale pink, or whatever compliments your tissue paper. Tear the tissue paper into 1/2" squares. Brush a small amount of Liquitex onto the ornament, place on a square of tissue paper, brush over with paintbrush to smooth down. Repeat this over half the ornament, overlapping squares randomly. Allow to dry for several hours and finish the remainder of the ornament in the same manner. Once thoroughly dry give a finishing coat of Liquitex.

Friday, March 25, 2011

Catching up with Gama Go

Once a week I spend the day playing catch up, adding the finishing touches to any projects not quite yet done, taking photos and browsing the net for inspiration, and as always, looking for free patterns and interesting tutorials. To stick to my commitment to posting daily, I'll share with you something that I thought was a fabulous find.


My eldest daughter has been bugging me for an owl purse ever since she saw this ornament perched in my mini tree.  It should be fairly easy to adapt, rather than sewing up the top and stuffing, it should be a simple matter to sew in a zip, and then put a press-stud closer under the central peak.

Anyway while looking for ideas on how to bring this together I found this fabulous gem! You can print out the pattern here.


Thursday, March 24, 2011

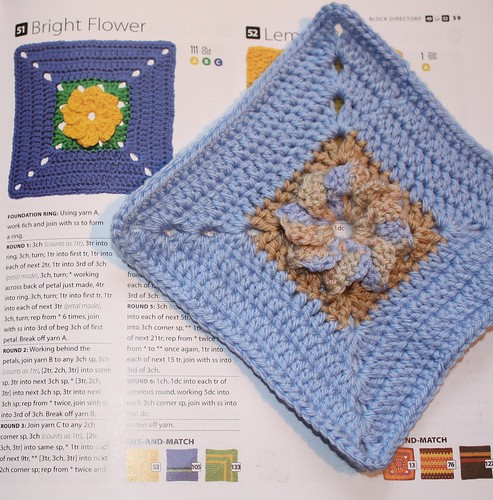
Six Inch Crochet Blanket Sampler - Bright Flower

Bright Flower

Technique: Crochet

Materials:
8 ply yarn in 3 colours

Tools:
4mm crochet hook

Finished Size:
6 inches

The original pattern comes from the book 200 Square Crochet Blocks by Jan Eaton.

Wednesday, March 23, 2011

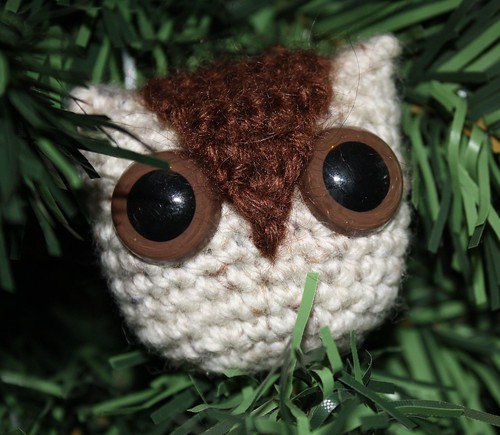
Barn Owl Crochet Ornament

Barn Owl


Technique: Crochet

Materials:
scrap yarn in two colours
safety eyes

Tools:
3.5mm hook or size appropriate to the yarn
tapestry needle

Start with a magic circle in the main colour.

Rnd 1: 6 sc into loop, draw tail up to shorten circle
Rnd 2: 2 sc in ea sc, 12 sc
Rnd 3: [2 sc in one, 1 sc] repeat 6 times, 18 sc
Rnd 4: [2 sc in one, 2 sc in next two sc] repeat 6 times, 24 sc
Rnd 5 - 13 sc around
Bind off

Attach the safety eyes and fill with stuffing. Using a tapestry needle whip stitch the top seam together.

Count down four rows at the back of the owl and using the contrasting colour, slip stitch so it is aligned with the right ear.

Rnd 1: 8 sc, ch1, turn
Rnd 2: 8 sc, ch1, turn
Rnd 3: 8 sc, ch1, turn
Rnd 4: 8 sc, ch1, turn
Rnd 5: 8 sc, turn
Rnd 6 skip first st, 7sc, turn
Rnd 7 skip first st, 6 sc, turn
Rnd 8 skip first st, 5 sc, turn
Rnd 9 skip first st, 4 sc, turn
Rnd 10 skip first st, 3 sc, turn
Rnd 11 skip first st, 2 sc, turn
Rnd 12 skip first st, 1sc, bind off

The above pattern creates the triangular nose area. Attach the peak to the body of the owl with the yarn tail from binding off.

Tuesday, March 22, 2011

Aries Kimekomi Ball

Technique: Kimekomi (Or New Sew Fabric)

Materials:
styrofoam ball
fabric
cord, braid etc
paper
piece of string

Tools:
orange stick (cuticle stick)
scissors
ruler
scalpel
compass

This one is a day later than the actual date that Aries starts, due to Mabon falling on the same date, but for those Ram's out there, enjoy!

Long before it had the name Kimekomi, I had seen fabric Christmas ornaments at fetes and fairs. Now that it has the name Kimekomi there are of course specialized tools you can buy, but it's not necessary at all.

Firstly, wrap a piece of string around the middle of your styrofoam ball to measure the circumference. Whatever length it is, divide that by six, and mark that on your string. Your ball should have a mould line, a straight line around the circumference. Using the string, mark the 6 segments around the mould line.


There are lots of tutorial videos to show you how to segment Kimekomi balls, this is just how I do it. Using your string, make marks around the ball, then with a pencil, join opposite marks, like a dot to dot around a ball. This should create six evenly spaced segments around the ball, like an orange.

Set your compass to the same width as the segments, and starting at lines that intersect begin drawing circles around your ball. Rather than give you a specific pattern direction, I encourage you to draw circles on the ball until you find a pattern you are happy with.  The larger the pattern segments the easier the ball will be to construct, so bear that in mind. I will often have many circles overlapping before I find a pattern that repeats that I like.  When I did find the pattern I wanted, I outlined the score lines in red, so that it was clear which lines I needed to score.

Score each of these lines lightly with a scalpel, you want to cut down about 1/4" of an inch.

Start with one colour of fabric and cut a piece that is going to be just a bit larger than the segment you wish to cover (you can trim this as you tuck so its better to be generous than skimpy here). Hold firmly in the centre of the fabric and using the cuticle stick, tuck one edge into the groove, and then the other, working each side evenly so that the fabric remains true and doesn't distort and end up uneven. Tuck the points in and trim any excess fabric if necessary. Continue in this manner until all six wedges of fabric have been used.

Chose a cord or braid that compliments your fabric. If using a thin cord this will sit neatly into the channels, and the ends will tuck into the ball nicely. Braid is thicker and will sit over the channel, you can use glue or decorative pins to secure this in place. The same process applies to the hanger. You can push some cord into the top of the ornament with a skewer, or use a decorative pin to secure a loop of braid to the top.

Monday, March 21, 2011

March 21st - Blackberry Pie

Technique: Salt Dough Modelling

Materials:
flour
salt
water
wallpaper paste
small aluminium pie case
acrylic paints

Tools:
general sculpting tools
rolling pin
oven

March 21st marks the Autumnal Equinox here in the southern hemisphere, referred to by many pagans as Mabon.

"Among Wiccans, the most common Wheel of the Year narrative is that of the God/Goddess duality. In this cycle, the God is born from the Goddess at Yule, grows in power at Vernal Equinox (along with the Goddess who has now returned to her maiden aspect), courts and impregnates the Goddess at Beltane, wanes in power at Lammas, passes into the underworld at Samhain, then is once again born from Her mother/crone aspect at Yule. The Goddess, in turn, ages and rejuvenates endlessly with the seasons, being courted by and giving birth to the Horned God." Wikipedia

Mabon then, is the time between Lammas and Samhain. It is the second of the three harvests, the first beginning with Lammas and the last culminating with Samhain. Only twice in the year does the light and dark hold equal balance in the sky, and from this day onwards the nights will become longer and the days shorter and the weather cooler until Yule marks the shortest day and longest night, and then they increase again until there is balance again at the Spring Equinox.

Foods that are at their peak this time of the year are grapes, figs, pomegranates, blackberries, apples and pears, nuts such as almonds, hazelnuts and walnuts. Mmmm blackberries. The bushes grow wild in the hills around Adelaide, and it has been said you can pick blackberries in any month that has an 'A' in it, but I find late February/early March to be the best time to go picking.

Some days I start the blog and I haven't a clue what ornament I am going to make. Today was like that until I started rambling on about the blackberries! In honour of the autumnal equinox, I present to you a blackberry pie ornament =)

Sunday, March 20, 2011

March 20th - Angels For Hope

March 20th Angel


Every week I crochet an angel and send it off to someone around the world that I don't know who is need of hope. This is fantastic way to let people know that no matter what they are dealing with, that they are not alone.

If you would like to register for Angels for Hope you can do so here. Also, if you know someone who is need of an Angel, you can put in your request there.

Saturday, March 19, 2011

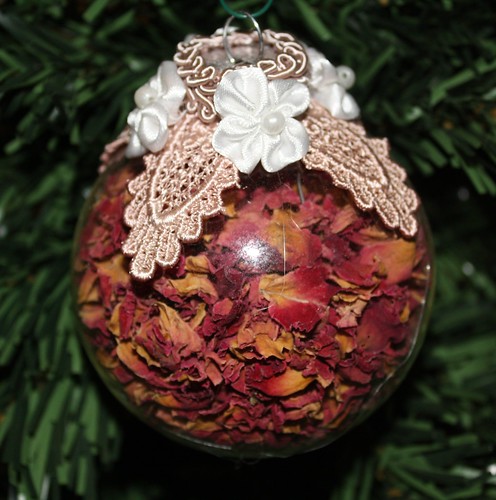
Rose Petal Bauble

Rose Petal Bauble


Technique: General Crafting

Materials:
clear glass bauble
dried rose petals
lace and ribbon embellishments

Tools:
hot glue gun

These glass baubles are excellent for showing off pretties, and what could be prettier than roses! Fill the bauble with rose petals and replace the hanger. I used hand dyed lace, I have a huge stash of it from way back when I was teaching tassle making, but any good fabric store should have a large range to choose from. Hot glue on lace, ribbon roses and any other embellishments you like.

Friday, March 18, 2011

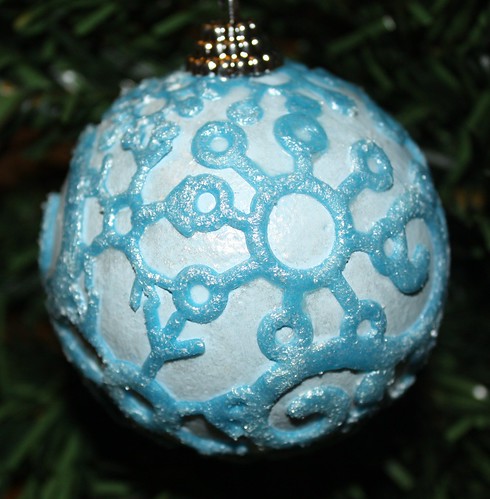
Snowflake Lace Ornament

Snowflake Lace Ornament


Technique: General Crafting

Materials:
acrylic paints
styrofoam ball
felt snowflake(s) or ribbon
foam glue
iridescent medium

Tools:
paintbrushes and/or painting sponges
I found this lovely blue snowflake trim at my local craft store. It is made from felt and intended for scrapbooking pages, but works well for any kind of embellishment.

Paint the ball in a mixture of white and pale blue, I went a few shades lighter than the snowflakes for contrast and for that icy blue feel, but you could go several shades darker instead if you prefer. Allow to dry and apply the snowflakes to the ball using foam glue and allow to dry. Neither felt nor foam are fond of sticking to anything, in the end I saturated the felt and draped it around the ball and allowed it to dry.

I wanted a shimmer to this that was more subtle than glitter so I dappled the surface with iridescent medium.  Spray with a gloss varnish or sealant to finish.

Thursday, March 17, 2011

Celtic Charm Herbal Tea

Technique:  Herbcraft

Top of the mornin' to ya, and Happy Saint Patrick's Day!  This is a delightful blend, everything you love about Irish Breakfast tea with a hint of spice and orange. 

100g Irish Breakfast loose tea
10g allspice
5g nutmeg
15g dried orange rind

Use a mortar and pestle to crush the allspice, nutmeg and dried orange rind.  Combine with the Irish Breakfast tea and store in an airtight container.  Use at a rate of 1 teaspoon per cup.  With traditional herbal teas you would not add milk, however as this has a black tea base, you can freely add milk and sugar to taste.

Wednesday, March 16, 2011

Crochet Shamrock

Technique: Crochet

Materials:
8 ply yarn, green

Tools:
2.5mm hook

This pretty little motif can be turned into a brooch, used as adornments for bags, buckles and patches, or you can attach a magnet for a cute little fridgie.

Shamrock:

Rnd 1: Ch 5 (counts as first dc); 12 dc in 5th chain from hook; ch 1, turn work: (13 dc)
Rnd 2: 5 hdc in next dc, sc in next dc, 5 hdc in next dc, slip st in next dc) 3 times
Tail: Ch 7, slip st in 2nd ch from hook and in each remaining ch, dc in beginning chain, (where first 12 dc were worked on Row 1), slip st in first hdc on Row 2.
Fasten off, secure ends and weave in.

Tuesday, March 15, 2011

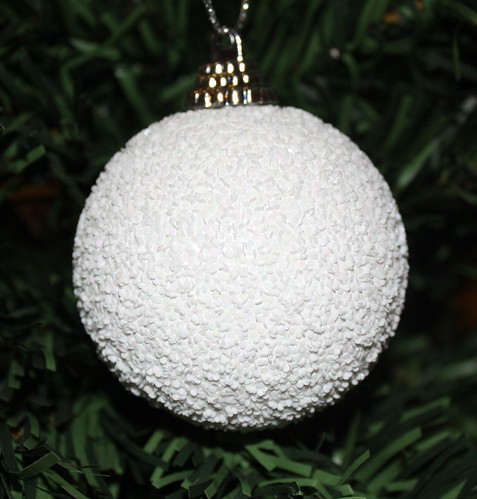
Sparkling Snowball

Snowball


Technique: General Crafting

Materials:
styrofoam ball
white acrylic paint
white glitter
pva glue
paperclip

Tools:
paintbrush

I have the flu this week so it will be quick and easy ornaments, and they don't come much quicker or easier than this one. Simply give the foam ball a base coat of white paint and allow to dry. Brush a thin layer of pva glue over the surface of the ball and dust with glitter. Break the paperclip in half and push into the ball for the hanger. Voila! Now back to bed for me :(

Monday, March 14, 2011

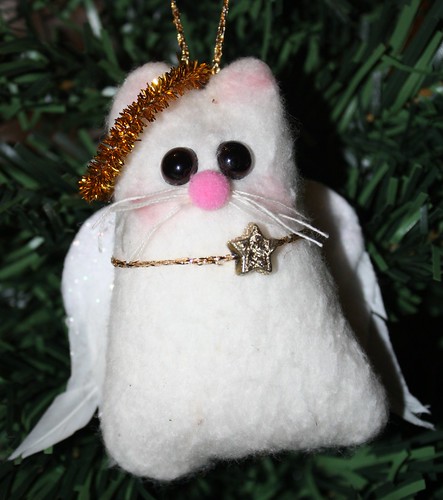
Angel Kitty

Angel Kitty

Technique: Sewing

Materials:
natural quilt batting
polyester filling
calico thread
7.5mm animal eyes

Tools:
sewing machine
stencil brush

Print and cut out the pattern below.

(pattern up shortly)

Fold the quilt batting right sides together and cut two kitties. The pattern does not include a seam allowance, so be sure to cut out about 1/4 - 1/2 an inch larger.

Take one piece and face it right side up. Insert the animal eyes according to the manufacturers instructions. Mine have a screw type post that you push through the fabric and then a stopper to secure on the other end.

With a needle and thread sew loops for whiskers, securing thread on the wrong side.

Place kitties right side together and sew around edge, leaving about an inch to turn and stuff.

Turn right side out fill with polyfill. Whipstitch the opening together.

With a stencil brush, brush a little highlights on the cheeks and ears. I used pastel chalks, you could use light pink paint and drybrush it on, you could even use cosmetic blush if that is all you have.

Glue a pom pom for the nose, and embellish. I used a gold chenille for the halo, put some adorable wings I found at the two dollar shop, and used a bead and ribbon around the neck.

Sunday, March 13, 2011

March 13th Angels For Hope

March 13th Angels for Hope


Every week I crochet an angel and send it off to someone around the world that I don't know who is need of hope. This is fantastic way to let people know that no matter what they are dealing with, that they are not alone.

If you would like to register for Angels for Hope you can do so here. Also, if you know someone who is need of an Angel, you can put in your request there.

Saturday, March 12, 2011

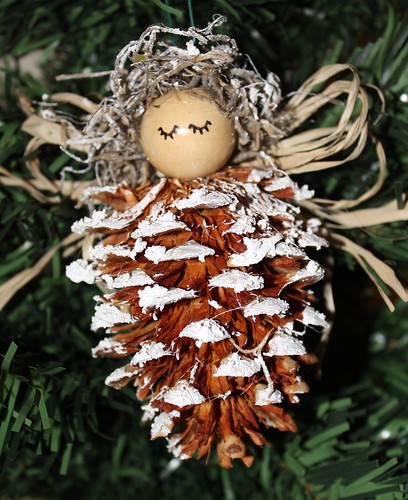
Pine Cone Angel

Pine Cone Angel


Technique: General Crafting

Materials:
pinecone
texture paste or fake snow
wooden bead
permanent marker
oakmoss or similar dried botanical for hair
natural raffia
cuphook

Tools:
hot glue gun

I love making ornaments from natural ingredients, and this one came out quite cute. She's really quite simple. With the permanent marker, draw eyes onto the bead. Glue the bead into position on the top of the pinecone and then glue some oakmoss around the bead for her hair.

Use the texture paste or fake snow to dapple the tips of the pine cone. Set aside and allow to dry. Attach a raffia bow at the back for wings, and attach a cup hook into the top of the bead to hang her from.

Friday, March 11, 2011

Catching up with Studio Willich

Once a week I spend the day playing catch up, adding the finishing touches to any projects not quite yet done, taking photos and browsing the net for inspiration, and as always, looking for free patterns and interesting tutorials. To stick to my commitment to posting daily, I'll share with you something that I thought was a fabulous find.

I had recently borrowed a book from the library on painting and decorating wooden spoons.  As always, when I find something new, I do an online search and what a joy it was to discover Studio Willich.

I have always had a fondness for polymer clay dolls, and a great admiration for the artists that give the clay so much character and life.  The Studio Willich site has some of the best step by step tutorial photographs that I have seen online, well worth the visit for clay and doll enthusiasts.


Thursday, March 10, 2011

Six Inch Crochet Blanket Sampler - Willow

Granny Willow


Technique:  Crochet

Materials:
8 ply yarn in 3 colours

Tools:
4mm crochet hook

Finished Size:
6 inches

The original pattern comes from the book 200 Square Crochet Blocks by Jan Eaton.

Wednesday, March 9, 2011

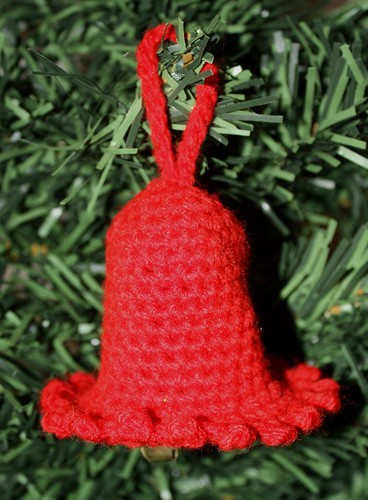
Crochet Bell

Crochet Bell


Technique: Crochet

Materials:
8ply yarn

This pattern is worked in the round.

Crochet 4 ch and form a ring with 1 sl st
ROUND 1: 6 sc in ring.
ROUND 2: 2 sc in each sc = 12 sc.
ROUND 3: * 1 sc in first sc, 2 sc in next sc *, repeat from *-* = 18 sc.
ROUND 4: * 1 sc in each of the first 2 sc, 2 sc in next *, repeat from *-* = 24 sc.
ROUND 5 to 14: 1 sc in each sc.
ROUND 15: * 1 sc in first sc, 2 sc in next sc *, repeat from *-* = 36 sc.
ROUND 16: 1 sc in each sc.
ROUND 17: * 4 ch, 1 sc in first ch, skip 1 sc, 1 sc in next sc *, repeat from *-*.
Cut and fasten thread.

HANDLE: Crochet 1 sc at the top of the bell with 1 thread Cotton Viscose – leave approx 1 meter [1.1 yds] for making the clapper afterwards. Work 30 ch and fasten with 1 sl st at the top. Cut the thread.

Tuesday, March 8, 2011

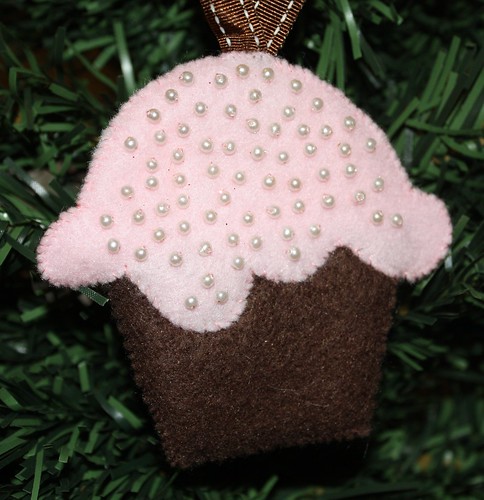
Cupcake Ornament

Cupcake Ornament


Technique: Sewing

Materials:
pink and brown felt
matching thread
beads
ribbon
quilt batting

Tools:
scissors
sewing needles

Use the template below as a pattern and cut out two of the tops in pink, and two of the base in brown, and one of each from the quilt batting. Use your printer settings to resize for a larger or smaller cupcake.


Sew the beads onto one cupcake top. Sandwich together the bottom layer so that it is brown/batting/brown and whipstitch the three outside edges together. Repeat with the top so that it is pink/batting/pink and whipstitch together, leaving the scalloped edge free.

Nest together the base and the cupcake top, slipping the base in and under the scalloped edge. Secure with pins so it doesn't slip and whipstitch all the way around to secure. Attach a ribbon to the top to hang.

Monday, March 7, 2011

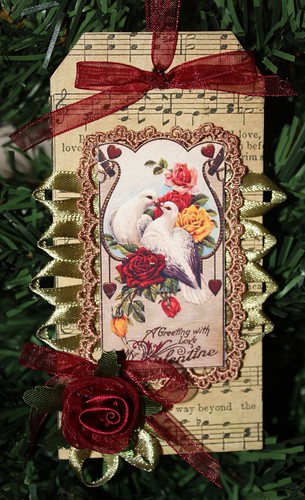
Vintage Valentine Love Birds


Lovebird Tag

Materials:
600gsm card
vintage sheet music
vintage clipart
ribbons
ribbon roses
hot glue
spray adhesive
double sided foam adhesive squares

Tools:
scissors
hot glue gun

This one was a lot of fun for me because I hand dyed the ribbon to match. It's pretty simple to put together. Cut a tag from 600gsm cardstock and glue on the sheet music with spray adhesive. Trim any overhang from the sheet music.


Print the image onto glossy paper using a photo quality printer and setting. Glue loops of ribbon to the back side of the image and mount onto the tag with double sided foam adhesive squares. Embellish with ribbon and roses as desired.

Sunday, March 6, 2011

March Angels

Crocket Angel


Every week I crochet an angel and send it off to someone around the world that I don't know who is need of hope. This is fantastic way to let people know that no matter what they are dealing with, that they are not alone.

If you would like to register for Angels for Hope you can do so here. Also, if you know someone who is need of an Angel, you can put in your request there.

Saturday, March 5, 2011

Santa's Belly Bauble

Santa's Belly Bauble


Technique: General Crafting

Materials:
glass bauble
red acrylic paint
black ribbon
silver buckle jewelery finding

Tools:
scissors
hot glue gun

Pour red acrylic paint into the glass bauble, swirl to coat the inside then drain out the excess. Allow to dry thoroughly.

Cut a length of ribbon long enough to wrap around the mid-section of the bauble and glue into position. Glue a buckle over where the ribbon joins. Voila! A big, round, santa belly!

Friday, March 4, 2011

Catching up with Wee Folk Art

Once a week I spend the day playing catch up, adding the finishing touches to any projects not quite yet done, taking photos and browsing the net for inspiration, and as always, looking for free patterns and interesting tutorials. To stick to my commitment to posting daily, I'll share with you something that I thought was a fabulous find.

These are so adorable that at some point I am sure I will want to make some as Christmas gifts, but alas in our house a shoe is about as designer as our doorstops get!


The pattern for the cat can be found here at the Wee Folk Art blog.


The pattern for the owl can be found here.

The entire Wee Folk Art website is worth grabbing a cuppa and settling in for a visit, a huge range of free patterns with a special focus on gnomes.  Love gnomes!

Thursday, March 3, 2011

Crochet Heart

Crochet Heart


Technique: Crochet

Materials:
crochet cotton size 10
fabric stiffener
hot glue

Tools:
size 5 steel crochet hook

Round 1: Ch 56, join to form a ring, ch 3, 2dc in base of ch 3, [2 hdc in next ch, hdc in next ch] 12 times, 2 hdc in next ch, ch 3, sk 2 chs, sc in next ch, ch 3, sk 2 chs, rep [] 12 times, 2 hdc in next ch, join in 3rd ch of beg ch 3.

Round 2: Ch 1, sc in same place [{ch 4, sl st in 4th ch from hook} 4 times], sk 1 st, sc in ea of next 2 sts, *rep between [], sk4 sts, sc in next st*, rep from * to * 4 times, **rep between [], sk 3 sts, sc in next st**, rep from ** to ** twice, ch2, sc in centre sc at top, ch 2, sc in next hdc, rep from ** to ** 3 times, rep from * to * 5 times, join in beg sc, fasten off.

Follow the manufacturers directions for using the fabric stiffener. Shape in the form of a heart and allow to dry thoroughly. Embellish as desired.

Wednesday, March 2, 2011

Oreo Cookie

Technique: Crochet

Materials:
dark brown yarn
white yarn

Tools:
4.5mm crochet hook

I found this pattern in a Crochet Monthly, where a whopping 60 cookies are used in a gorgeous blankie.  The cookies themselves, though, make a great play food item for a kid's kitchen, or the ever popular teddy bear picnic!

Make a magic circle with brown.
8 half double crochet into the circle, join with a slip stitch
Chain 3 (counts as first half dc), half double crochet in same space, then 2 dc in each space around, join with a slip stitch and bind off.

Make 2 brown and one white and when you bind off with the white make a loop that will be the hanger. Sandwich together and sew.

Tuesday, March 1, 2011

Sardines Please

Sardines Please


Technique: General Crafting

Materials:
clean sardine can
cats with sardines print found here
cardstock
beading wire
embellishments
spray adhesive

Tools:
scissors
wire cutters
Dremel tool

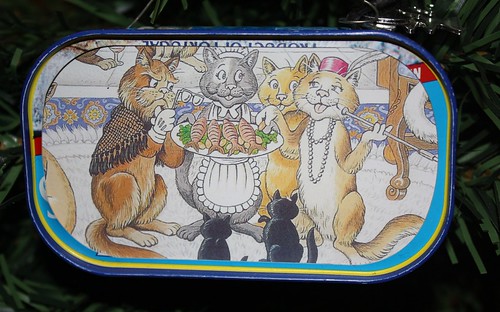
When I saw this sardine can in the store I knew just what to do with it. First step, feed the sardines to the cats (blech). Next, clean the can scrupulously, several times to be sure, and let it air. If, when dry, it has the slightest whiff of anything fishy, soak it in a bleach solution and clean it again.

When dry, use it as a template to cut a piece from the cardstock and one from the print.

Using the spray adhesive, attach the print to the card and fanangle it into the can (by fanangle I mean bend it ever so slightly, only enough to ease it in, not enough to crease it.

Use the Dremel to drill to holes in the top of the can for the hanger. Push a BBQ skewer in through the holes and push the print to the front of the can. Mine was a nice snug fit, but if yours is relatively loose, run a rim of glue around the inside lip of the can and then push the print up against it so it stays put. Leave dry if necessary and make a hanger from the wire and push through the holes, securing with glue if needed.