Saturday, September 3, 2011

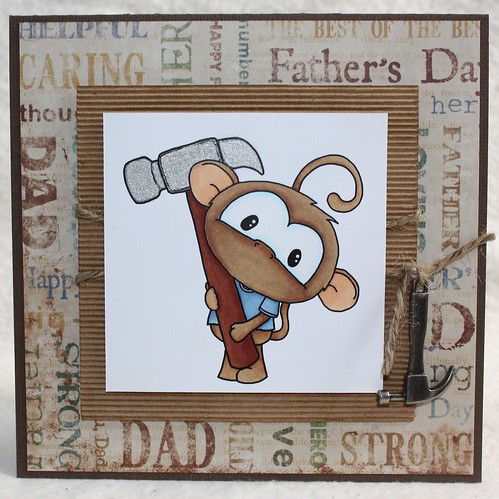
Father's Day Card

DIY Chester


Technique:  Papercraft

Materials:
designer paper
DIY Chester digi from Pollycraft
Copic markers

It's Father's Day this Sunday, so a card from my son to his Dad was in order.  We have always joked with our son, who from a wee age has been quite the climber, so we nicknamed him "monkeyboy".  This darling little image of Chester was perfect.  The sentiment inside reads "For the one hundredth time, I am NOT a monkeyboy".  His face was filled with joy as he gave it to his Dad, and isn't that exactly why we do what we do? :o)

Friday, September 2, 2011

Catching up with Crafty Storage

Once a week I spend the day playing catch up, adding the finishing touches to any projects not quite yet done, taking photos and browsing the net for inspiration, and as always, looking for free patterns and interesting tutorials.  

Where do you craft?
The major living areas of our house are relatively open plan (thanks to some creative renovations!).  The lounge room and dining room are one big room, and the dining room and kitchen are divided by a breakfast bench, so if you stand at the kitchen bench you can see right through to the lounge.  At the beginning of this year my storage space was two book cases in the dining room, and my work space was the kitchen bench.

This became increasingly frustrating, having to clean away what I was working on before every meal, or risk it getting dirtied as others prepared food in the house.  So I cleared out the spare bedroom of everything and moved my craft stuff in there.

It's still not fancy, I work on a 6' long trestle table, have plain wooden book cases with stacking baskets and round tubs to try and organize everything, but I can shut the door and be at peace, or close it off from wandering pets and people without worrying about half done projects being disrupted.  As finances permit I will start remodelling in there to specifically accommodate my crafting equipment, which is where this site deserves a mention.

Crafty Storage is a blog dedicated to showcasing craft storage ideas, how to stash your stash.  It has tonnes of ideas submitted by readers, not just for organizing entire rooms, but fabulous ideas for specific products like holders for your Copic pens, stamp and ribbon organizers etc.

I've spent hours committing the sin of envy and drooling over many of the work spaces.  Mostly I can't even imagine how some people have so many crafting supplies!  I imagine I will get there eventually LOL

Here are two of my favourite posts, ranging from one extreme to the other.

First is Jane's Creative Cupboard, which is literally a crafting space in the under the stairs cupboard space.


And in complete contrast is Dawn's Creation Station, a complete cottage set aside for her crafting.  I just loved the exterior decorations she chose!


I hope you enjoy looking through the blog as much as I did :o)

Thursday, September 1, 2011

Christmas Sparkle

Well this is the first post I am writing, not for the benefit of the DT that might be reading my challenge entry, but because I am part of the DT!  Thankyou to Arline from Christmas Crafting, and to everyone who participates in the challenge this month.

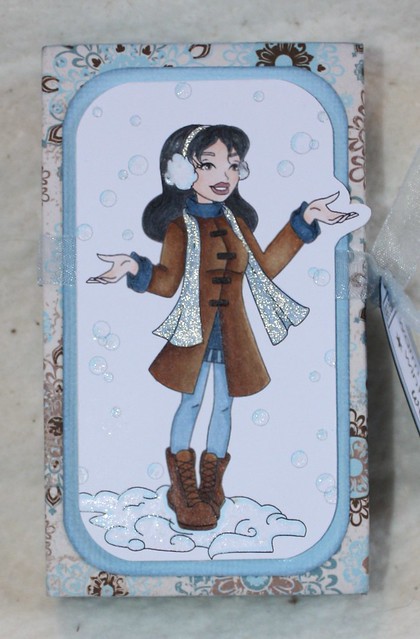
Our first challenge theme, and the third for the blog, is Christmas Sparkle.  We were very kindly provided with our choice of two digital stamps from Sassy Studio Designs, and I chose to work with the one called First Snow, she's just so pretty!

First Snow Match Box

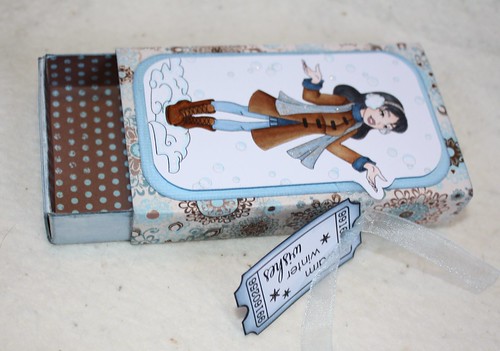
My first project is an altered match box, the extra jumbo size measuring 3.5" x 4.5" in size.

The designer paper is Spring Acres by Kaisercraft, which to me looks like snowflakes :o)

First Snow Matchbox

The inside of the drawer is lined with the reverse of the paper, so both projects were completed with just one sheet.  The ticket is a freebie that you can download from here which has been inked with Faded Denim Distress ink and attached with a piece of pale blue organza ribbon.

The glitter on the snowflakes is Rock Candy Distress Stickles, and the shimmer on her scarf and headband is a Sakura Gelly Roll Stardust pen in silver.  She also has sparkly little earmuffs thanks to a touch of Sparkly Fluff.

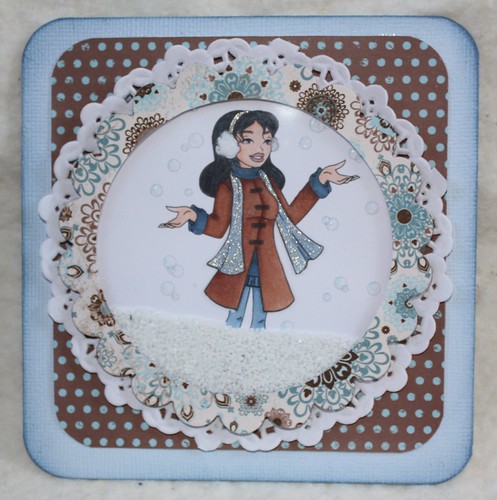
All that falling snow had me itching to make shaker card, which is my second project to inspire you.


The paper is the same, as I mentioned before I made both projects from the one sheet of paper.  I have used the large scallop die from Spellbinders to make the frame, and inked the edges of the card with Faded Denim Distress Ink.
Both images have been coloured with the following Copcs:

Hair: C1, C3, C5, C7
Blues: B91, B93, B95, B97
Skin: E0000, E000, E02, E11
Lips: E04
Browns: E31, E33, E35, E37
Snow: B000
Highlights in the hair have been added back in with a white prismacolour pencil.

Thankyou for stopping by, I hope my projects have inspired you, be sure to drop by the other DT blogs to see their fabulous projects.  I look forward to visiting everyone and seeing your wonderful, sparkly creations :o)

Wednesday, August 31, 2011

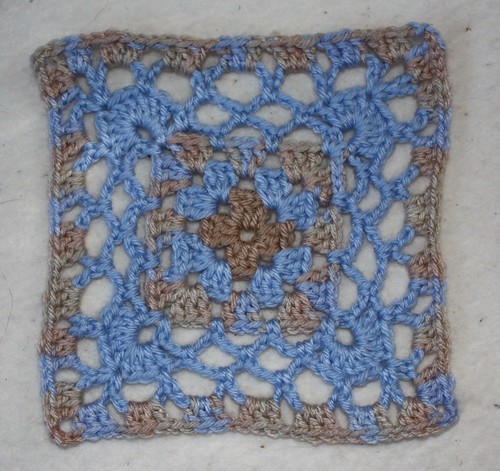
Six Inch Crochet Blanket Sampler - Granny in Chains

Granny in Chains


Technique: Crochet

Materials:
8 ply yarn in 3 colours

Tools:
4mm crochet hook

Finished Size:
6 inches

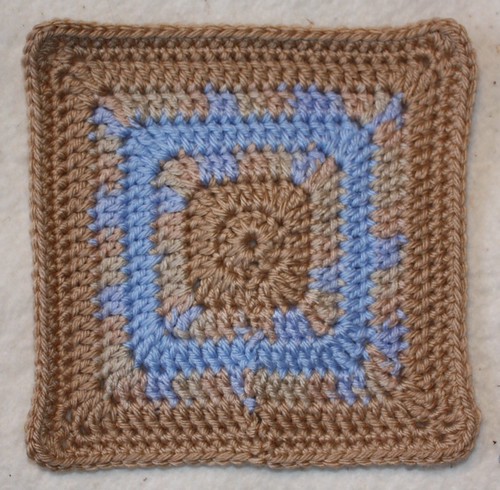
I've been working with Jan Eaton's patterns, which are all meant to be a uniform 6" in size and are not, which has (by necessity) taught me how to make little tweaks here and there to get right.  This led me to trying other patterns to see if I could adapt them.  The following was originally an 8" block that I have adapted to fit the 6" size I need for my sampler.  I chose the name Granny in Chains, because it is essentially a granny square in both the centre and the edges with two rounds of chain stitches in the middle.

Round 1:  With size G (4mm) hook, ch 4, 2 dc in rth ch from hook (first 3 chs count as first dc), ch 2, [3 dc in same ch, ch 2] 3 times, slip stitch into 3rd chain of beg ch-3.  Fasten off.

Round 2:  Join next colour in any ch sp, ch 3 (counts as first dc), (2 dc, ch 2, 3 dc) in same ch sp (corner), ch 1, [(3 dc, ch 2, 3 dc) in next ch sp (corner), ch 1] around, join in 3rd chain of beg ch-3.  Fasten off.

Round 3:  Join next colour in any ch-2 sp, ch 3 (counts as first dc), (2 dc, ch 2, 3dc) in same ch sp, ch 1, *3 dc in next ch sp, ch 1**, (3 dc, ch 2, 3 dc) in next ch sp, ch 1, rep from * around, ending last rep at **, join in 3rd ch of beg ch-3.  Fasten off.

Round 4:  Join next colour with sc in any corner ch sp, ch 5, sc in same ch sp, *[ch 5, sc in next ch sp] twice**, ch 5, (sc, ch 5, sc) in corner ch sp, rep from * around, ending last rep at **, ch 2, join with dc in beg sc forming last ch sp.

Round 5: Ch 1, sc in this ch sp, ch 1, *9 dc in corner ch sp, ch 1, sc in next ch sp**, [ch 5, sc in next ch sp] twice, ch 1, rep from * around, ending last rep at **, ch 5, sc in next ch sp, ch 2, join with dc in beg sc forming last ch sp.

Round 6:  Ch 1, sc in this ch sp, *ch 6, sk next ch sp and next st, sc in next st, ch 6, sk next 2 sts, (sc, ch 6, sc) in next st, ch 6, sk next 2 sts, sc in next st, ch 6, sk next st and next ch sp, sc in next ch sp, ch 6**, sc in next ch sp, rep from * around, ending last rep at **, join with sl st in beg sc.  Fasten off.

Round 7:  Join 3rd colour with sl st in any corner ch-5 sp, ch 3 (counts as first dc), (2 dc, ch 3, 3 dc) in same ch sp, * ch 1, [3 dc in next ch sp, ch 1] 5 times**, (3 dc, ch 3, 3 dc) in next corner ch sp, rep from * around, ending last rep at **, join in 3rd chain of beg ch-3.  Fasten off.

I think this makes around 20 blocks now, halfway to a blankie!
Tuesday, August 30, 2011

Wine Bottle Tag

Wine Bottle Tag


Technique:  Papercraft
Materials
designer paper
glitter
adhesive
ribbon

Tools:
Sizzix Big Shot
Tim Holtz Tiny Tags die
corner chomper
circle die or template

The theme this week at Winter Wonderland was to trim a tree.  It's taken me all week to get motivated for this one, I almost thought I was going to miss this week.  But that is what I love about challenges, and they wouldn't be a challenge if they didn't push me and force my mind in directions it wouldn't normally go.

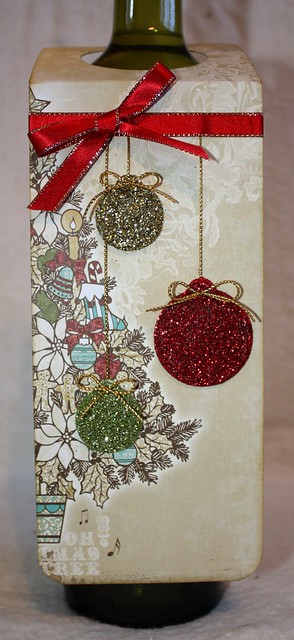
Anyway, the designer paper is from Webster's Pages, which you can get digitally, but this one I bought from my local store.  The tag is a strip of paper 11" x 3.5", scored at 3.5" to create the top part of the tag.  The corners have been rounded and I used a circle template to make the hole for the hanger.

The baubles are both little round tags cut from the tiny tags die which have beengiven a liberal coating of  vintage style glitter, but any circle punch or die would work.  I've used some thin gold cord to create the hangers and tie tiny bows at the top of each ornament, and a strip of red ribbon with a bow across the top.  I wish I had been able to capture the glitter better on camera, the baubles sparkle like jewels, so pretty!

Monday, August 29, 2011

Witches Shoe Treat Holder

Witches Shoe


Materials:
shoe template from Skip To My Lou
FREE halloween digi paper from here
black card
adhesive

Tools:
scissors

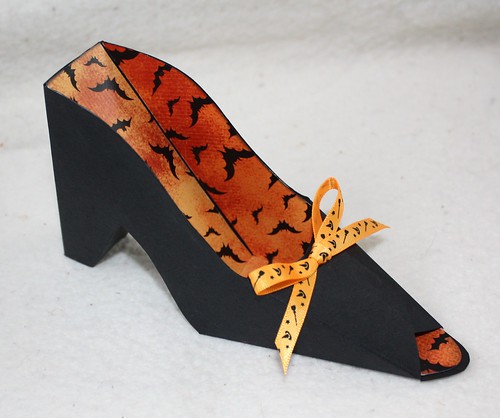
This project has everything I love.  It's cheap as chips, no die cutting machine or dies necessary, just a printer, some card and a pair of scissors.  The template is free, as is the designer paper I used.  It's super simple to put together, making several would be fairly painless which makes them ideal party favors.

I printed the patterns onto the thickest card that my printer will take, and cut both out.  I then used this as a template to draw around to cut one shoe from black card and one shoe lining from the designer paper. Score on the lines indicated and glue to secure.  It really is as simple as that!  The longest part was creating the template, once that part is done I reckon you could whip up several of these in no time at all.

I've gone for a Halloween theme, but with some red glitter you would have a pair of shoes Dorothy would be envious of, or you could use white card for a bridal shower favor, or bling it up for a twenty first.  You could of course add a lot more embellishments than I have, a tag, some paper lace, rhinestones, buttons etc, but I love that these look great even with just a simple bow.


Witches Shoe
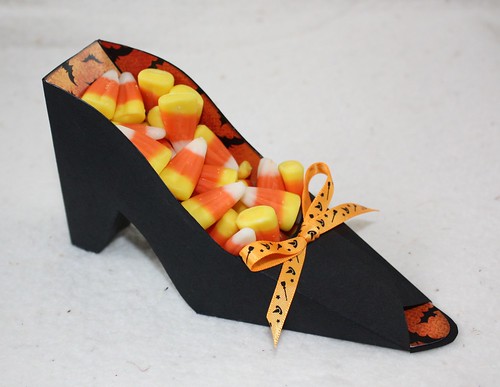
Mmmm candy corn!  so good, but hard to get here in Australia, and expensive!


Sunday, August 28, 2011

August Angels

August Angel


Technique: Crochet

Hello to my new followers, I'm so glad you joined me :o)

Every week I crochet an angel and send it off to someone who is need of hope through an organization called Angels for Hope. This is fantastic way to let people know that no matter what they are dealing with, that they are not alone. Each week I blog about it in the hopes that someone who wanders this way will read it and spread the word.

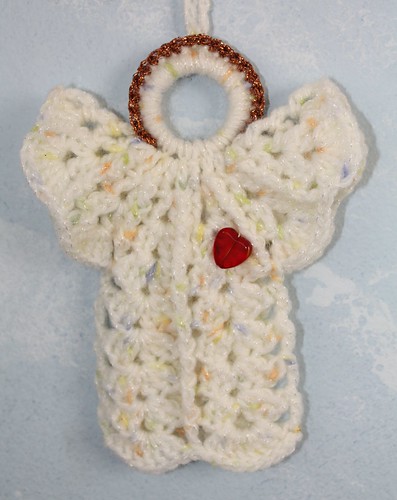
I was inspired by an unseasonal bout of warm weather to make all of my August angels out of a white yarn that has flecks of pastel colours running through it, with a copper halo to signify the unusual sunshine.  This is the last angel for August, new colours next month to celebrate the arrival of Spring.

If you like to crochet and would like to register for Angels for Hope you can do so here. Also, if you know someone who is need of an Angel, you can put in your request there.

Saturday, August 27, 2011

Vintage Valise Mini Album Pt 1

Valise Album


Technique:  Papercrafting

Materials:
thick cardboard
adhesive
designer paper
Tim Holtz Ideology large binder spine
tissue tape
Distress Inks (black & walnut)

Tools:
Sizzix Big Shot
Tim Holtz Vintage Valise die

I recently worked with a digital stamped called First Snow, and it got me thinking about the first time I saw snow.  It never snows where I live, we're close to sea level and too close to the coast line.  We will, on occasion, get a light snowfall in the Mt Lofty Ranges, a 90 minute drive from where I live, but the snow is so light and so briefly lived that it would be gone in the time it took to travel there!

The first time I saw snow was in Mt Hood, Oregon.  I visited there in October around a decade ago, and Mt Hood is high enough and cold enough that it has snow all year around, so my friends took me to see it.  I was so excited!  I remember being near the ski lodge and there was patches of snow around on the ground.  "SNOW" I squealed.  I was told that it was most certainly not snow, it was "snirt", what happens to snow when it melts and mixes with dirt.  They did take me further up the mountain to where the snow was still around knee deep.

Anyway, the memories got me digging through my photos, plane tickets, postcards and other junk, which led to wanting to take them out of the dingy box they have been sitting in and into an album or junque journal.

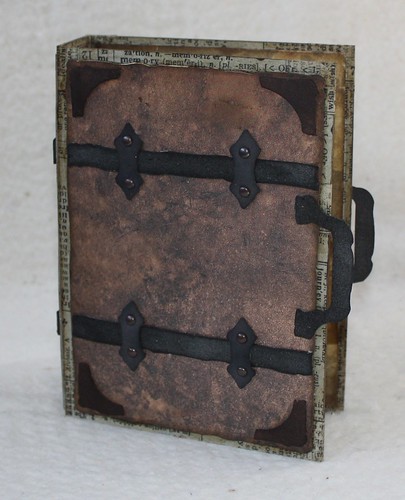
The cover is made from a sheet of thick cardboard, I used the backing board to a sketch pad cut down to 14" x 4.5".  It has then been scored at 4.5" and 6" to create a 1.5" width spine.  This is slightly larger than the valise die, and just big enough to fit a 5" x 6" glossy.  A decade ago digital photography was almost unheard of, so I have a handful of actual photo's I would like to preserve.

Valise Album


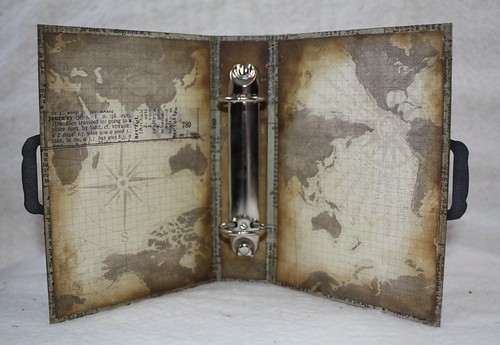
I used tissue tape on all the edges and to re-inforce where I scored the spine.  The interior of the binder has a world map glued into position, with another piece of tissue tape that has the dictionary definition of "journey" on it.

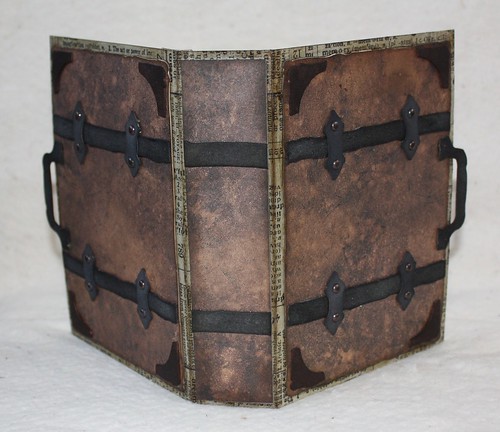
The exterior of the binder has the vintage valise pieces.  I had a piece of leathery looking paper in my stash that I used for the suitcase.  The bindings were made from some scraps of grungepaper, inked with black distress ink, and the whole binder has had liberal applications of walnut stain ink.

Valise Album


I was inspired to create this by the Simon Says Stamp and Show challenge theme this week which was travel.  I didn't get enough time to even start on the inside of the album pages, so I'm just entering the binder and I'll fill in the pages over the coming weeks.

Thursday, August 25, 2011

Six Inch Crochet Blanket Sampler - Solid Square

Solid Square


Technique: Crochet

Materials:
8 ply yarn in 3 colours

Tools:
4mm crochet hook

Finished Size:
6 inches

The original pattern comes from the book 200 Square Crochet Blocks by Jan Eaton. I have been regularly making one per week, with the goal that by the end of the year I will have enough to put together a blanket.  This block was a very simple construction, but like many of the patterns in the book (despite the claim that they are all six inches and totally interchangeable), it required an extra row to give it the correct number of stitches to make it a 6" square.

Wednesday, August 24, 2011

Christmas ATC Swap

Technique:  Papercraft

Materials:
Distress Inks:
* Stormy Sky
* Dusty Concord
*Chipped Sapphire
* Bundled Sage
Versacolour white ink
white embossing powder
Rock Candy Stickles
Sparkly Fluff
Glossy Accents

Tools:
heat gun
Spellbinders Leaves die

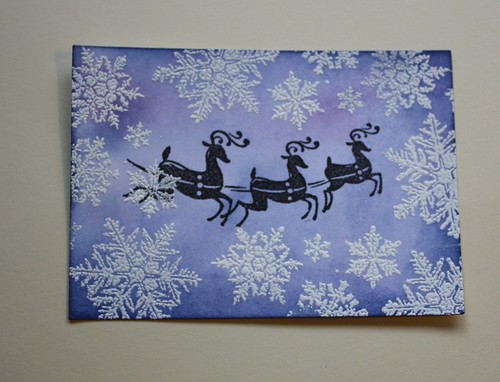
Arline at Christmas Crafting is hosting an ATC swap and as I have just been announced as one of the design team I wanted to participate. (What emotion is elation and terror mixed together?! LOL)

This is my first ATC, and as I started researching techniques and tutorials I realized that he only standard thing about an ATC is the size, everything else is totally up to the artist.  It can be flat, have dimensional elements, be painted, drawn, stamped, stitched, it really is a 3.5" x 2.5" anything goes.

I thought I would take you through the steps I took to create my ATC.

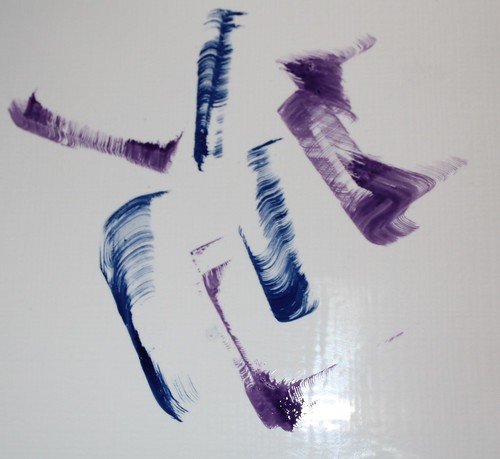
Smear some distress inks onto the work surface, here I have used Dusty Concord and Stormy Sky.  I know the craft sheets are very popular, but I actually like using my tile more.  It has weight so it doesn't shift about on the table, it doesn't stain and most importantly it doesn't absorb or 'store' colour.  Also, it cost me $1.00 at the local hardware store :o)

ATC


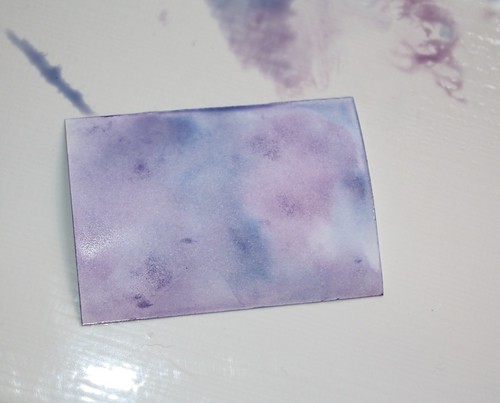
Spritz the inks with some water and then dip and swirl the ATC into the ink.  Turn right side over and allow to dry.


ATC


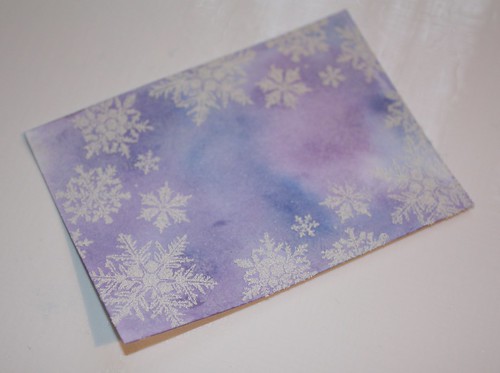
I used the snowflakes stamp from the Tim Holtz mini holidays stamp set to stamp a pattern around the edges of the card, which I embossed for a raised texture.


ATC


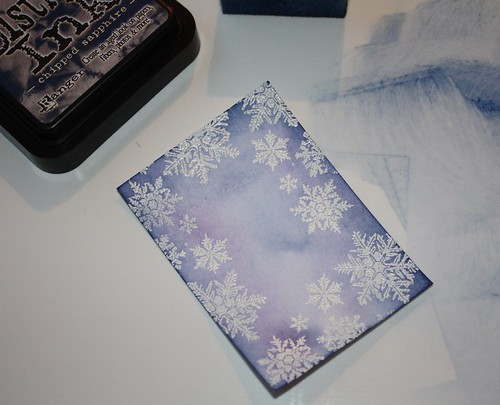
Ink the edges of the card with Chipped Sapphire.


ATC


Stamp the reindeer in the middle of the card.


ATC


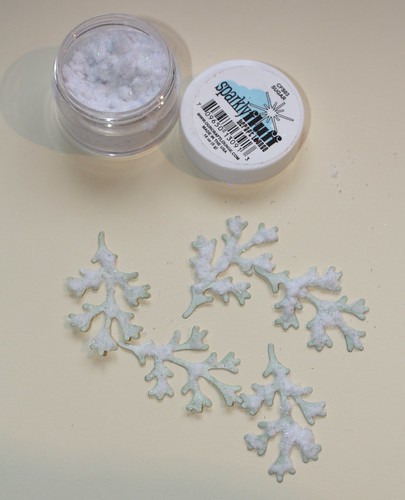
The trees were quite fun to make, although rather labour intensive!  Using the leaf die from Spellbinders I cut out a pile of little frond shapes from plain white card.  To give them some colour I sponged them with Bundled Sage ink.


ATC


Each little frond then got it's own sprinkling of Sparkly Fluff to simulate snow.


ATC


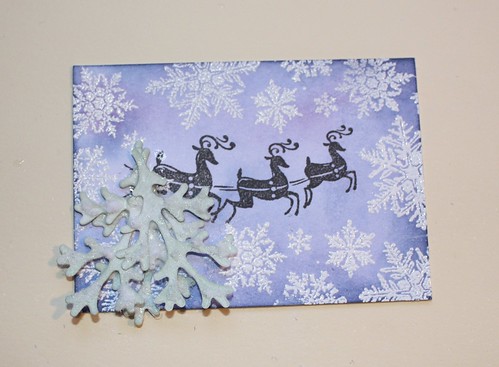
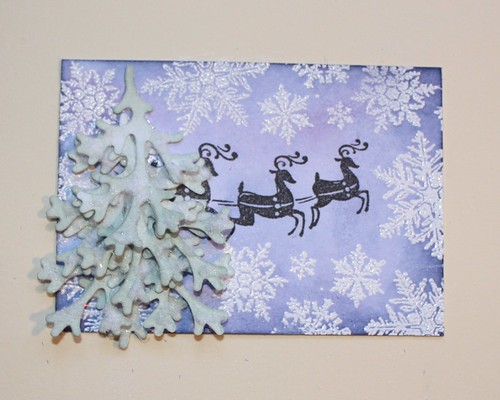
The trees each took 8 fronds glued in a layer to complete.  Three across the bottom row, three on the next row, and then two more to form the peak. 


ATC

Once secure, they got a further dusting of sparkly fluff to fill in any gaps in the branches and some rock candy stickles for extra glisten, and a little bit of glitter in each of the corners.

These are on their way to the lovely Arline for the Christmas Crafting ATC Swap. Hop on over to the Christmas Crafting website if you would like to join in :o)


Tuesday, August 23, 2011

All Wrapped Up

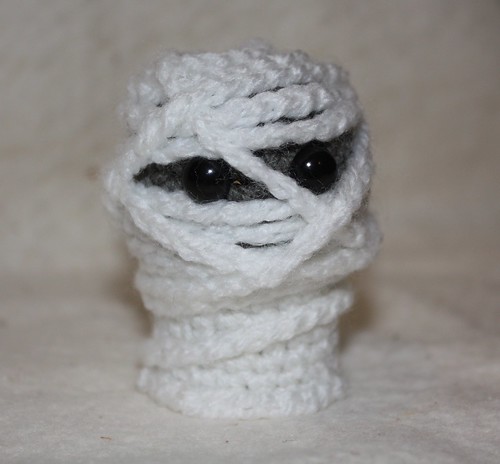
Mummy Cork*it


I've spent two days struggling with my copics.  I usually buy my blending card from a local store, and it's sold unlabelled so I don't know what brand it is, but I like it.  When I visited a different store they sold the branded Xpress card so I bought some of that and I hate it!  I feel like it is less 'absorbant' than the other, so it doesn't take long for the ink to start pooling on top of the page, and then once that happens it starts streaking.  As I was working with brown all I achieved was various shades of mud, streaky horrible mud.  I should have been colouring pigs!  

So time to put the pens down for a bit.

This little guy is made from crochet, but he is dead easy (I made a punny!).  The body is done in crochet then slipped over a champagne cork, so he is only a wee little thing.  A cute little desk companion for halloween, or lovers of old spooky movies and all things generally macabre.

You will need 8ply wool in white and grey and a 3mm crochet hook.

To begin start with a magic circle in grey wool.

Round 1: 1 6 sc Round 2: 2 2 sc in ea sc (12)
Round 3: 3 [2sc, sc] x 6 times (18)
Round 4: 4 sc around (18)
Round 5: 5 sc around (18)
Round 6: 6 sc around (18)
Round 7: sc around (18)
Round 8: sc around (18)
Round 9: sc around (18)

Switch to white yarn
Rounds 10 - 17: sc around

Instead of binding off at the end of round 17, chain 400, this will form the bandage wrap that goes around the mummy.  Bind off.

Slip the body over a champagne cork, it will be a tight fit but the yarn will stretch.  Once he is all snug and cozy start wrapping the bandages around the mummy, securing with a few small pins or dab of glue.  I used 7mm plastic eyes that I bought at the local craft store, the kind intended for making soft toys.  Use an old knitting needle to poke holes in the cork where you want the eyes, and then just press into place.

If you don't have an old champagne cork, well, this is the perfect excuse to buy a bottle, I know I need to!