Saturday, April 30, 2011

Samhain - The Pomegranate Experiment

 Here in Australia Samhain falls on May 1st, so our 'Hallows Eve' falls on April 30th.

We've previously celebrated Lammas, the first harvest, and Mabon, the second harvest.  Samhain, which means summers end, marks the third and final harvest.  Agriculturally, it was the time that farmers made the choice about which animals to keep for breeding in the spring, and which would be slaughtered for feed.  The last fruits and vegetables of the season were harvested and preserved for the coming winter when fresh foods were scarce.

Pomegranates are a powerful symbol at this time.  They represent the journey Persephone makes to the underworld, causing Demeter to go into mourning and winter to cloak the land.  Root vegetables such as turnips, beets and potatoes were amongst the last to be harvested before the ground became frozen.  And of course squash and pumpkin have now become synonymous with 'Halloween'.

Samhain is also the time where the veil between the worlds is believed to be at it's thinnest and least guarded.  When the Church placed their All Souls Day festival at the same time as Halloween a blending of the two mythos occured to create the symbolism that most of us are familiar with.

Here in Australia, Halloween and Samhain are separate events that occur at opposite ends of the year, just as with Christmas and Yule.  For Samhain I like to observe the more traditional and agricultural traditions, those that tie in with Autumn which is actually what is happening here, so I chose a project that reflects that.  When October rolls around I will make some of the spookier Halloween projects that we are all so familiar with.  So today, I am drying pomegranates.

My mum has an ornamental pomegranate tree, which is supposed to give small ornament sized pomegranates, but the handful she brought me were quite varied in size.  I've read two methods of drying online, one states to pierce the skin several times, whilst the other does not, then both go on to suggest leaving the fruit to dry on an airing rack for several weeks.  As I have a few pomegranates I am trying both methods!  I will report back and let you know which one I thought worked best.

What can you use them for when they are dry?  If you have any that are a bit blemished, so they can be gilded, either with gold spray paint or gold leaf, and hung as ornaments.  You can incorporate them into decorative seasonal bowls, pomegranates and pine cones make a beautiful combination, perhaps combined with some walnuts or acorns if they are available where you live, and some cinnamon sticks or cinnamon ornaments such as these.

Here's a beautiful combination that Pottery Barn put together, that you can very easily replicate:


And here is another beautiful idea from the Vintage Garden Gal, an autumn wreath that uses the simple beauty of pomegranates and acorns.

Thursday, April 28, 2011

The Flower Garden Purse Pt 4

Technique: Crochet

Materials:
8 ply yarn in various colours;
blue and green for the bag
3 complimentary colours for the flowers
4mm hook
tapestry needle

The original pattern for this purse appeared in Crochet World Magazine 2007. I'm sure I'd get in trouble for republishing the pattern here, but I can take you through what I did step by step.

If you would like the original pattern I can highly recommend subscribing to Crochet World. It is $16 per year for a digital subscription, and that instantly gives you access to several years worth of back issues. Fantastic Value.

OK onto the instructions, and mine differ somewhat to the original. The instructions are part of an ongoing project, see the related posts below if you have come across them in the incorrect order:

Part 1, The Flowers
Part 2, The Bag
Part 3, The Liner
Part 4, Construction (you are here!)

In total you will be constructing:
12 flowers
1 bag body
1 bag insert/liner
2 straps

Let's make our straps and then put it all together!

The straps are made from a chain of blue and a chain of green twisted together. You want a nice lengthy piece of chain, around 200-250 stitches long. Hold the chains together and knot each end. Get a volunteer (or a hook) to hold one end, while you hold the other. Put a pencil through your end holding the length fairly taut twist, twist, twist! You will know when it's tight enough when you slacken the tension a little and you can see it's starting to twist back on itself. When it reaches that stage bring the two tied ends together and allow it to twist back on itself, and tie off.


Do this twice, so you have two handles. Honestly it sounds a lot more complicated than it actually is!

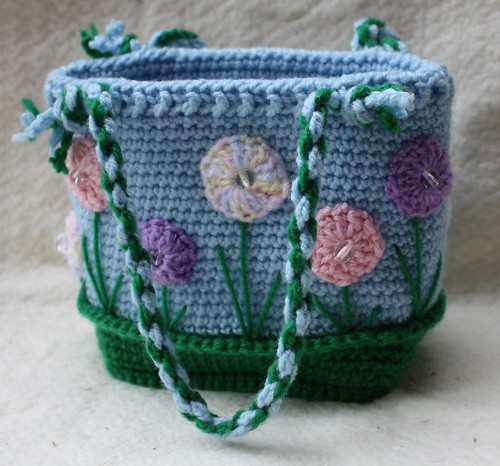
Pin your flowers into place on the outer bag so you get a good spacing. I had three large flowers across each side at the top and three across each side at the lower edge. Once you have the spacing you are happy with, stitch them into place.


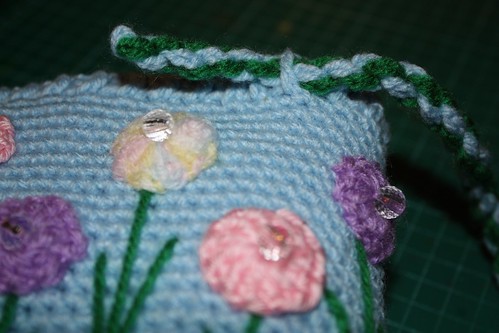
Closeup of Flowers
Closeup of the flowers, stems and leaves.


Using green yarn, create stems and leaves for each flower.

Slip the liner into place and slip stitch across the top of the bag with blue yarn.


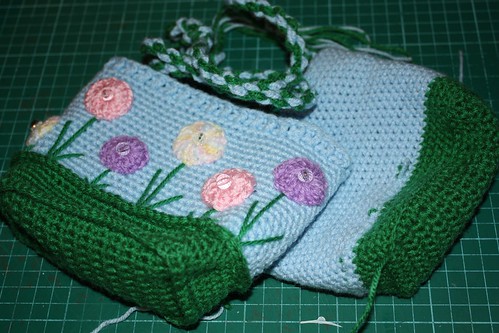
Bag Components
Bag, liner and handles ready to be assembled.


Slip the ends of the cords through the decorative finish and fasten off.


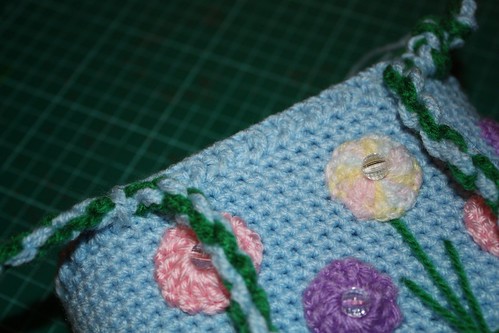
Handle
Slip the end of the cord that does not have a knot through a loop on the right hand side of the bag, pull it through...


Handle
Slip it through a hook on the left hand side of the bag and knot.  Voila!  A handle.


Stand back and admire!

Wednesday, April 27, 2011

The Flower Garden Purse Pt 3

Technique: Crochet

Materials:
8 ply yarn in various colours;
blue and green for the bag
3 complimentary colours for the flowers
4mm hook
tapestry needle

The original pattern for this purse appeared in Crochet World Magazine 2007. I'm sure I'd get in trouble for republishing the pattern here, but I can take you through what I did step by step.

If you would like the original pattern I can highly recommend subscribing to Crochet World. It is $16 per year for a digital subscription, and that instantly gives you access to several years worth of back issues. Fantastic Value.

OK onto the instructions, and mine differ somewhat to the original. The instructions are part of an ongoing project, see the related posts below if you have come across them in the incorrect order:

Part 1, The Flowers
Part 2, The Bag
Part 3, The Liner (you are here!!)
Part 4, Construction

In total you will be constructing:
12 flowers
1 bag body
1 bag insert/liner
2 straps


Today, I made the the liner for the bag. The original pattern did not include a liner, however I felt it was necessary to finish the bag.


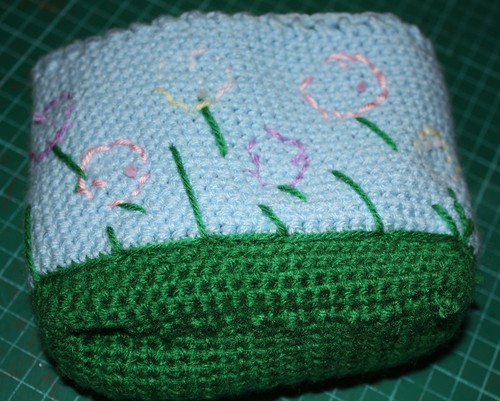
Inside the Bag
You can see here the stems and leaves of the flowers, which could easily catch on keys if left unlined.


Once the flowers and stems get attached there are quite a few threads on the interior that could catch on things like keys. You could sew a liner if you prefer, but the double layer of crochet I felt would make the bag sturdier. I made the liner one stitch smaller in dimensions than the outer bag. You could also, if you prefer, make the liner one solid colour rather than the two colours as I did here.

Row 1: With green, chain 11, sc in 2nd chain from hook, sc in each remaining chain across, turn (10 sc)
Row 2-23: Ch 1, sc in each sc across, turn. At the end of row 23 do not turn.

This is where you begin working in rounds now rather than rows:

Round 24: Chain 1, sc across the long edge into the end of each row (23 sc), sc across the short edge (10 sc), sc across the long edge into the end of each row (23 sc), sc across the short edge (10 sc).

Now remember on the outer bag we worked in the bag loops to form a right angle so the bag would sit nicely, for the liner we want to work in the front loops, so that the right side of the crochet is facing the inside of the bag, which will allow us to put wrong sides together when we stitch the lining in.

Round 25: Working in front loops for this round only, ch 1, sc in each stitch around, do not join in beginning sc.

Round 26-29: Sc in sc around.

Also remember on the outer bag when we switched colours we worked into the back loops again, no need to do that for the liner, simply switch to blue at the start of row 30 and continue in sc rounds until your liner matches the height of your bag and finish off.

Tuesday, April 26, 2011

The Flower Garden Purse Pt 2

Technique: Crochet

Materials:
8 ply yarn in various colours;
blue and green for the bag
3 complimentary colours for the flowers
4mm hook
tapestry needle

The original pattern for this purse appeared in Crochet World Magazine 2007. I'm sure I'd get in trouble for republishing the pattern here, but I can take you through what I did step by step.

If you would like the original pattern I can highly recommend subscribing to Crochet World. It is $16 per year for a digital subscription, and that instantly gives you access to several years worth of back issues. Fantastic Value.

OK onto the instructions, and mine differ somewhat to the original. The instructions are part of an ongoing project, see the related posts below if you have come across them in the incorrect order:

Part 1, The Flowers
Part 2, The Bag (you are here!!)
Part 3, The Liner
Part 4, Construction

In total you will be constructing:
12 flowers
1 bag body
1 bag insert/liner
2 straps

Today, I made the the body of the bag. The base is rectangle, worked in short rows. By this I mean choose how deep you want the bag to be (ie 8, 10, 12 stitches deep) and create a foundation chain. Let's assume you want it to be 10 stitches deep, so your first and second rows will look like this:

Row 1: with green yarn, chain 11 stitches, sc in 2nd chain from hook, sc in each remaining chain across (10 sc) and then turn.

Row 2: chain 1, sc in each sc across (10 sc), turn.

Now you will add as many rows as you want until you reach the desired width. This will form a rectangle that will serve as the base to your bag. When it is the size that you want, don't turn the next row. Instead of working in rows, you are now going to start working in rounds (which means don't slip stitch to join, just work in continuous rounds.

Lets assume that you made your bag 20 rows wide. Row 21 will look like this:

Row 21: Chain 1, sc across the long edge into the end of each row (20 sc), sc across the short edge (10 sc), sc across the long edge into the end of each row (20 sc), sc across the short edge (10 sc).

So you will have a round that comprises of 60 stitches. Make sense?

Now to set the base up so it sits nice and flat, and that the sides form a right angle to the base, on the next row you are going to sc around in only the back loops.

Continue working in green yarn until the 'garden bed' is as high as you would like it, 5 or 6 rows should do it and fasten off the green

Attach the blue yarn, and on this joining row work only in the back loops again. So join, chain 1, work in back loops only and sc around. Then you can work as many rows of sc in blue as you want until the bag is the height that you wish. 18-20 rows should do it. Slip stitch to join on the final row.

The decorative top edge is made by alternating fdpc and bdpc, so you would chain 3, fpdc around the sc post below, then bpdc around the next sc post below, all the way around, then slip stitch to join in the 3rd chain of the beginning ch-3, and fasten off.

As an additional trim, on both the rows where we worked into the back loops, you can sc crochet around in the front loops to create a decorative rim.

Monday, April 25, 2011

The Flower Garden Purse Pt 1

Flower Bag Finished


Technique: Crochet

Materials:
8 ply yarn in various colours;
blue and green for the bag
3 complimentary colours for the flowers
4mm hook
tapestry needle

The original pattern for this purse appeared in Crochet World Magazine 2007. I'm sure I'd get in trouble for republishing the pattern here, but I can take you through what I did step by step.

If you would like the original pattern I can highly recommend subscribing to Crochet World. It is $16 per year for a digital subscription, and that instantly gives you access to several years worth of back issues. Fantastic Value.

OK onto the instructions, and mine differ somewhat to the original. The instructions are part of an ongoing project, see the related posts below if you have come across them in the incorrect order:

Part 1, The Flowers (you are here!!)
Part 2, The Bag
Part 3, The Liner
Part 4, Construction

In total you will be constructing:
12 flowers
1 bag body
1 bag insert/liner
2 straps

Today, I made the 12 flowers, 6 large and 6 small. The flowers are basically a circle, so start with a chain 4 and then double crochet around until you have the size that you want, and then slip stitch to close. Leave a nice long tail on the flowers, you can use that to attach them to the bag later.

Saturday, April 23, 2011

Salt Dough Lebkuchen


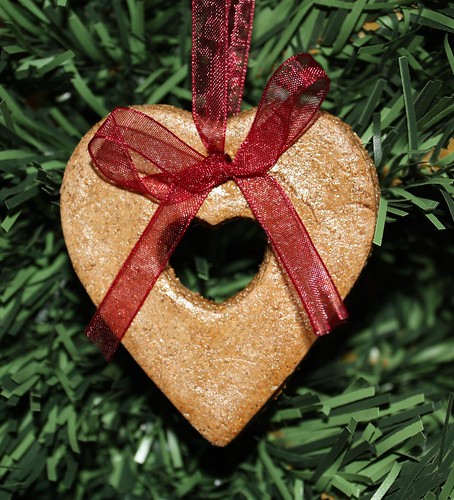
Gingerbread Salt Dough Heart


Technique: Salt Dough

Materials:
all purpose flour
salt
wallpaper paste
acrylic paints
polyeurethane

Tools:
cookie cutter
paintbrushes
oven

Salt Dough Recipe
2 cups all purpose flour
1 cup salt
1/2 cup ground allspice
2 tspn wallpaper paste
1/2 cup water

Combine all the ingredients and knead until smooth, approximately 10 minutes. Allspice is a combination of nutmeg, ginger and cinnamon that has a wonderful gingerbread smell. If you can't find it commercially prepared, you can substitute in half a cup of cinnamon. I'm not typically a fan of salt dough, although cheap to make it doesn't have the versatility of polymer clay, however this recipe is excellent for making "cookies".

You can treat salt dough exactly as you would roll out cookie dough. Roll it to the desired thickness, usually about 1/4" thick and use cookie cutters to form shapes. Use a straw to push a hole in the top of the cookie for hanging later. For these Lebkuchen cookies I used two sizes of heart shaped cutters.

Lay on a baking tray and bake in an oven at around 250F/120C for an hour, turn and cook for another hour. Let cool in the oven. After baking they should be dry, light and have a hollow sound when tapped.

Once the cookies are fully dried and cooled you can paint and decorate however you wish. For best results and a cookie that will last many years, give several coats of varnish, making sure you coat inside the hanging hole also. Salt is a humectant, and will draw any moisture in the air to the dough causing it to soften, it is essential to seal it properly to prevent your cookie from going soggy.

Most of us have probably seen traditional Lebkuchen at Christmas time. The warm, dark, spiced cookies, most often seen in a heart shape. I used the same batch of dough that I created the gingerbread man from, but rather than using a waterbased sealant, on the Lebkuchen I used Wattle Estapol, a solvent based varnish that requies turpentine to cleanup. It has a deep, golden colour that really enhances the colour of the cookie.

Friday, April 22, 2011

Catching up with Craft Passion

Once a week I spend the day playing catch up, adding the finishing touches to any projects not quite yet done, taking photos and browsing the net for inspiration, and as always, looking for free patterns and interesting tutorials. To stick to my commitment to posting daily, I'll share with you something that I thought was a fabulous find.

This week I spent quite a bit of time browsing the Craft Passion website, which has dozens of free projects and tutorials. 


These adorable little bunnies were made by the author as dessicant bags, but you could fill them with lavender and use them to scent drawers and cupboards, or fill them with rice or wheat and make a "bunny toss" game for the kids, or use them as a paper weight, or fill them with polyfill and turn them into ornaments, or sew on adornments.  That's what made this find so fabulous, there are so many ways to utilize this easy to assemble pattern.

You can see the full tutorial and pattern here.

Thursday, April 21, 2011

Six Inch Crochet Blanket Sampler - Pastel Delight

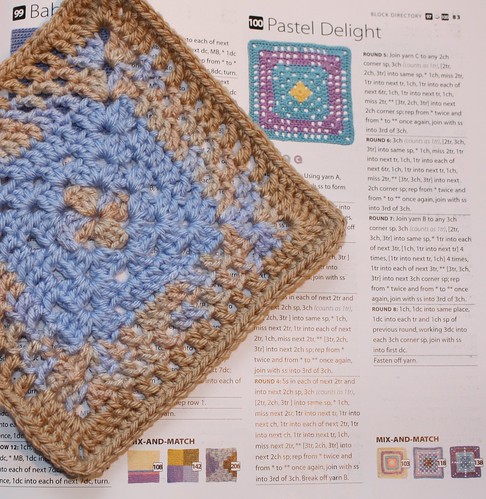
Pastel Delight

Technique: Crochet

Materials:
8 ply yarn in 3 colours

Tools:
4mm crochet hook

Finished Size:
6 inches

The original pattern comes from the book 200 Square Crochet Blocks by Jan Eaton.

Wednesday, April 20, 2011

Jack Skellington Part 4

jack3Jack Skellington Ornament

Technique: Freehand Drawing

Materials
white acrylic paint
glass bauble
Bic Mark It pens


Add a little water to the white paint until it is the consistency of pouring cream. Pour into the bauble and swirl around to coat the inside fully and then tip upside down and drain. I have a little lab beaker that I use for this, works a treat!

Draw Jack's details onto the bauble with a black permanent marker. If you make a mistake simply dip an orange stick or toothpick into some isopropyl alcohol and rub away the boo boo. This is the fourth in a series of Nightmare Before Christmas Ornaments.

Set 6 Jack Skellington Ornaments


Jack Skellington Ornament

Jack Skellington Ornament

jack3Jack Skellington Ornament

Jack Skellington Ornament

Jack Skellington Ornament

Jack Skellington Ornament

Tuesday, April 19, 2011

Easter Planter Pot

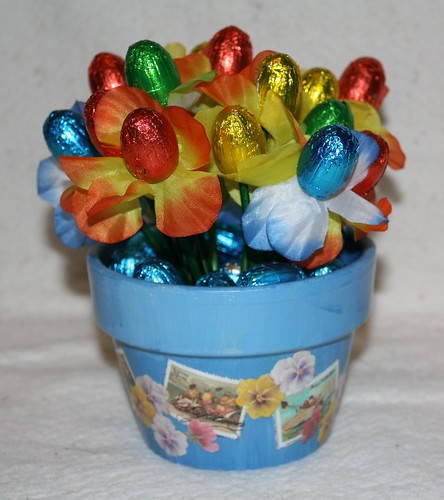
Easter Egg Flower Pot


Technique:  Decoupage

Materials:
terracotta pot
acrylic paints
Modge Podge or similar product
linen paper or other good quality ink jet paper
Blu-Tac

Tools:
scissors
printer
foam pad
tapestry needle
paint brush
spray sealant

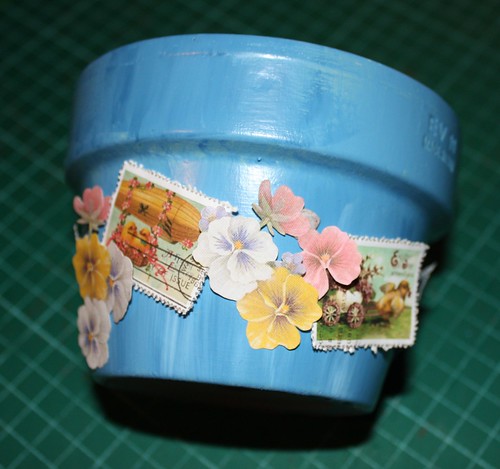
Paint the terracotta pot using your favourite decorative method.  I often use a sponge to apply paint but this time I loaded up a wide brush with blue and white and streaked it down the pot for a colour variation.  Let it dry thoroughly and apply a second coat if necessary.  Seal using Modge Podge when totally dry.


Click on the images above to get the full size, then save and print out on linen paper on the highest quality setting your printer can manage.  The stamps were created by me using vintage post cards and Gimp to create postage stamps.  If you are making this for any other occasion, feel free to use the template below to make your own stamps.


Spray the front of the image with a spray sealant.  When I print out images I prefer to use a spray sealant as I have found brushing on something like Modge Podge can drag the ink particles and cause smearing.  You can use Modge Podge on the back of the print though.

Easter Stamp Perforation

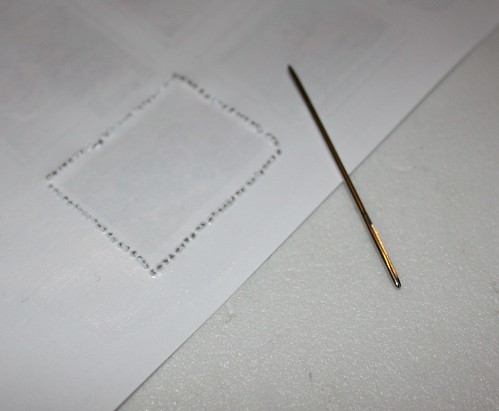
Lay the image over a sheet of styrofoam for support and perforate the edges with the tapestry needle.  This gives a lovely, authentic look to the stamp.  Cut out as many pansies from the first print as you think you might need.

Easter Pot Design Phase

Once you have your images prepared use balls of Blu-Tac to design the piece.  This lets you move and rearrange until you get it exactly how you want it.  When you are satisfied use Modge Podge to stick the pieces permanently.  Allow the pot to dry over night and finish with a coat or two of Modge Podge.

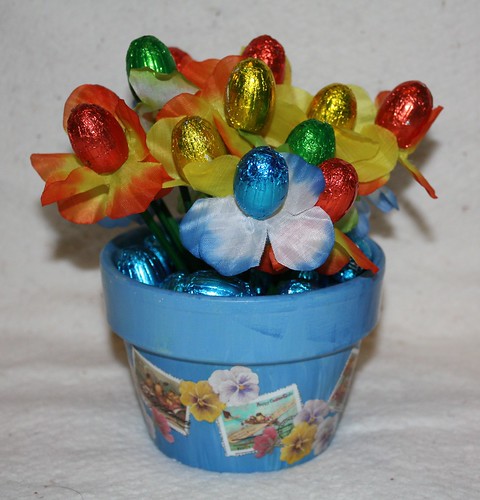
I made this for my Mum.  I used the Easter Flowers I made a few days earlier to create a chocolate floral arrangement.

Easter Egg Flower Pot

Monday, April 18, 2011

Elf "Pin Up" Doll

Elf "Pin Up" Doll

Technique: Sewing, Painting, General Crafting

Materials
clothes pin
wooden bead for head
assorted felt
acrylic paints
tacky glue
yarn for hair
Dremel or small drill
flexible but firm wire
chenille sticks
flesh tone embroidery floss
jingle bell and holly embellishments

Tools:
scissors
sewing machine
wire cutter
pinkingshears
paintbrush

Follow this tutorial for a step by step guide on how to get the doll ready up to the dressing stage.

Using the templates below, cut one of each from felt.


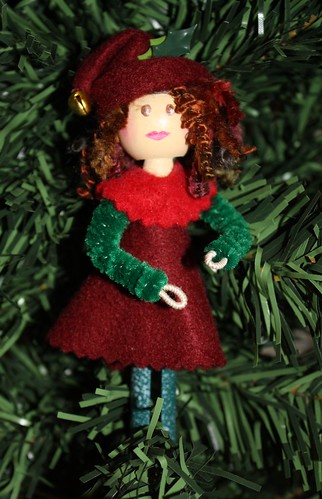
Sew or glue the edges of the hat together, turn right side out and fold up the lower edge to form the brim. Sew or glue the edge of the dress and turn right side out. Glue into position right up in the 'underarm' section of the doll. Cut a small strip of contrasting felt, using pinkingshears to get the zig zag edge and glue into place around the neck of the doll, this is the collar of the dress.

Paint the details onto her face, glue yarn into place for her hair. With needle and thread attach a jingle bell to the end of her hat, and then attach the point of the hat to the brim to fold it over as shown in the photo. Tuck a few holly leaves into the brim.

Wednesday, April 13, 2011

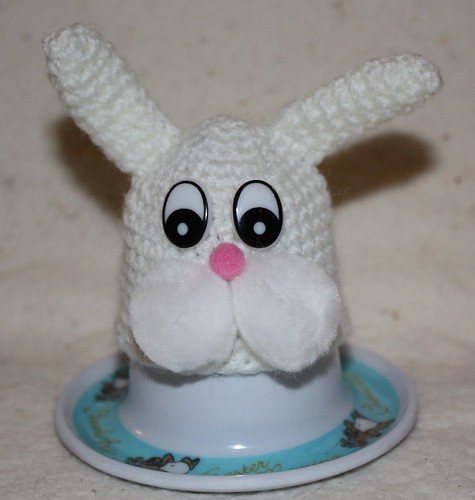
Bunny Egg Cozy

Bunny Egg Cosy

Technique: Crochet

Materials
8 ply yarn

Tools:
3mm crochet hook

This egg cozy is designed to fit over an extra large hen egg.

Body
Rnd 1: Work 4 sc in first ch. Place marker in first st for beg of rnd; move marker up as each rnd is completed.
Rnd 2: Work 2 sc in each sc around - 8 sc.
Rnd 3: *2 sc in next st, sc in next st, rep from * around - 12 sc.
Rnd 4: *2 sc in next st, sc in each of next 2 sts, rep from * around - 16 sts.
Rnd 5: *2 sc in next st, sc in each of next 3 sts, rep from * around - 20 sts.
Rnd 6: *2 sc in next st, sc in each of next 4 sts, rep from * around - 24 sts.
Rnd 7: *2 sc in next st, sc in each of next 5 sts, rep from * around - 28 sts.
Rnd 8: *2 sc in next st, sc in each of next 6 sts, rep from * around - 32 sts.
Rnd 10- 20: sc around, finish with a slip stitch and bind off

Ears
Rnd 1: Work 4 sc in first ch. Place marker in first st for beg of rnd; move marker up as each rnd is completed.
Rnd 2: *2 sc in next st, sc in next st, rep from * around - 6 sc.
Rnd 3: *2 sc in next st, sc in each of next 2 sts, rep from * around - 8 sts.
Rnds 4-8: Sc in each st around. Fasten off.

Finishing:
Sew ears to body. Glue on embellishments such as wobbly eyes, pom pom for nose, cheeks and tail.

Tuesday, April 12, 2011

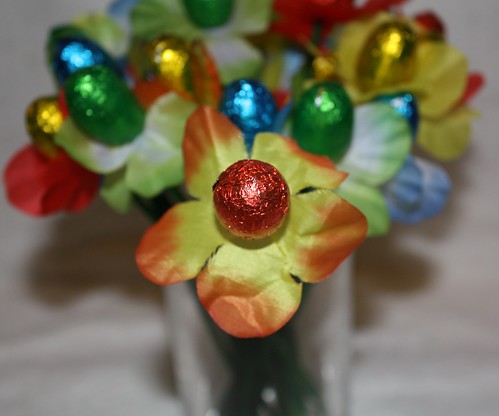
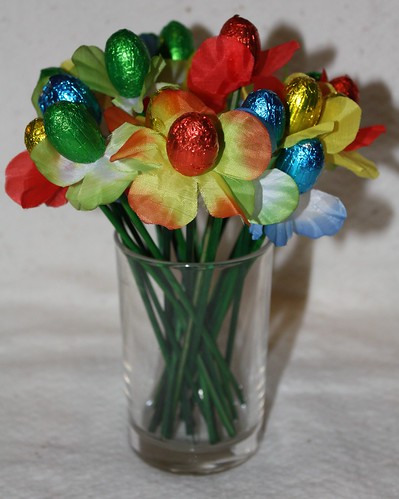
Easter Flowers

Easter Egg Flower

Technique: General Crafting

Materials:
wooden bbq skewers
green food colouring
silk flowers
mini easter eggs

Soak the skewers in green food colouring for around 30 mins or until they are thoroughly green and then put on a sheet of newspaper and allow to dry thoroughly. Don't be tempted to use paint for this step, it must be food safe.

When the skewers are dry thread a silk flower over the point and then stick the point into the bottom of a mini easter egg to form the flower. I found that the petals from a cheap dollar store Hawaiian lei worked perfectly for this, I got a few dozen out of a $2 lei.

To present the bouquet you can make a bunch out of out a dozen and wrap a decorative ribbon around the stems, or you can place them in a vase or planter filled with shredded green paper or more eggs or both!
Easter Egg Flower

Monday, April 11, 2011

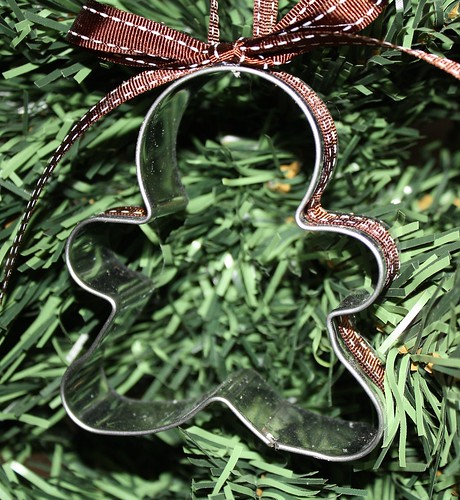
Gingerbread Cookie Cutter Ornmanet

Gingerbread Cookie Cutter Ornament


Technique: General Crafting

Materials:
cookie cutter
raffia, ribbon and other embellishments

Tools:
scissors
hot glue gun

After playing around with the salt dough yesterday, I realized that the cookie cutters themselves could be dressed up to make ornaments in their own right. I simply glued ribbon around the wide edge of the cookie cutter and put a ribbon bow on top of the gingerbread's head, but you could be as elaborate as you wish.

Saturday, April 9, 2011

Santa Cross Stitch 2011

Santa Cross Stitch 2011


Technique: Cross Stitch

Materials:
embroidery floss in the listed colours
14 count aida
small wooden embroider loop

Tools:
scissors
embroidery needle

Thursday, April 7, 2011

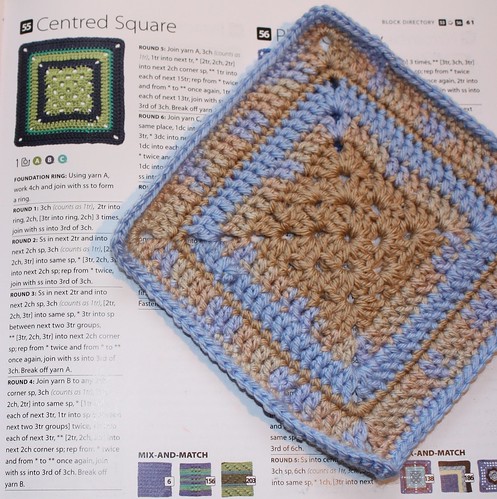
Six Inch Crochet Blanket Sampler - Centered Square

Centered Square


Technique:  Crochet

Materials:
8 ply yarn in 3 colours

Tools:
4mm crochet hook

Finished Size:
6 inches

The original pattern comes from the book 200 Square Crochet Blocks by Jan Eaton.

Monday, April 4, 2011

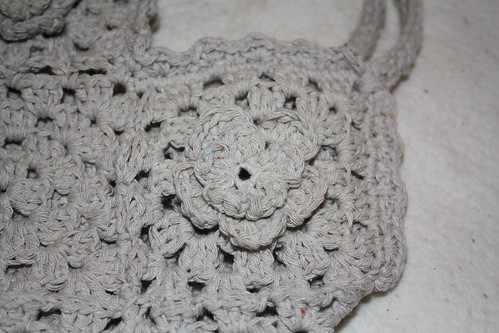
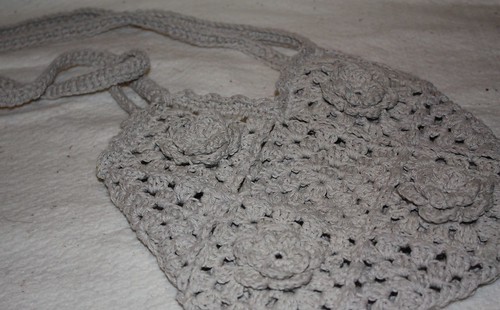
Granny Square String Tote Bag Pt 1

String Bag


Technique: Crochet

Materials:
medium weight yarn of choice

Tools:
4mm hook

I was taught to do the basic granny square when I was quite young. Of course after not doing any crochet for years I totally forgot how to do one again, but it is one of the most basic crochet patterns and easily picked up again.

The great thing about the granny square is that you can finish one off pretty quickly, and they are very portable making it ideal as a travel project.

If you have never tried a granny square here is a lovely tutorial.  The original pattern for the bag can be found here: Flower Tote Bag.

Note:  The original pattern was offered freely to all at the above link.  Since my first publishing of this post it has been removed and it is now offered for sale here.  If you want the original pattern as it was published, please follow the link provided.

As for the instructions below: I believe that the regular old granny square pattern is considered common property, freely available for all.  I have adjusted my pattern below to use only the granny with a link to a free tutorial on how to embellish with a flower.   I have also made a number of changes to the pattern along the way, both in size, materials used, and construction.  Whilst I would never claim that what is below is an original pattern created by me, I feel I have made enough changes that it is not breaching the original owner's copyright.

The original pattern calls for #5 crochet cotton in Ecru, which I bought but the band on the ball of cotton recommended a 2mm hook, whereas the pattern calls for a 4mm hook, so as you can image the resulting squares were much looser than I would have liked.

Ever since the Sound of Music I have had a love for string, and I happened to have some soft cotton string in the pantry, so I decided to use that.  It is a similarly neutral colour, and the strength is excellent.

In total you will be constructing 13 granny squares.

2 x Granny Square A (regular granny square)
3 x Granny Square B (the joining granny squares)
8 x Granny Flower Square (granny square with optional flower embellishment)

Join with slip stitch unless otherwise noted.  Chain 2 at the beginning of each row or round counts as first DC.
Using 4mm hook

Granny Square A.  
Make 2.  This is the central square as shown in the photo above.

Rnd 1:  Ch4, slp st into first chain to form a ring, ch 2 (counts as first dc), 2 dc in ring, [ch 2, 3 dc in ring] 3 times, ch 2, join

Rnd 2:  Slp st in each of next 2 dc, slp st in next chain space, ch 2, (2 dc, ch 2, 3 dc) in same ch space, ch 1, [(3dc, ch 2, 3 dc) in next ch sp, ch 1] around, join in second ch of beginning ch 2.

Rnd 3:  Slp st in each of next 2 dc, slp st in next chain space, ch 2, (2 dc, ch 2, 3 dc) in same ch space, *ch 1, 3 dc in next ch 1 sp, ch 1 **, (3dc, ch 2, 3 dc) in next ch 2 sp, rep from * around ending last repeat at **, join in second ch of beginning ch 2.

Rnd 4: Slp st in each of next 2 dc, slp st in next chain space, ch 2, (2 dc, ch 2, 3 dc) in same ch space, ch 1, *[3 dc in next ch 1 sp, ch 1} twice**, (3dc, ch 2, 3 dc) in next ch 2 sp, ch 1, rep from * around ending last repeat at **, join in second ch of beginning ch 2, fasten off.


Granny Tote Construction


Granny Flower Square.  
Make 8.  These are the four squares that get attached to the central square that you just made (see photo above).

Note:  If you want the exact granny flower squares that I used you will need to purchase the pattern from this link. The instructions below will make the same basic granny square as shown above, and then if you would like to embellish it with a crochet flower this excellent free tutorial will show you how. 

Rnd 1:  Ch4, slp st into first chain to form a ring, ch 2 (counts as first dc), 2 dc in ring, [ch 2, 3 dc in ring] 3 times, ch 2, join

Rnd 2:  Slp st in each of next 2 dc, slp st in next chain space, ch 2, (2 dc, ch 2, 3 dc) in same ch space, ch 1, [(3dc, ch 2, 3 dc) in next ch sp, ch 1] around, join in second ch of beginning ch 2.

Rnd 3:  Slp st in each of next 2 dc, slp st in next chain space, ch 2, (2 dc, ch 2, 3 dc) in same ch space, *ch 1, 3 dc in next ch 1 sp, ch 1 **, (3dc, ch 2, 3 dc) in next ch 2 sp, rep from * around ending last repeat at **, join in second ch of beginning ch 2.

Rnd 4: (Joining round, basically between every 3dc shell you slip stitch to an adjoining square chain space to join them together): Sl st in each of next 2 dc and next ch-2 sp, ch 2, 2 dc in same ch sp, ch 1, #sl st in corresponding ch sp on other square, ch 1, 3 dc in same sp on this square, [ch 1, sl st in next ch sp on other square, 3 dc in next ch sp on this square] twice, ch 1, sl st in next ch sp on other square ##, 3 dc in next ch sp on this square, ch 1, sl st in next ch sp on other square, ch 1, 3 dc in same ch sp on this square rep from # number of times needed to join squares for front and back, ending at ##, making sure to join all corners tog where there is more than 2, working on this square, *[ch 1, 3 dc in next ch sp] twice**, (3 dc, ch 2, 3 dc) in next ch sp, rep from * around, ending last rep at **, join in 2nd ch of beg ch-2.  Fasten off.


Granny Square B (the joiner squares)
Make 3
 
Rnds 1-3: Rep rnds 1-3 of Square A (essentially the first 3 rounds of a basic granny square)
Rnd 4:  Rep rnd 4 of flower square, joining according to front and back illustrations.
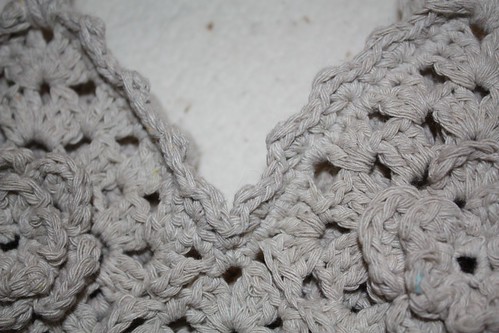
String Back Centre Detail


Top Edging
Rnd 1: With 4mm hook, join with sc in ch 2 sp on any square along the top, sc in each ch sp and in each st around, join in beg sc.

Rnd 2: Ch 1, sk first st, (sc, dc, sc) in next st, sk next st, sc in next st, [sk next st, (sc, dc, sc) in next st, sk next st, sc in next st] across to centre back, sc in centre sc of next sc group, ch 10 (button loop), sl st in same st as last sc, [sk next st, (sc, dc, sc) in next st, sk next st, sc in next st] around, join in beg sc, Fasten off.

Straps
Row 1: With WS tog and 2 strands held tog, join with sc in ch-2 at inside top point of #2 Flower Square, chain 27 or desired length, sc in point of #5 Flower Square on front, ch 1, sc in each ch across, sl st in beg sc. Fasten off.

Row 2: Join 2 strands with sc in ch-2 sp at inside top point of #10 Flower Square, working on opposite side of same ch as on row 1, sc in each ch across, sc in ch-2 space at point of #7 Flower Square. Fasten off. 

Note:  I did the straps a little differently to the instructions...

Row 1: With WS tog and 2 strands held tog, join with sc in ch-2 at inside top point of #2 Flower Square, chain 100, 2sc in point of #5 Flower Square on front, sc in each ch across, sl st in beg sc. Fasten off.

String Bag Handle Detail

Sunday, April 3, 2011

April 3rd - Angels for Hope

Technique: Crochet

Every week I crochet an angel and send it off to someone around the world that I don't know who is need of hope. This is fantastic way to let people know that no matter what they are dealing with, that they are not alone.

If you would like to register for Angels for Hope you can do so here. Also, if you know someone who is need of an Angel, you can put in your request there.

Saturday, April 2, 2011

A Day At The Races

Pink Felt Hat


Technique: No Sew Fabric

Materials:
felt
fabric stiffener
styrofoam ball
rubber band
embellishments

Tools:
scissors

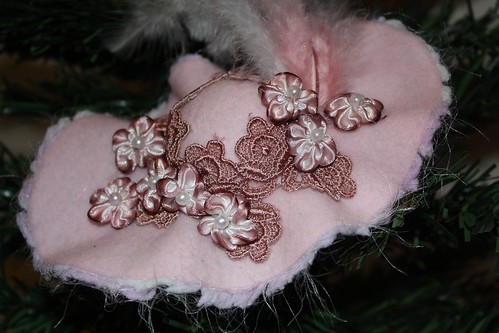
Cut a circle or oval from felt, approximately the size of a bread and butter plate.  I used an oval to get the hat you see in the photo, so it has wider brims at the side than it does at the front or back. Follow the manufacturers directions for using the fabric stiffener and drape over the styrofoam ball (imagine the ball is a head) and secure with a rubber band. Allow to dry thoroughly. Embellish with ribbon, feathers, flowers, beads etc.

Friday, April 1, 2011

Catching up with Loani Prior

Once a week I spend the day playing catch up, adding the finishing touches to any projects not quite yet done, taking photos and browsing the net for inspiration, and as always, looking for free patterns and interesting tutorials. To stick to my commitment to posting daily, I'll share with you something that I thought was a fabulous find.

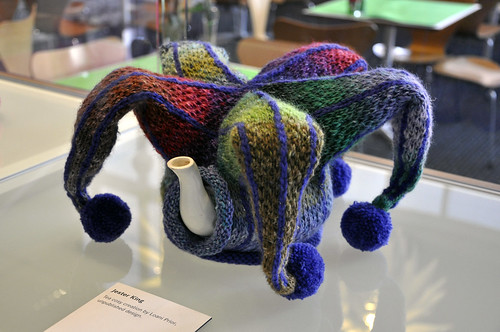
Today, being April Fools Day, I spent a while searching for Jester Hats and stumbled across these Jester Tea Cozies by Loani Prior.


The Jester 1 tea cosy

The Jester 2 tea cosy


I rushed to the library and borrowed her book Totally Wild Tea Cosies which features the pattern for the tea cosy above, but alas she knits :(


Book - tea cosy

Jester King