Sunday, July 31, 2011

July Angels

July Angels


Technique: Crochet

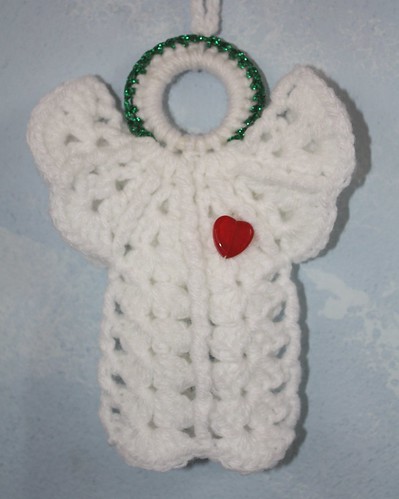
Every week I crochet an angel and send it off to someone around the world that I don't know who is need of hope. This is fantastic way to let people know that no matter what they are dealing with, that they are not alone. Each week I post about it in the hopes that someone who stumbles across my blog will read it to continue try and raise awareness of this wonderful organization.

All of my angels in July featured white yarn with a green halo.  The red heart is a glass bead, and is part of the Angels for Hope symbol, to let the recipient know that someone cares.  Last angel for July, looking forward to a new colour scheme for August!

If you would like to register for Angels for Hope you can do so here. Also, if you know someone who is need of an Angel, you can put in your request there.
Saturday, July 30, 2011

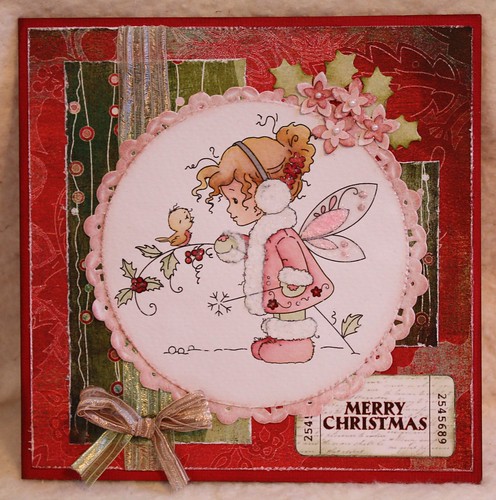
Winter Fairy Christmas Card

Red Winter Fairy


Technique:  Papercraft

Materials:
cardstock
Distress Ink:
* Victorian Velvet
* Bundled Sage
* Vintage Photo
* Aged Mahogany
Basic Grey Digital Papers:
*DSH-621 Yule Log
*DSH-630 Tree Skirt
watercolour paper
Wee Stamps Digi Winter Fairy
paper doily
Sparkly Fluff
pink glitter glue
various embellishments

Tools:
paper cutting/scoring tool
flower paper punch
holly punch
printer

I love working with Sylvia Zet's images, so sweet!  She is printed on water colour paper and painted with distress inks.  She has a touch of pearl pink paint on the centre part of the wings topped with a light coat of crackle medium.

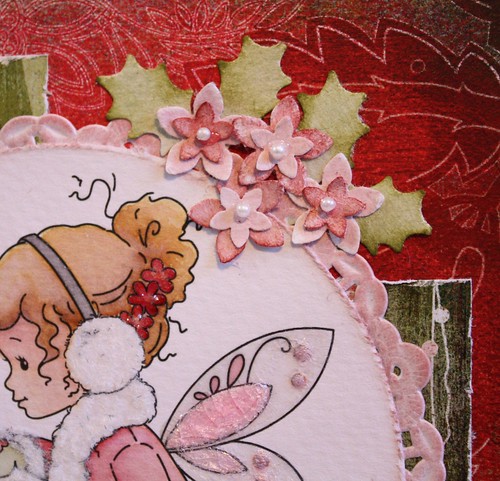
The little flowers were made with two sizes of a flower punch cut from water colour paper, I love the texture this paper has, the edges are brushed with distress inks, with a wee little pearl for the centre.


Red Winter Fairy


Challenges:

Basic Grey - Sketch
Totally Gorjuss - Christmas in July
Crafty Catz - Christmas in July
Winter Wonderland - Fairies or Angels
Cuddly Buddly - Petals and Pearls

Friday, July 29, 2011

Catching up with Agnes The Red


Once a week I spend the day playing catch up, adding the finishing touches to any projects not quite yet done, taking photos and browsing the net for inspiration, and as always, looking for free patterns and interesting tutorials. To stick to my commitment to posting daily, I'll share with you something that I thought was a fabulous find.

All this week I had been doing searches for matchbox ornaments, to see what other people had dreamed up and get a little inspiration. I noticed that a few people called them matchbox shrines, and when I searched for those, I found Agnes The Red Tutorials.

The author has over a dozen step by step tutorials on a number of different techniques related to stamping and altered art, but the matchbox shrine tutorial is absolutely fantastic, with 46 step by step colour photos to walk you through her creation process. 

Wednesday, July 27, 2011

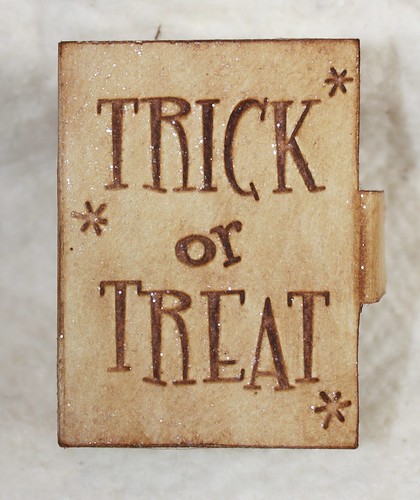
Trick or Treat Mini Book Box

tot3Trick or Treat Book Box


Technique: Papercraft

Materials:
over sized match box
patterned paper
Vintage Photo Distress Ink
Rock Candy Stickles

Tools:
Sizzix Big Shot
Sizzix Halloween #2 Textured Impressions
pin stripe embossing folder

This wasn't what I had in mind when I first sat down, I had originally intended to include a coloured image, but it took on a life of it's own!

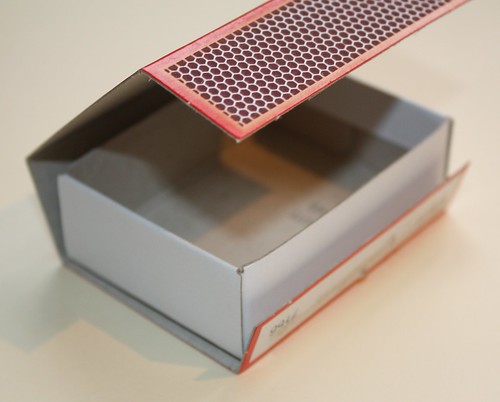
I didn't take photos of every step I took, just of how I made the book jacket from the matchbox, as the remainder was simply just decorating which you could do any which way you choose.

First, split the box open along the seam.


Trick or Treat Book Box


Cut tabs from both flaps, this forms the front and back closure for the book.


Trick or Treat Book Box


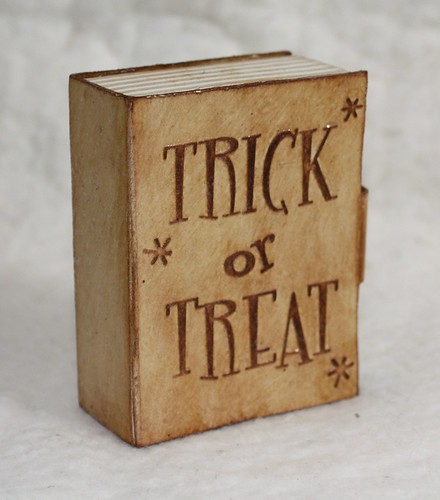
From here the decorating commenced. The 'trick or treat' wording is one of the mini embossing folders from the halloween set #2 by Sizzix. I embossed this onto a strip of cream paper and then cut it to fit the book jacket. Once glued into position I distressed heavily over the embossing to highlight the words, and around the edges to age the book. I also distressed the inside of the book cover heavily

The 'pages' of the book are made from the matchbox drawer. Emboss plain white card with a pinstripe pattern, distress with ink to bring out the pattern and then cut into strips to cover the sides. You only need to cover 3 sides of the drawer, both short sides and one long side, as the final long side forms the spine. Glue the drawer into place.


Trick or Treat Book Box


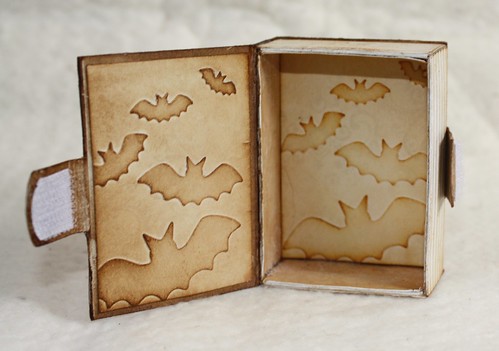
The two panels inside of the book are made with the bat texture folder, distressed with vintage photo to bring out the details. The two little 'flaps' that form the book closure have had velcro attached so that it holds shut.  I used a stiff brush to scumble rock candy Stickles all over the exterior of the box, which has given it the lovely texture you see below, and a gorgeous sparkle, not too much though that's what I love about Stickles, it's a subtle sparkle.


Trick or Treat Book Box


I chose to stop adding anything at this point, as I wanted it to be a candy holder/treat box, but you could continue to embellish and add all manner of little halloween do-dads inside to make a spooky interior.

Tuesday, July 26, 2011

Edwin's Holly Wreath

Edwin as Santa Holly Wreath


Technique:  Papercraft

Materials:
Martha Stewart Holly Punch
two shades of green paper
adhesive
Rock Candy Stickles
red seed beads
Edwin as Santa Magnolia Mini Worlds
Copics:
Reds: R25, R27, R29
Greys: C-3, C-5, C-7
Browns: E11, E21
Buckle: Silver Gel Pen
White trim: Opaque White pen
wooden curtain ring
green acrylic paint
red ribbon

I know we aren't supposed to rave over our own projects, but I love the way this one turned out, so cute!

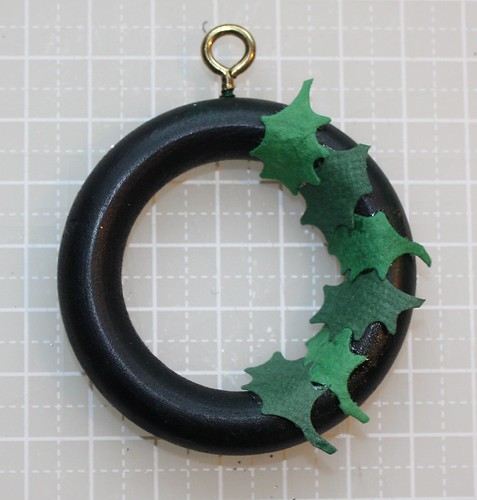
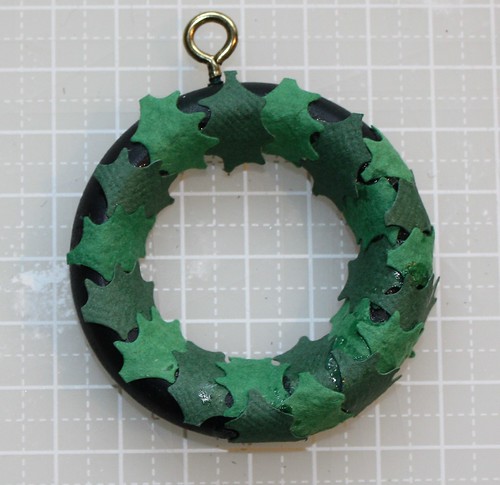
I started with a wooden curtain ring and gave it a lick of green paint.  This ensures that any little gaps in the holly leaves won't be noticed.

I used two shades of green, and two textures of paper also.  The darker green has a weave pattern to it, the lighter green is mulberry paper and has that lovely, rugged texture to it.  Chomp, chomp, chomp with the holly punch! I also cut the leaves apart so rather than dealing with a pair of leaves, I could glue on individual leaves.

Holly Wreath
Here's the first circle of holly leaves going around the inner circle.


Holly Wreath
Then the second circle of holly leaves going around the outer circle.


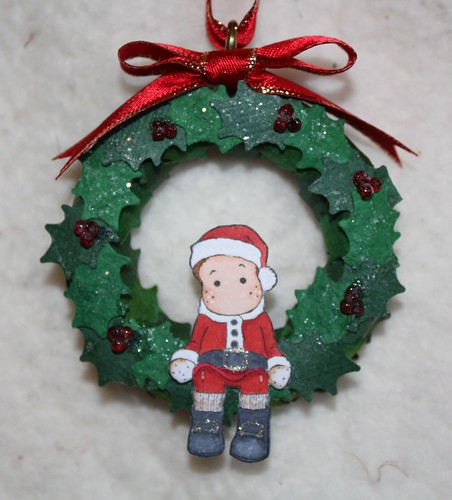
A final ring of holly leaves is placed directly on top to finish the wreath and little clusters of red seed beads are glued around for the holly berries. A touch of fairy dust (aka Rock Candy Stickles), a ribbon and a wee little Edwin.

Challenges: 
Winter Wonderland - Holly and Ivy
Polka Doodles - Christmas in July
Christmas Stamping All Year Long - All About You
Jellypark Friends - Christmas in July 
iCopic - Anything but a Card

Monday, July 25, 2011

Happy Birthday To Ewe

Happy Birthday To Ewe


Technique: Papercraft

Materials:
600gsm card
Distress Inks:
* Antique Linen
cord and ribbon
charm
Happy Birthday to Ewe digital stamp
Religious Christmas Herd paper
1/8" inch hole punch
black card
velcro dots

Tools:
Sizzix Big Shot
Box with Scallop Flap Scoreboard Die
2" scallop circle die

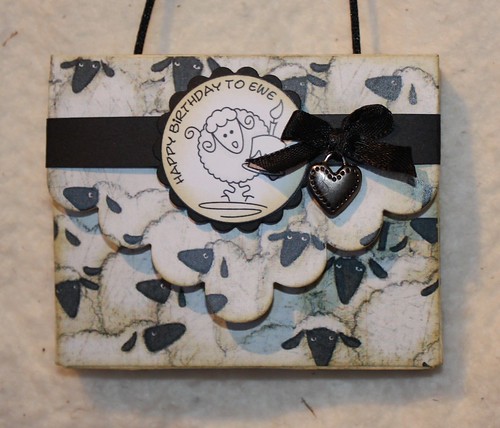
I bought this scoreboard die months ago thinking I would use it all the time, but this is the first time!  It's a great size, idealt for storing a pack of gum, or breath mints, or a travel pack of tissues, or band-aids, or for discreetly storing feminine products.  You could put a mini sewing kit in there, it's big enough to hold an ATC, and of course it's the perfect size for gift cards, it's shameful that I haven't made anything with this die yet!

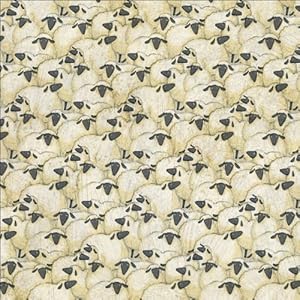
My middle daughter will be 19 in a few days (July is a busy month for me with 4 birthdays in total).  I knew that Cuddly Buddly had an awesome range of digi stamps that use the word "ewe" instead of "you" so when I found the Religious Christmas Herd paper it was a match made in heaven!


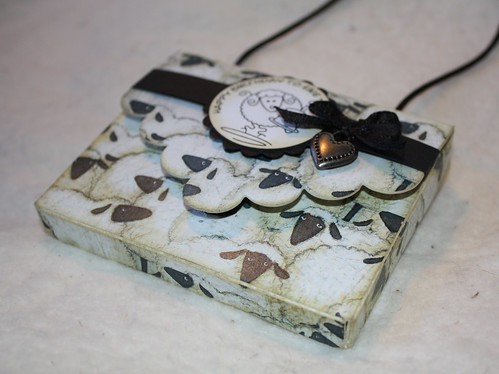
The scoreboard dies are intended to cut and score quite thick materials.  If you run regular paper through it will cut it, but it's not thick enough to have the score lines imprinted (you can buy a score mat separately).  I used 600gsm card, which is about as thick as you can get without getting into foamcore.  Using spray adhesive I attached the sheep paper to one side and then ran it through and cut out the die.  The edges and inside have all been inked with Antique Linen distress ink, which matches the paper beautifully.  It's then a simple matter to fold along the scored lines and glue the edges to form the envelope shape.

I have used a 1/8" hole punch in the top through which I have strung some black cord so it looks like a mini purse.  A velcro dot under the flap and on the front edge of the purse ensures it will stay closed.  A 1/4" band of black card has been wrapped around the top of the purse, which acts as the base for the digi and embellishments.  This can be removed, if desired, without damaging the purse. Finish with a bow, a charm and the "ewe" digi of your choice!


Happy Birthday To Ewe


Challenges:

Cuddly Buddly - add a charm
Simon Says Stamp and Show - anything goes
Craft Us Crazy - anything goes

Sunday, July 24, 2011

July Angels

July Angels

Technique: Crochet

Every week I crochet an angel and send it off to someone around the world that I don't know who is need of hope. This is fantastic way to let people know that no matter what they are dealing with, that they are not alone. Every week I post about it not just to try and raise awareness of this wonderful organization.

For July, in the spirit of Christmas in July, I have decided to make white angels with a green halo.  How lovely it would be to have a winter Christmas! 

If you would like to register for Angels for Hope you can do so here. Also, if you know someone who is need of an Angel, you can put in your request there.
Saturday, July 23, 2011

Christmas Mouse Ornament

Mouse Ornament


Technique:  Sewing

Materials:
larger sized matchbox
warm and natural quilt batting
assorted fabrics
7mm plastic eyes
black embroidery floss
ground cinnamon
Distress Inks
* Vintage Photo
* Peeled Paint
holly punch
grunge paper
adhesive

Tools:
sewing machine, needle and thread etc
printer
paper distressing tool

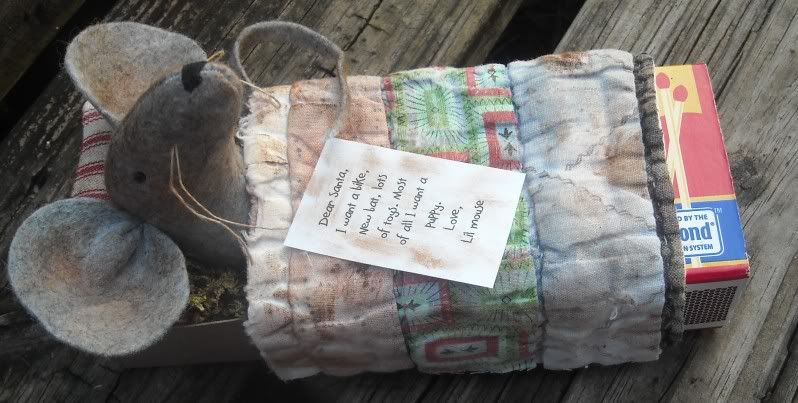
If you saw my post on Friday you will know straight away where the inspiration for this wee little mouse came from!  The Olde Country Cupboard has a large collection of free patterns available to download, (scroll down the page to find them) and although I didn't actually use most of their pattern, I drew heavily upon it for inspiration, so if you download it and follow her directions you can't really go wrong.

Anywhere, here's what I did differently!

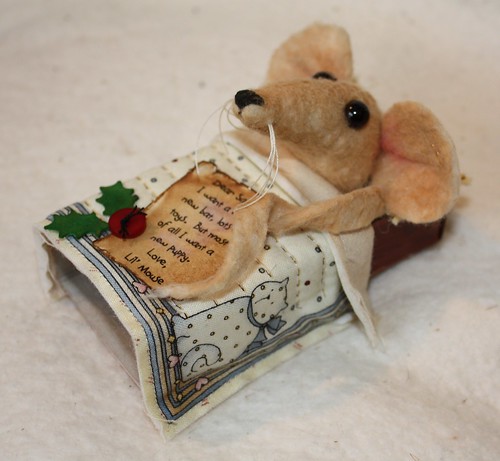
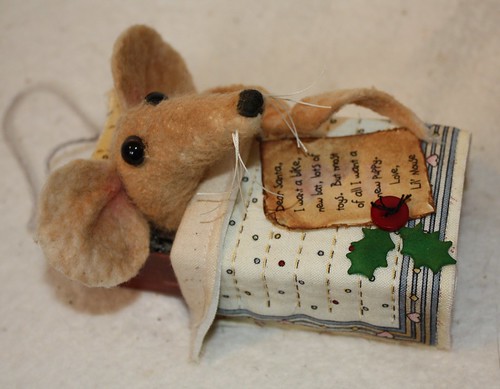
I used warm and natural batting to make my mouse rather than grey felt.  I adjusted the pattern shape of the mouse for a pointed nose rather than the blunt, rounded nose and I embroidered the nose at the tip of the point.  I used plastic eyes instead of french knots, and once he was sewn together I dusted him heavily with cinnamon powder to make him look old and dirty.  The quilt is made from a Debbie Mumm quilt label, and glued in place over the top of the match box.  The letter to Santa is directly from the pattern, and I have aged it with distress inks and glued it in place with a sprig of holly.

It is my son's eleventh birthday in a few days, and believe it or not he asked me to make him an ornament as a present.  He also insisted that he not see it before his birthday and that it be kept as a surprise!  You can see in the photo below the hanger for the ornament, I punched a hole in the top and strung through a bead and some twine so my son can put it on the tree this year.  If you preferred you could glue four beads to the base of the matchbox to act as feet for the bed so it can be a shelf sitting ornament.


Mouse Ornament


Oh, and I have just noticed that the theme this week at Winter Wonderland holly and ivy so I am going to pop this little rascal over there as my first entry this week. I just bought a Martha Stewart holly punch so I have a few projects in mind for this week :0)

Friday, July 22, 2011

Catching up with The Olde Country Cupboard

Matchbox Mouse

Once a week I spend the day playing catch up, adding the finishing touches to any projects not quite yet done, taking photos and browsing the net for inspiration, and as always, looking for free patterns and interesting tutorials. To stick to my commitment to posting daily, I'll share with you something that I thought was a fabulous find.

I think I was searching for inspiration for a few light bulbs I want to turn into ornaments when I stumbled across The Olde Country Cupboard, a site dedicated to country/primitive style decorations.  Her style is just lovely, I find some prim art is too primitive, too simplistic and too drab for my liking, but she has a gorgeous rustic style.

Best of all, if you scroll down to the bottom of the page you will find her "share box" where there is a collection of over two dozen free pdf patterns to download, like the adorable mouse in a matchbox you see above.

Wednesday, July 20, 2011

Robot Ornament

Robot Ornament


Technique:  Papercraft

Materials:
1.5mm balsa wood
Xtron paper by Kaisercraft
adhesive
beading wire
silver glitter
sandpaper
small wooden beads
silver acrylic paint

Tools:
craft knife
scissors
hot glue gun

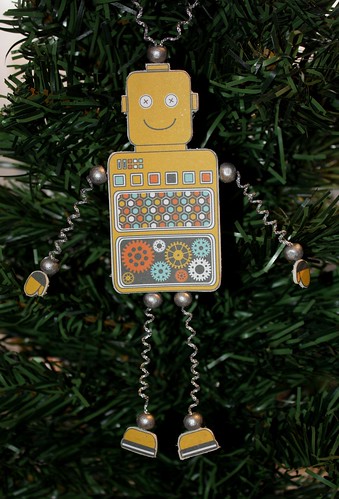
After making the card for my son's birthday I thought the robot paper I used could be adapted to make a great ornament.

Start by painting 9 small wooden beads in silver acrylic paint and set these aside to dry.

Choose an image that you like and glue it onto a sheet of balsa.  I chose balsa wood for the base, rather than chipboard, because it is so much easier to cut with a craft knife and it sands back so easily (I used an emery board!).  When the image is dry cut around a few millimetres from the paper and then sand it into shape.

Wrap some beading wire around a knitting needle to form the coils of the limbs and one to form the hanger/antenna from the top of the head.  Thread a bead onto each end and then glue into position on the back of the robot with hot glue.  Coat the back of the wood with glue and cover liberally with silver glitter, this will camoflauge where the limbs were attached.

Tuesday, July 19, 2011

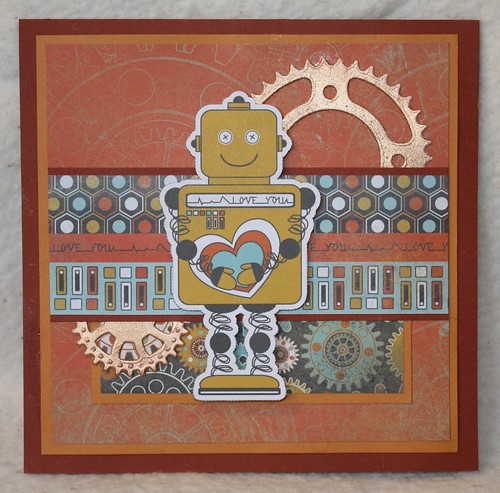
Robots In Love

Robots In Love


Technique:  Papercraft

Materials:
patterned paper
coloured card
adhesive
gold spray paint

Tools:
Spellbinders Sprockets die
Sizzix Big Shot
cutting board, tools etc

My son's eleventh birthday is coming up this week and what boy that age doesn't like robots?  He's at a magical age, still young enough to be beautifully innocent and joyful, still young enough to cuddle and hold down for tickles, but smart enough to engage in an intelligent conversation.  

It's funny a week or so ago I was going through my paper stash and I found the orange and rust coloured papers and thought to myself, I am never going to use those...  proof that you should never, ever throw anything away! :o)

Monday, July 18, 2011

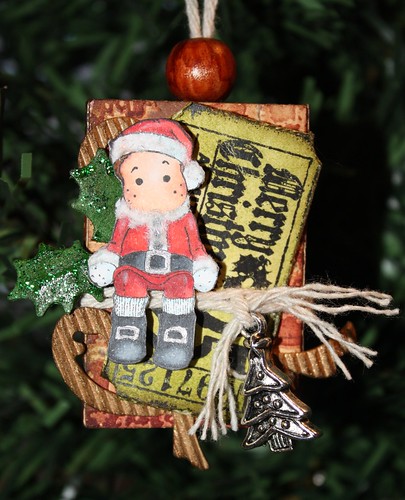
Santa's Chimney Matchbox Ornament

Edwin Matchbox Ornament


Technique:  Papercraft

Materials:
matchbox
manila card
brick texture embossing folder
Copic Markers
silver gel pen
glitter glue
wooden bead
string
Distress Inks
* Frayed Burlap
* Fired Brick
* Aged Mahogany
* Walnut Stain
* Peeled Paint

Tools:
Tim Holtz Texture Fade
* brick wall
Tim Holtz Movers and Shapers die
* mini flourish
Sizzix Big Shot
scissors
Martha Stewart Holly Punch
Magnolia Mini World rubber stamp

The challenge at Winter Wonderland this week was give it a little lift, by using wet or dry embossing.

Part of what I enjoy about the challenges is choosing something that is out of the ordinary to work with, try and do something unexpected, so I had it in my head that I wanted to use the brick texture fade for this and be a little different.  But how?  The other thing I love about the challenges is how it gets my creative juices pumping!  In my head I have half a dozen different ways to use the brick texture in a Christmas project, but I had been wanting to make a matchbox ornament for weeks, so....

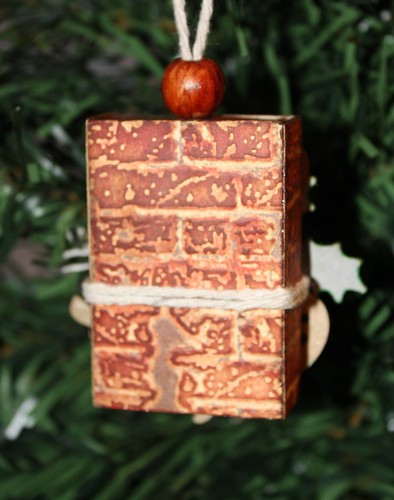
I inked the raised side of the texture fade with frayed burlap before putting the paper in and running it through the machine, to get some ink deep into the crevasses.  Then the embossed areas are inked with fired brick, walnut stain, aged mahogany and a little more frayed burlap.  It's then cut into small rectangles and glued on all four sides of a regular size match box.  Looks just like a chimney!


Matchbox Ornament
The back of the ornament showcases the brick texture.

Once the "chimney" has been made, the rest is just a matter of laying embellishments until you get the result that you want.  I used a corrugated card mini flourish, a Christmas ticket by Tim Holtz, some string, a silver tree charm and a sprig of holly with a splash of glitter glue.  The image is a Magnolia Mini World, and wow they are so teeny that they make the brush nib on a copic look like an oversized crayon! 

The inner tray of the matchbox is coloured with brown copics, as is the bead, which is threaded through the top with string to act as a hanger for the tree.  Small treats can be placed inside and hung on the tree.  I had so much fun with this that I plan to make a *lot* more like this!  Fairly quick to put together, very inexpensive, and the scope for creativity is enormous!

Challenge entries:

Winter Wonderland, use wet or dry embossing.
Simon Says Stamp and Show is show some embossing, it's going in there too!

Sunday, July 17, 2011

July Angels

July Angels

Technique: Crochet

Every week I crochet an angel and send it off to someone around the world that I don't know who is need of hope. This is fantastic way to let people know that no matter what they are dealing with, that they are not alone. Every week I post about it not just to try and raise awareness of this wonderful organization.

For July, in the spirit of Christmas in July, I have decided to make white angels with a green halo.  How lovely it would be to have a winter Christmas!  The light is terrible for taking photo's though!  It's been dull and overcast for weeks now.

If you would like to register for Angels for Hope you can do so here. Also, if you know someone who is need of an Angel, you can put in your request there.
Saturday, July 16, 2011

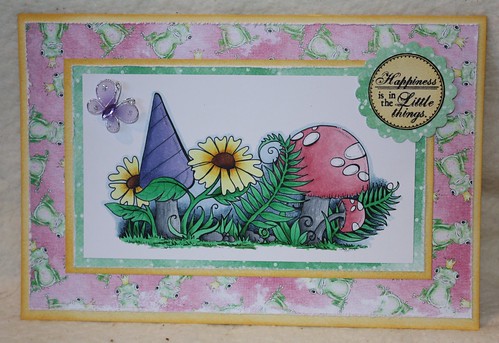
Bright Colours and Butterflies

Down in the Flowers card

Technique:  Papercraft

Materials:
coloured card
patterned paper
adhesive
Down In The Flowers digi stamp
Copic markers
greens: G02, G03, G05, G07
pinks: R81, R83, R85
blues: B91, B93, B95, B97
greys: C-3, C-5, C-7
purple: BV02, BV04
Distress Inks:
* Scattered Straw
butterfly bling

Tools:
scissors
printer
paper distressing tool

The challenge at Cuddly Buddly this week is to use bright colours and butterflies.

I have chosen the Down In The Flowers digi stamp by Lilyboo as my central image and coloured it with Copics.  Although I am slowly increasing my colours, I am still somewhat limited still, I only have one shade of green, one blue etc, so choosing which colours to use wasn't all that difficult ;)

Usually once I have coloured the image I will shuffle through my papers, both actual and digital and try and find one that I think will compliment the image, the two papers I used by Magnolia jumped out at me, the pink, yellow and green were perfect!  The edges are all roughed up with a distressing tool, except for the manila card stock which I inked with Scattered Straw Distress Ink.  The sentiment is by Whimsy and the butterflies are from Jenni B.

I didn't add much in the way of bling.  I am by nature a cornflake girl (the simple things in life are often the best), and the frog prince paper was so cute I didn't want to over shadow it.  Thanks for taking the time to look!

Friday, July 15, 2011

Catching up with Fonts For Peas

Once a week I spend the day playing catch up, adding the finishing touches to any projects not quite yet done, taking photos and browsing the net for inspiration, and as always, looking for free patterns and interesting tutorials. To stick to my commitment to posting daily, I'll share with you something that I thought was a fabulous find.

I have found that every new thing I make requires a font, requires it's own font! I guess it's because each has it's own feel, and there really isn't a one font suits all. So I did the happy dance when I stumbled across Kevin Amanda's site which offers two huge arrays of fonts.

The first is handwriting fonts, which she creates from samples sent in by her readers. Dozens and dozens of beautiful fonts can be downloaded for free at Fonts For Peas. Loopy, lazy, scrawled, elegant, they are all here!


The second is scrap booking fonts in all shapes and sizes, fun, quirky, enough that I think even I could find a font for every mood!


These are just four from dozens and dozens she has available, all free to download, most conveniently packaged in monthly zip files.

Wednesday, July 13, 2011

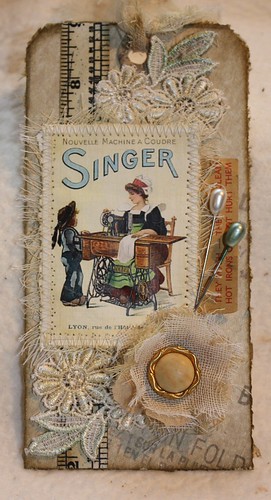
Vintage Sewing Tag

Vintage Sewing Tag

Technique: Papercraft

Materials:
600 gsm card stock
old sewing pattern
adhesive
muslin
Distress Inks:
* Antique Linen
* Bundled Sage
* Brushed Corduroy
scraps of lace
ephemera, embellishments etc

Tools:
Sizzix Big Shot Machine
Tim Holtz Alterations
* Tag and Book Plate die
* Tattered Florals die

This week's challenge at Simon Says Stamp is to Show Some Stitching

I covered a piece of card stock with several layers of an old sewing pattern before putting it through the Sizzix to cut the tag out.  Once cut I have distressed it with a little Brushed Corduroy.

I found this gorgeous postcard here, the site is worth the visit for all the other lovely vintage images freely available.


I printed the postcard on linen paper so that it had a fabric look.  Cut a piece of muslin slightly larger than the postcard, and glue that to a piece of ordinary white paper, then glue the post card in position on that so you have a three layer sandwich, then using a sewing machine zig zag around the edges to secure.  Tear away the base paper and pull out loose muslin threads until you have a fringed effect.  Distress the stitching and the muslin with antique linen.

The lace flowers are died with Antique Linen and Bundled Sage and glued into position on the card.  The button card that you can see peeking out from behind the postcard is an actual vintage button card, tattered and torn, from my grandmother's button collection.

The flower is made using layers of muslin and tissue paper from the sewing pattern and the Tattered Floral die.  I have about 9 layers, alternating between tissue, plain white muslin, and muslin dyed with Antique Linen.  The strips of fabric at the top of the tag are also muslin dyed with Antique Linen, love that colour!  The button that forms the centre of the flower is from my collection.

Tuesday, July 12, 2011

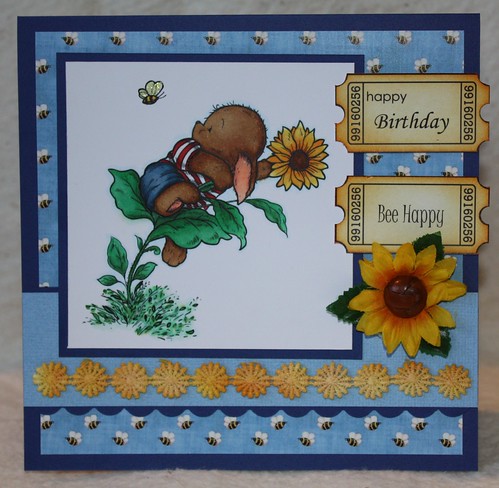
Bee Happy Birthday Card


Technique:  Papercrafting
Materials:
card stock
copic markers
Distress Inks
* Scattered Straw
* Dried Marigold
scrap of lace
silk sunflower
adhesive

Tools:
scallop border punch
scissors

The second challenge at Cuddly Buddly is Lace and Flowers.  I have a friend celebrating his forty something birthday in a few days, my 10 year old son adores him so I wanted to create a card for the little man to give to the big one!  With that in mind I wanted to create a card that was suitable for a young boy to give to a male, but still incorporated lace and flowers!

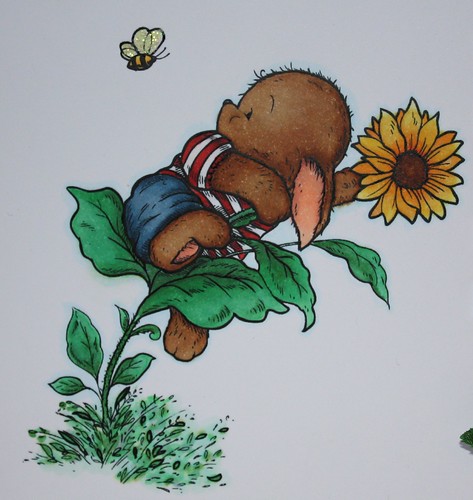
The background paper comes from Toby Tumble's Hearts and Flowers digital paper, and suits the image of Toby perfectly!  The lace was white and I have dyed it with the distress inks, and I have also used the two inks to colour the tickets which I adapted myself from this free ticket digi.


Monday, July 11, 2011

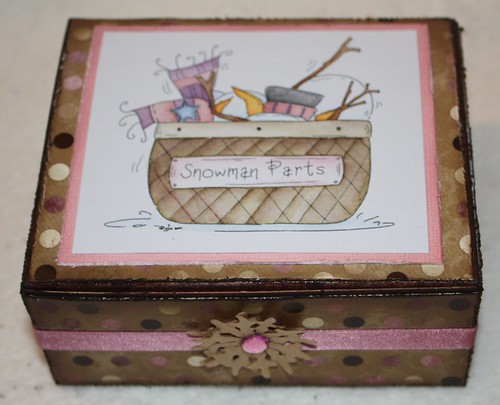
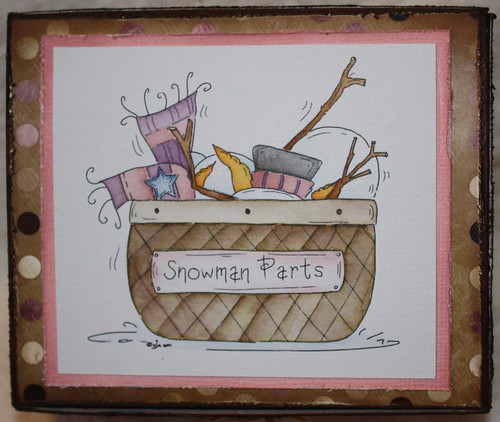
Snowman Parts Gift Box

Snowman Parts


Technique:  Papercrafting

Materials:
patterned paper
Snowman Parts digi
Distress Inks:
* Victorian Velvet
* Vintage Photo
* Walnut Stain
* Milled Lavender
* Faded Denim
water colour paper
adhesives
ribbon, bling etc

Tools:
aqua brush
printer

The Winter Wonderland challenge for this week is red and green must not be seen.  It's actually tougher than I expected, especially as I had decided I wasn't going to use blues either.

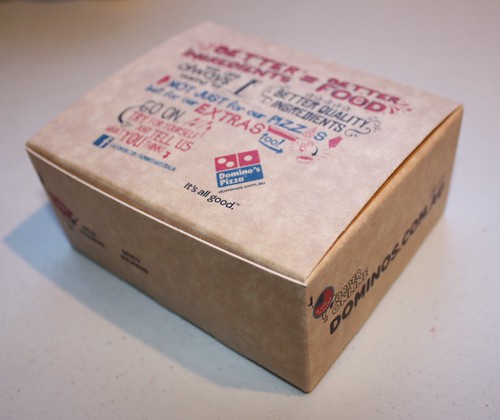
I started with another Domino box, these are my favourite things to work on at the moment!  Here's what it looked like before I started doing anything to it.


Dominoes Box


The edges have been inked with walnut stain before gluing on the patterned paper.  The gorgeous paper was the inspiration for the whole box, the warm chocolate colours with dusky pink and plum.  Usually I choose a paper to compliment the stamp, I loved this paper so much I did it the other way around!  Ink the edges again with walnut stain after they have been glued into place.

You can download the paper for free from here.


Snowman Parts


The digi is coloured with distress inks, I love the soft, warm look they give The patterned paper really is the star here so I choose to keep it simple with just a ribbon, and a flower made from snowflakes.  This box will be perfect filled with marshmallows and pretzels (snowman parts!)


Snowman Parts


Before I go I wanted to share my little adventure this afternoon. As I was working on this box hubby came bouncing into the house yelling "There's a koala! There's a koala!". He had gone out to the car and he saw a koala running along the road, when it got startled it ran up the tree in our neighbour's front yard. To give you an idea of just how rare and special this is, I have lived in suburbia almost all of my life, and this is the first time in my 40 years that I have ever seen a koala just wandering around!


Koala

Sunday, July 10, 2011

July Angels

July Angels

Technique: Crochet

Every week I crochet an angel and send it off to someone around the world that I don't know who is need of hope. This is fantastic way to let people know that no matter what they are dealing with, that they are not alone. 

For July, in the spirit of Christmas in July, I have decided to make white angels with a green halo.  How lovely it would be to have a winter Christmas!  The light is terrible for taking photo's though!  It's been dull and overcast for weeks now.

If you would like to register for Angels for Hope you can do so here. Also, if you know someone who is need of an Angel, you can put in your request there.
Saturday, July 9, 2011

Tilda Christmas Angel


Technique:  Papercraft

Materials:
Tilda with Hanging Heart rubber stamp
Momento Tuxedo Black ink
Copic Markers:
reds: R22, R24, R27, R29
skin: E0000, E000, E00, E02, E11
browns: E31, E33, E35
greens: G03, G05, G07
glitter glue
adhesive
syrofoam cone
glitter
patterned paper
paper doily

Tools:
scissors

I first saw this ornament in the last Christmas issue of Magnolia Ink.  The ornament is very simple to construct.  Once you have stamped and coloured Tilda, cut around the outline and fix her to the top of a cone made from patterned paper.  For mine I have given her an "underskirt" which is a styrofoam cone coated in glitter that has the paper cone slipped over the top.  I felt this would give the ornament more body, making it a little sturdier.

I'm planning on doing several of these in different colour variations and in both copics and distress inks.  I wasn't terribly happy with the red, I usually use R22, R27 and R29, but I felt that was too much of a gap between the R22 and R27.  This time I used an R24 as a bridge and I lost too much of the highlights I think.  I was happy with the hair though!

Wednesday, July 6, 2011

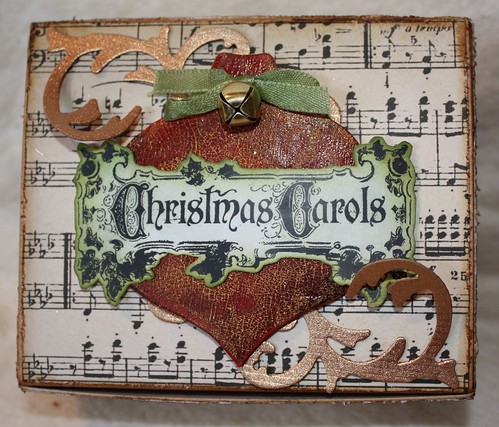
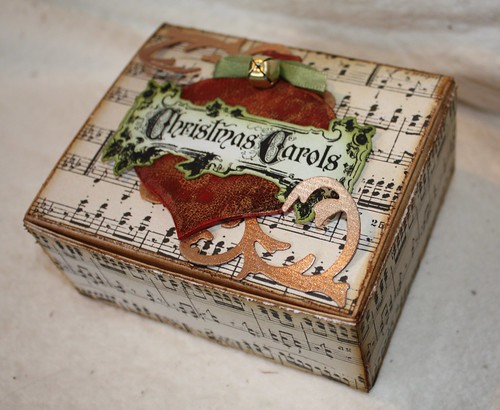
Christmas Carols Gift Box

Christmas Carols Box


Technique:  Papercrafting

Materials:
a box to decorate
adhesive
music paper
Distress Inks:
* Aged Mahogany
* Bundled Sage
* Vintage Photo
* Peeled Paint
acrylic paints
gold spray paint
crackle medium
fine sandpaper
600gsm card stock

Tools:
Sizzix Big Shot
Tim Holtz Alterations
* Carved Ornaments
* Mini Flourish
scissors
paintbrushes
paper distressing tool

This week's challenge at Simon Says Stamp and Show is to Show a Flourish.

A few weeks ago the family had Domino Pizza delivered, and as soon as it was delivered I eyed the little dipper box on top and thought to myself,  "I can't wait to decorate that!"  The next day I went to my local Domino store and the kind manager there gave me a few brand new boxes for me to play with.  That's what I have used for this project.

Dominoes Box


The box has a lovely parchment colour to it so I chose a paper that complimented that.  I have used a scrap book paper with music, Kaisercraft I think it might be, any sheet music will do.  Cut strips for the sides and lid, distress the edges and ink with Vintage Photo and glue into position. 

Altered Box


Using the card stock as your base, cut two mini flourishes and one small carved ornament.  Spray the flourishes with gold paint.  Paint the carved ornament with red acrylic, and when dry ink with with Aged Mahogany and apply a coat of crackle medium.  Allow to dry thoroughly then sand lightly with fine sand paper and rub some gold acrylic paint into the cracks.

 The sentiment is by Tim Holtz, inked with Bundled Sage and Peeled Paint.

Christmas Carols Box

Monday, July 4, 2011

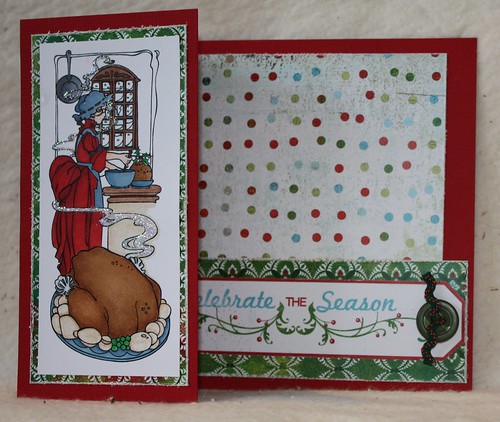
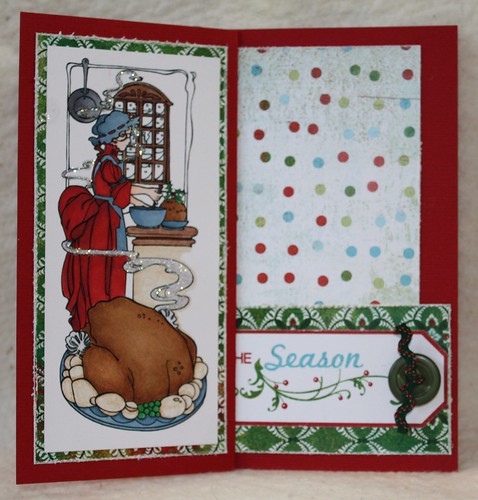
Christmas Buffet Card

Christmas Buffet
The card viewed open

Technique:  Papercraft

Materials:
cardstock
digital stamp
Copic markers
adhesive
patterned paper
button
ribbon

Tools:
paper cutting/scoring tool
scissors

The challenge at Winter Wonderland this week was a Christmas Buffet,  where we were offered a smorgasbord of patterened paper, 1 charm, ribbon, snowflakes, buttons/gemstones or brads, and from that list we had to choose three.  I chose patterened paper, a button and ribbon.

The past two weeks I had done very cutesy cards, this week I wanted to get away from that and try something with a vintage feel.   The image I used is actually a colouring book image that I found on this site.  Aren't they just gorgeous!  Incredibly detailed, and quite challenging to colour with copics when scaled down to a size suitable for cards, but the end result was worth it I think.  I took the 'christmas buffet' theme a step further and chose an image that suited that theme also :)

The patterned paper is Basic Grey, Dasher, which you can download digitally from their site here.  The tag that I used is included in their Dasher Starter Kit.

The card has a half flap on the front, so the centre back of the card shows.  I'm new to card making so I am not sure what that style is called?  I felt it suited the narrow image I had chosen nicely though.  The card is finished with a sprinkle of glitter, one button with a teensy bit of ribbon. 

Christmas Buffet
The card when closed

I had a look through all the challenge entries this week, the quality is simply stunning!  Over the moon to have  had two cards chosen in the top three now, thankyou! :o)

Sunday, July 3, 2011

July Angels

July Angels

Technique: Crochet

Every week I crochet an angel and send it off to someone around the world that I don't know who is need of hope. This is fantastic way to let people know that no matter what they are dealing with, that they are not alone. 

For July, in the spirit of Christmas in July, I have decided to make white angels with a green halo.  How lovely it would be to have a winter Christmas!  The light is terrible for taking photo's though!  It's been dull and overcast for weeks now.

If you would like to register for Angels for Hope you can do so here. Also, if you know someone who is need of an Angel, you can put in your request there.
Saturday, July 2, 2011

A Brand New Challenge

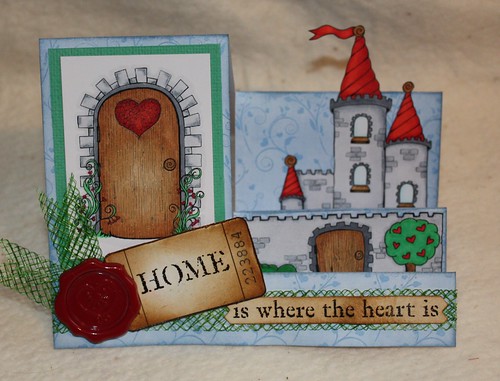
Home is where the heart is

Technique:  Papercrafting

Materials:
cardstock
Lilyboo Designs Digital Stamps
Castle of Dreams
The Secret Door
Pachela Studios Digital paper
Toby Tumble Hearts and Flowers
Copic Markers
Browns:  E31, E33, E35
Greens: G03, G05, G07
Reds: R23, R27, R29
Blue: B0000
Greys: C-0, C-3, C-5
X-Press It Blending Card
adhesive
wax seal
ribbon

Tools:
scoring/cutting implement
scissors
printer

One of my favourite stores to buy digital stamps from is Cuddly Buddly, and they have just launched their own challenge blog.  Their very first theme is, fittingly, A Brand New... my daughters have just moved into a new house, so the theme of my card is A Brand New Home.

The base card is the blue patterned paper out of the Hearts and Flowers digital paper pack, printed directly onto card stock with my laser printer.  I have coloured the digi's using the copics listed above, then cut around the castle outline and separated the castle wall from the towers so they could sit on separate steps for added dimension.  I find that cutting around the image 'scuffs' the edge of the paper leaving white spots, a whiz around the edges with a C-5 copic pen will cover that right up, and it will look like it was the outline of the illustration.

The ribbon across the bottom is haberdashery ribbon, it's the kind used in hats.  The original colour was the colour of straw, so I used green copics so it matched the colour scheme.

The sentiment is printed out on card stock using a free blank ticket template I found here, I use this again and again!  The font is Old Rubber Stamp which you can download for free here.
The finishing piece was the wax seal, which features a heart embossed in the centre.
I am quite excited about the Cuddly  Buddly challenges, I love their images, Toby Tumble is just gorgeous!