Technique: Papercrafting
Materials:
balsa wood ornament base
chipboard frame
glue
image of Santa
spray adhesive
tiny brass screws
gold leaf
600gsm card stock
scrap acetate
embellishments as desired
Tools:
Tim Holtz Alterations:
* Tags and Bookplates die
Sizzix Big Shot
scissors
screwdriver
paintbrush
A few days back I showed you how I made the basla wood base for this ornament. The post is here in case you missed it.
Here's how I finished off that ornament.
Run some 600gsm card stock through the sizzix with the tags and bookplate die. I love this die! Keep the oval bookplate, and put the rest away for another day.
Use the bookplate as a template to choose an image of santa from an old card or wrapping paper and cut to just smaller than the plate. Repeat this process but with a scrap piece of acetate to form the 'glass' of our frame.
Lightly coat the front of the plate with spray adhesive and lay it sticky side down onto a sheet of gold leaf. You can buy gold leaf size that is a tacky adhesive especially for gold leaf, but spray adhesive will do the job too. Tear away the excess and use a soft brush to gently go over the entire surface to encourage adhesion and show up the highlights. You now have a gilded frame. You could of course use a real metal fitting, such as the type found in the Ideology range, or you could use a brooch finding, anything you like really, but I think the gold leaf really brings it to life.
To complete the frame, put a rim of glue around the edge of the acetate and glue to the underside of the book plate, then put a rim of glue around the image of santa and glue the image to the acetate. Voila! A gold frame.
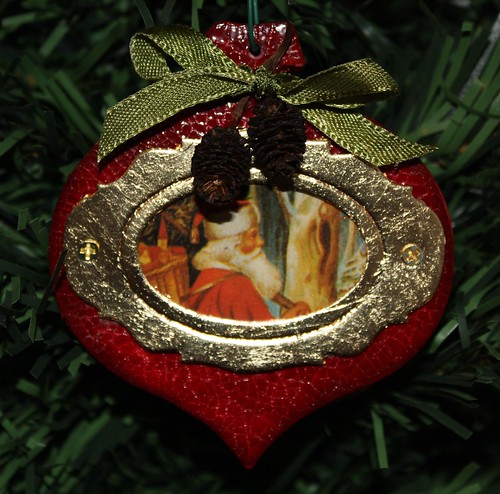
All that is left to do now is screw the frame into place with some tiny brass screws, and glue on your embellishments. I used two teeny pine cones and a strip of ribbon.
No comments:
Post a Comment