Technique: General Crafting
Materials:
styrofoam egg and ball
foam glue
acrylic paint
glitter
buttons
Modge Podge or similar sealant
hot glue
Tools:
knife
hot glue gun
Take a small slice off one end of the styrofoam ball, and a similarly small slice off the narrow end of the egg, then glue the flat sides together to form the head and body of the snowman.
 |
| Glue the ball to the egg to create a head and body. |
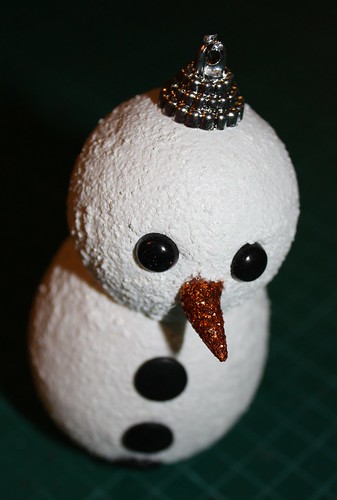
Allow to try thoroughly. Apply two coats of acrylic paint, again allowing each coat to dry thoroughly. Apply glitter to the entire body of the snowman. Use hot glue to attach the embellishments.
For the nose I used a tiny conical shaped sea shell which I painted orange and then dipped in orange glitter. You could make one out of polymer clay if you prefer. Glue a hanger into the top of the snowman's head, and thread the string through the top of the hat.
 |
| A carrot nose made from a sea shell. |
The scarf was crocheted with 8 ply yarn and a 4mm hook. It was a very simple chain 51, turn, sc 50 and then add extra yarn at each end for the fringe. You could cut one from felt if you don't knit or crochet.
You can find the pattern for the felted hat here.
You can find the pattern for the felted hat here.


Soooooo very cute! I will be trying this for the Christmas holidays...thanks for sharing!
ReplyDeleteWhen do you use the modge podge on the snowman?
ReplyDeleteIs the Modge Podge applied BEFORE or AFTER the paint??
ReplyDeleteWhat is the Modge Podge used for?
ReplyDeleteGreat instructions to make this adorable snowman. Love the hat.
ReplyDelete