Technique: Knitting
Materials:
8 ply wool in three colours
bells, buttons or embellishments if desired
Tools:
scissors
3.5 - 4mm knitting needles
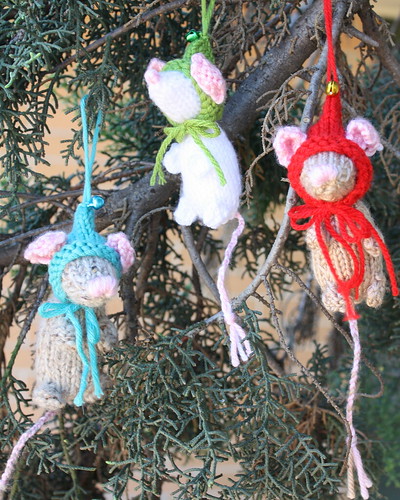
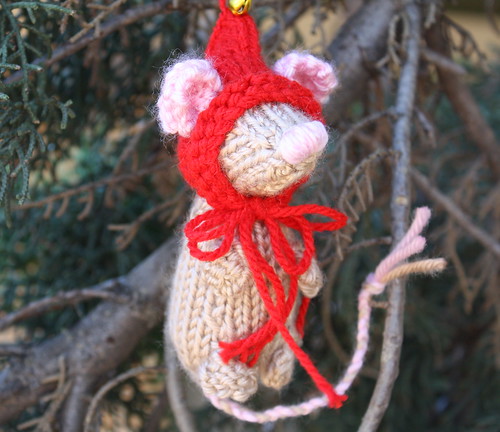
Before delving into the pattern the two small things that I did change. Originally I did put eyes on my first mouse, but when I put the bonnet on it came forward so far it completely covered them, which led to the idea of the Three Blind Mice. After that I deliberately left the next two without eyes.
Also, the pattern calls for 4mm needles and the closest I had was 3.75mm and they still came out perfectly. These little mice knit together very easily, even for someone with little to no knitting experience (me!!).
Aside from the basic knit and purl stitches you will be using two types of stitches that decrease the row. K2TOG is just as it says, you knit two stitches together as if they were one. SKPO also decreases, but it does so in such a way that the stitches lie in a different direction to K2TOG. First you slip a stitch from the right needle to the left without working it at all, knit the next stitch, then loop the slipped stitch over the stitch you just knitted. Utilizing both of these stitches is what gives the mouses nose that lovely point.
Holiday Mouse
Materials: 15 g worsted weight yarn in main colour (MC), 10 g of worsted weight yarn in contrasting colour (CC), small amount of pink worsted weight yarn, stuffing, pair of 8 mm safety eyes or buttons (or black yarn), 4 mm (US size 6) set of dpns or pair of needles), tapestry needle
Size: 8 cm (3")
Gauge: 22 sts and 32 rows per 10cm (4˝) in st st
Notes: Instructions are written for knitting flat with straight needles. To knit the toy in the round on dpns, knit all odd rows, rather than purling them (except for bobbles). Please note that you may need to shuffle sts between needles occasionally, in order to work the increases and decreases. Remember to attach safety eyes and stuff head before working Row 16.
MB = Make Bobble
Row 1: increase 5 sts into next st (knit into front, then back, front, back, front of st). (5 sts)
Row 2: p5, turn.
Row 3: k5, turn.
Row 4: p2tog, p1, p2tog, turn. (3 sts)
Row 5: s1, k2tog, psso. (1 st)
Then continue with pattern...
Body
Start at bottom. Cast on 7 sts with MC.
Row 1: P 1 row.
Row 2: k1, [m1, k1] x 6. (13 sts)
Row 3: P 1 row.
Row 4: k3, [m1, k1] x 7, m1, k3. (21 sts)
Row 5: P 1 row.
Row 6: k7, MB, k5, MB, k7.
Row 7-9: work 3 rows in st st.
Row 10: k6, k2tog, k5, skpo, k6. (19 sts)
Row 11-13: work 3 rows in st st.
Row 14: k6, MB, skpo, k1, k2tog, MB, k6. (17 sts)
Row 15-17: work 3 rows in st st.
Row 18: k2, [skpo] x 3, k1, [k2tog] x 3, k2. (11 sts)
Bind off. Cut yarn. Sew up back seam, leaving bound-off edge open. Stuff body.
Head
Start at back. Cast on 6 sts with MC.
Row 1: P 1 row.
Row 2: k1, [m1, k1] x 5. (11 sts)
Row 3: P 1 row.
Row 4: k2, [m1, k1] x 3, k1, [k1, m1] x 3, k2. (17 sts)
Row 5-9: work 5 rows in st st.
Row 10: k2, skpo, k1, k2tog, k3, skpo, k1, k2tog, k2. (13 sts)
Row 11: P 1 row.
Row 12: k3, k2tog, k3, skpo, k3. (11 sts)
Row 13: P 1 row.
Row 14: k2, k2tog, k3, skpo, k2. (9 sts)
Row 15: P 1 row.
Row 16: [k2tog] x 2, k1, [skpo] x 2. (5 sts)
Cut yarn, thread end through remaining sts, and pull tight to gather. Attach safety eyes. Sew seam, leaving an opening. Stuff head, adding extra stuffing to cheeks. Sew closed.
Hood
Start at front. Cast on 22 sts with CC yarn and straight needles.
Row 1: K 1 row.
Row 2: skpo, k18, k2tog. (20 sts)
Row 3: k2, p16, k2.
Row 4: skpo, k16, k2tog. (18 sts)
Row 5: k2, p14, k2.
Row 6: K 1 row.
Row 7: k2, p14, k2.
Row 8: k8, m1, k2, m1, k8. (20 sts)
Row 9: k2, p16, k2.
Row 10: k9, m1, k2, m1, k9. (22 sts)
Fold hood in half and graft together back from neck to point. Or, work one more wrong side row, then bind off, and sew back seam of hood. Add a couple lengths of yarn or ribbon to front corners for ties. If you like, add a pom-pom or bell to the hood point.
Beret
Cast on 18 sts with CC yarn and dpns. Join in the round.
Row 1-2: [k1, p1] x 9.
Row 3: [k2, m1] x 9. (27 sts)
Row 4-8: work 5 rows in st st.
Row 9: [k1, k2tog] x 9. (18 sts)
Row 10: K 1 row.
Row 11: [k2tog] x 9. (9 sts)
Row 12: K 1 row.
Row 13: [k1, k2tog] x 3. (6 sts)
Cut yarn, thread end through remaining sts, and pull tight to gather. Secure yarn ends.
Ears (make 2)
Ears must be knit flat.
Cast on 3 sts with pink yarn.
Row 1: P 1 row.
Row 2: [k1, m1] x 2, k1. (5 sts)
Row 3: P 1 row.
Row 4: k1, m1, k3, m1, k1. (7 sts)
Row 5: P 1 row.
Row 6: k1, [k2tog] x 3. (4 sts)
Bind off.
Finishing
If you're not using safety eyes, sew on button eyes, or embroider them with black yarn. Embroider a nose with pink yarn. Sew bound-off edge of ears to head or hat. Sew head to bound-off edge of body. Sew hat onto head (add a bit of stuffing to the hat if you like). For the tail, make a braid or a length of I-cord from pink yarn. If you're hanging the mouse on a tree, add a loop of yarn to the top of the head. If the mouse will be a toy, you may want to sew down the sides of the bobble feet.
Abbreviations
K or k = knit
k2tog = decrease 1 by knitting 2 together
m1 = increase 1 by picking up loop between stitch just worked and next stitch, and knit into the back of this loop
P or p = purl
p2tog = decrease 1 by purling 2 together
skpo = slip 1, knit 1, pass slipped stitch over
st or sts = stitch or stitches
st st = stocking stitch
This adorable pattern comes from www.fuzzymitten.com
I was directed to your post by someone on Ravelry. I'm happy to see people enjoying my Holiday Mice pattern! There is a little mistake in the website link you posted, as it's www.fuzzymitten.com. Also, people can find the pattern on Ravelry, if they want to post their projects there: http://www.ravelry.com/patterns/library/holiday-mice
ReplyDeleteThanks for popping by :) My apologies for the mistake in the URL, I have updated that so that people can find you. Thanks for sharing such a delightful pattern.
ReplyDelete